Do you have a question about the BenQ LK952 and is the answer not in the manual?
Details the wire connections for RS232 communication.
Lists pin configurations for RS232 serial ports.
Explains connecting via a serial port using a crossover cable.
Details configuration steps for RS232 serial port connections.
Configuration steps for RS232 communication over a LAN network.
Configuration steps for RS232 communication via HDBaseT.
This document provides an installation guide for controlling the BenQ LK952 projector via RS232 command control. It outlines the necessary connections and communication settings to enable remote control of the projector from a computer. The guide covers various connection methods, including direct RS232 serial port, RS232 via LAN, and RS232 via HDBaseT, along with detailed instructions for configuring each setup.
The BenQ LK952 projector can be controlled remotely using RS232 commands sent from a computer. This allows for integration into control systems, enabling automated operation and management of the projector's functions. The control system can send commands to power the projector on or off, select input sources, adjust audio settings, change picture modes, and modify various picture settings. It also supports reading the current status of several parameters, providing feedback to the control system.
The RS232 command control offers comprehensive control over the projector's functionalities.
Users can remotely power the projector on or off and check its current power status. This is useful for scheduling operations or integrating the projector into a larger system where power management is automated.
The projector supports a variety of input sources, including COMPUTER/YPbPr, HDMI (MHL), HDBaseT, and others. The RS232 commands allow for direct selection of these sources, facilitating seamless switching between different content inputs without manual intervention at the projector itself. The system can also read the currently active source.
Audio settings can be managed remotely, including muting/unmuting the audio and adjusting the volume level. The system can also query the current mute status and volume level. Additionally, there are commands for controlling microphone volume, although these are noted as not supported for this specific model. The audio source can also be selected independently, allowing for routing audio from different inputs.
A range of picture modes can be selected to optimize the display for different content types or environments. These include Presentation, sRGB, Bright, Vivid, DICOM, and User modes. This feature allows for quick adaptation of the projector's visual output to suit specific viewing requirements. The current picture mode can also be queried.
Fine-grained control over picture quality is available through commands for adjusting contrast, brightness, and color. Users can increase or decrease these values and read their current settings. Other settings like sharpness, flesh tone, and color temperature can also be controlled, though some are not supported for this model. The aspect ratio can be set to various options like 4:3, 16:9, Auto, and Real, providing flexibility for different content formats. Digital zoom and brilliant color settings are also available, with some limitations noted.
Various operational aspects of the projector can be managed. This includes settings related to quick auto search for input signals, direct power on functionality, and standby settings for network and monitor output. The projector position (front table, rear table, front ceiling, rear ceiling) can also be configured, which is crucial for correct image orientation based on installation. The status of these settings can be read back to the control system.
The communication baud rate can be set to various speeds, ensuring compatibility with different control systems. The current baud rate can also be queried.
Commands are available to switch between different lamp modes, such as Normal, Eco, SmartEco, Dimming, and Custom modes. For custom mode, the light level can be adjusted. The current lamp mode and lamp hours can be read, which is useful for monitoring lamp life and planning maintenance.
Additional control features include blanking the screen on/off, freezing the image, and navigating the projector's on-screen display (OSD) menu (up, down, right, left, enter/OK). The system can also read the model name.
The installation guide provides clear instructions for connecting the projector to a computer for RS232 control.
Detailed diagrams and tables illustrate the wire arrangement and RS232 pin assignments for a crossover cable, ensuring correct physical connection between the computer and the projector. This is critical for establishing a functional serial communication link.
The document outlines three primary connection methods:
For all connection types, the guide emphasizes the importance of configuring the communication software (e.g., Tera Term) with the correct serial port settings, including baud rate, data length (8 bit), parity (none), stop bit (1 bit), and flow control (none). It also advises checking the projector's OSD menu for the correct baud rate to ensure compatibility. For LAN connections, the projector's IP address and TCP port must be correctly entered.
While the document primarily focuses on control and installation, some features indirectly contribute to maintenance:
The ability to read the lamp hours (<CR>*ltim=?#<CR>) allows users to track the operational life of the projector lamp. This information is crucial for proactive maintenance, enabling replacement before the lamp fails, thus minimizing downtime and ensuring continuous operation.
Numerous commands allow querying the current status of various projector parameters, such as power status, current source, mute status, picture mode, contrast, brightness, and color values. These status queries can be used for diagnostic purposes, helping to identify and troubleshoot issues remotely without needing physical access to the projector. For example, if a projector is not displaying an image, checking the power status or current source can help pinpoint the problem.
The system provides specific error messages for illegal command formats, unsupported items, or commands that cannot be executed under current conditions (e.g., "Illegal format," "Unsupported item," "Block item"). This feedback is invaluable for debugging control system integrations and ensuring that commands are correctly structured and applicable to the projector's current state.
Although not explicitly detailed in the provided snippets, the ability to query device information (like model name) often implies the possibility of checking firmware versions. Keeping track of firmware versions is a standard maintenance practice to ensure the projector is running with the latest bug fixes and features.
The RS232 command control system for the BenQ LK952 projector offers a robust and flexible solution for remote management, enhancing its usability in professional and integrated environments.
| Matrix size | 0.47 \ |
|---|---|
| Matrix type | DMD |
| Number of colors | 1.073 billion colors |
| Native aspect ratio | 16:9 |
| Projection distance | 1.8 - 9.6 m |
| Vertical scan range | 24 - 120 Hz |
| Horizontal scan range | - kHz |
| Projection technology | DLP |
| Contrast ratio (dynamic) | 3000000:1 |
| Contrast ratio (typical) | - |
| Screen size compatibility | 30 - 300 \ |
| Projection distance (tele) | 2.88 - 9.6 m |
| Projection distance (wide) | 1.8 - 6 m |
| Projector native resolution | 1080p (1920x1080) |
| Keystone correction, vertical | -30 - 30 ° |
| Throw ratio | 1.36 - 2.18:1 |
| Magnification | 1.6 x |
| Zoom capability | Yes |
| Focal length range | 14.3 - 22.9 mm |
| Aperture range (F-F) | 1.81 - 2.1 |
| Vertical lens shift range | -23 - 23 % |
| Horizontal lens shift range | -60 - 60 % |
| RS-232 ports | 1 |
| Number of bulbs | 1 bulb(s) |
| Maximum analog resolution | 1920 x 1080 pixels |
| Maximum digital resolution | 3840 x 2160 pixels |
| Lamps quantity | 1 lamp(s) |
| Light source type | Laser |
| Service life of light source | 20000 h |
| 3D | No |
| Supported video modes | 480i, 480p, 576i, 576p, 720p, 1080i, 1080p, 2160p |
| Supported graphics resolutions | 640 x 480 (VGA), 720 x 400, 800 x 600 (SVGA), 832 x 624, 1024 x 576 (WSVGA), 1024 x 600, 1024 x 768 (XGA), 1152 x 864 (XGA+), 1152 x 870, 1280 x 1024 (SXGA), 1280 x 720 (HD 720), 1280 x 768 (WXGA), 1280 x 960, 1360 x 768 (WXGA), 1400 x 1050 (SXGA+), 1440 x 900 (WXGA+), 1600 x 1200 (UXGA), 1680 x 1050 (WSXGA+), 1920 x 1080 (HD 1080), 1920 x 1200 (WUXGA), 3840 x 2160 |
| HDMI connector type | Full-size |
| HDMI ports quantity | 4 |
| Serial interface type | RS-232 |
| USB 2.0 ports quantity | USB 2.0 ports have a data transmission speed of 480 Mbps, and are backwards compatible with USB 1.1 ports. You can connect all kinds of peripheral devices to them. |
| Placement | Ceiling, Floor |
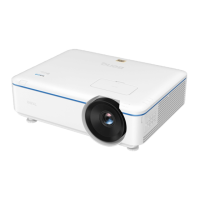
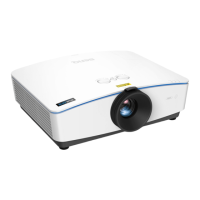
| Product type | Short throw projector |
| Product color | White |
| Market positioning | Business |
| Cable lock slot type | Kensington |
| Noise level | 40 dB |
| Number of OSD languages | 30 |
| Noise level (economic mode) | 38 dB |
| On Screen Display (OSD) languages | ARA, BUL, CHI (TR), CRO, CZE, DAN, DEU, DUT, ENG, FIN, FRE, GRE, HIN, HUN, IND, ITA, JPN, KOR, NOR, PER, POL, POR, RUM, RUS, SWE, THA, TUR, VIE |
| RMS rated power | 10 W |
| Power source | AC |
| AC input voltage | 100 - 240 V |
| Power consumption (max) | 585 W |
| Power consumption (standby) | 0.5 W |
| Power consumption (typical) | 520 W |
| Power consumption (PowerSave) | 390 W |
| Power consumption (network standby) | 2 W |
| Operating temperature (T-T) | 0 - 40 °C |
| Sustainability certificates | RoHS |
| Remote control type | Wireless/Wired |
| Number of batteries supported | 2 |
| Battery type | AAA |
| Harmonized System (HS) code | 85286200 |
| Depth | 380 mm |
|---|---|
| Width | 490 mm |
| Height | 159 mm |
| Weight | 10100 g |