3.4 Assembly
Pre-assembly of rail
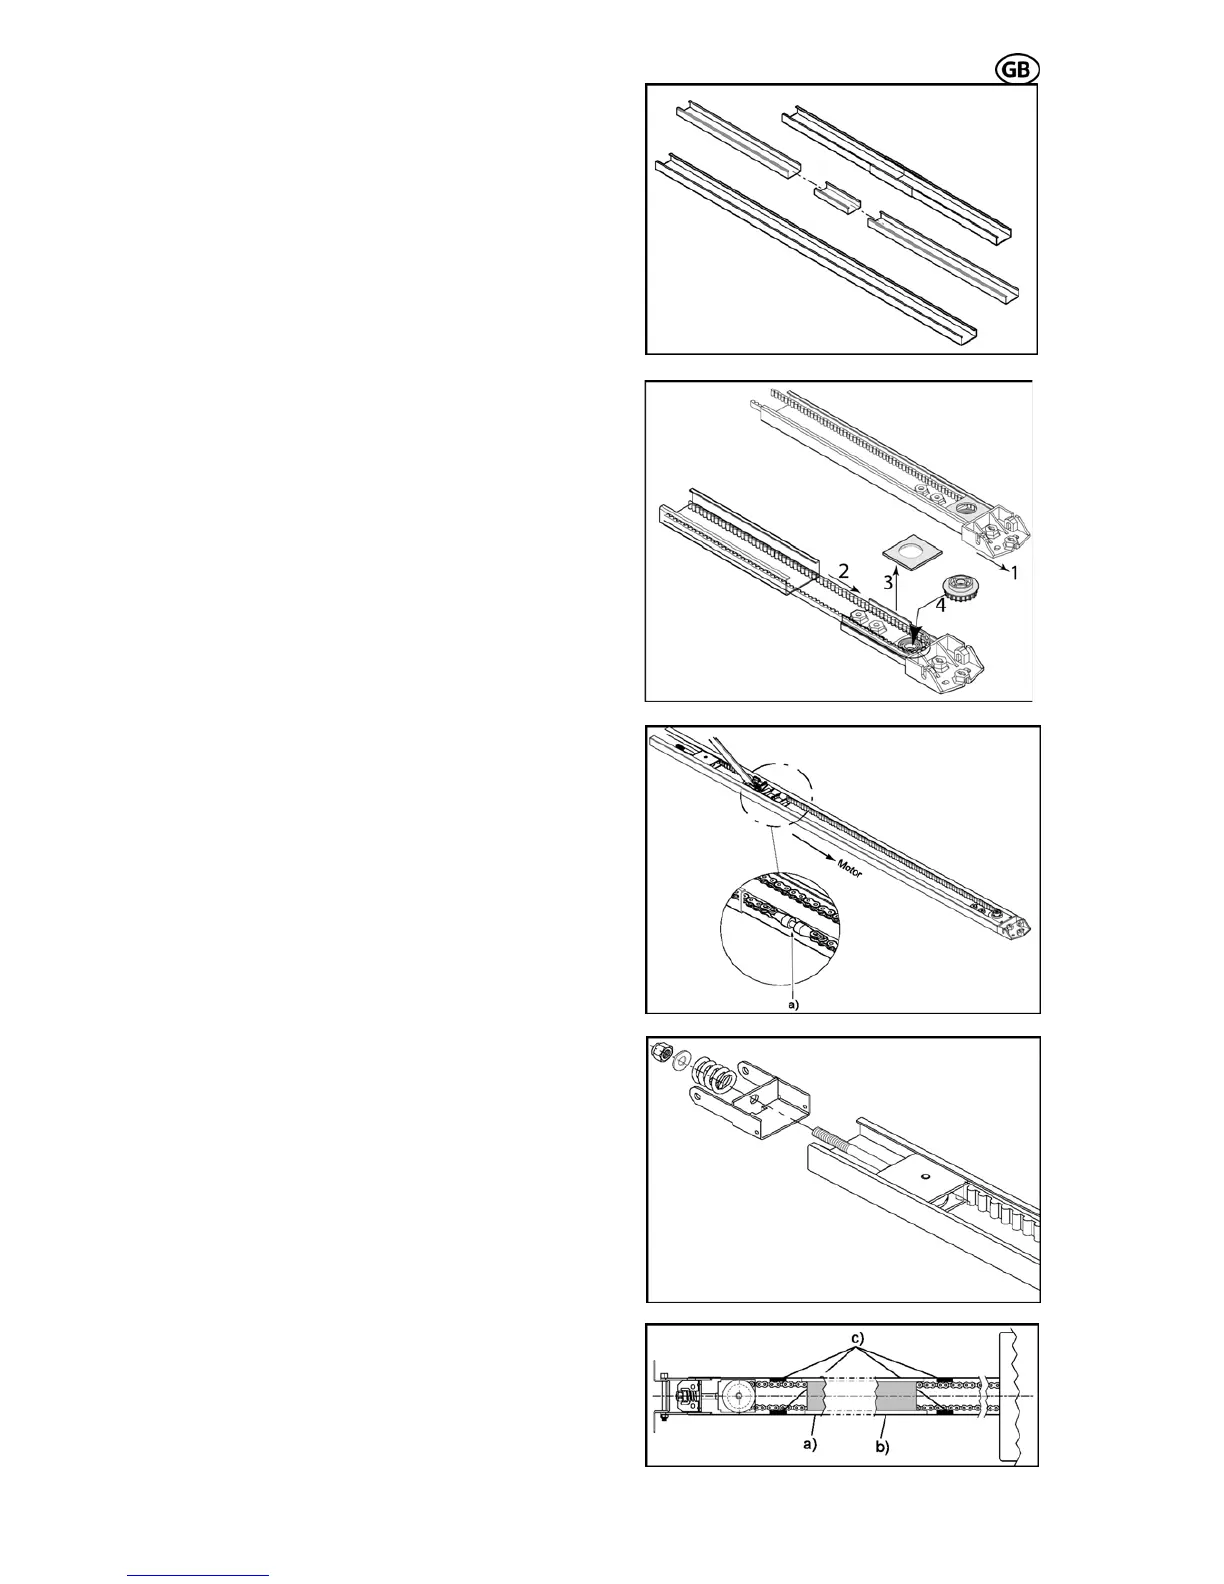
According to the version, the rails have to be
pre-mounted as requirements.
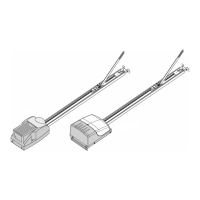
Put the rails together via the connection rail.
(Fig. 5) Slide the rails together to the stop posi-
tion.
Pull the rear bracket (Fig. 6.1) together with the
belt (Fig. 6.2) out of the rail. Remove the
transportation covering (Fig. 6.3) and press the
pinion (Fig. 6.4) into the bearing. Take care of
the belt not being squeezed. Then attach the
transportation covering again and push the
complete rear bracket back into the rail.
S 401 GB - 7 - 03-06
Adjust the tension of the chain or belt by pull-
ing the idler wheel towards the chain end.
Make sure, that the chain lock (Fig. 7a) is on
the left side of the rail. (Fig. 7)
Then push the tensioning bracket towards the
end of the chain and guide the coach bolt
through the hole of the tensioning bracket. Pay
attention that the coach bolt fits into the ten-
sioning bracket.
Push the provided spring and washer on the
end of the coach bolt and screw the nut on the
coach bolt. (Fig. 8)
Paste rubber buffers
If you have a chain drive, we recommend stick-
ing the provided rubber buffers to the inside of
the rail (Fig. 9c). Those serve to minimize the
noise caused, when the chain touches the rail.
Assure, that the rubber buffers are not in the
travel path of the trolley. The buffers have to
be put close to the end of the chain, so that the
trolley doesn’t touch them in door-closed- (Fig.
9a) or in door-open-position (Fig. 9b).
Fig. 5
Fig. 6
Fig. 7
Fig. 8
Fig. 9