Bettis P/N 137462E
Revision "A”
Page 17 of 18
5.5 ADD AN M3 JACKSCREW TO HOUSING ADAPTER (6-10)
NOTE: This Section can also be used to add an M3 to the cylinder end cap (4-20) at the same time as
the M3 is added to the housing adapter (6-10). When a M3 is only being installed into housing
adapter (6-10) skip step 3.3.14 during installation. For Single M3 addition to cylinder end cap
(4-20) use Section 5.6.
5.5.1 Prior to disassembly review all of Section 1 Introduction.
5.5.2 Disassemble the actuator per Section 2.1 - General Disassembly, Section 2.2 -
Pneumatic Cylinder Disassembly steps 2.2.2 through 2.2.5 and Section 2.3 - Housing
Disassembly steps 2.3.2 and 2.3.3.
5.5.3
Prior to actuator re-assembly review all of Section 3.1 - General Re-assembly, 3.2 -
Housing Re-assembly and 3.3 - Pneumatic Cylinder Re-assembly.
5.5.4 If new M3 housing adapter (6-10) is not pre assembled with the M3 then assemble M3 to
the housing adapter (6-10) per Section 3.2 step 3.2.1.
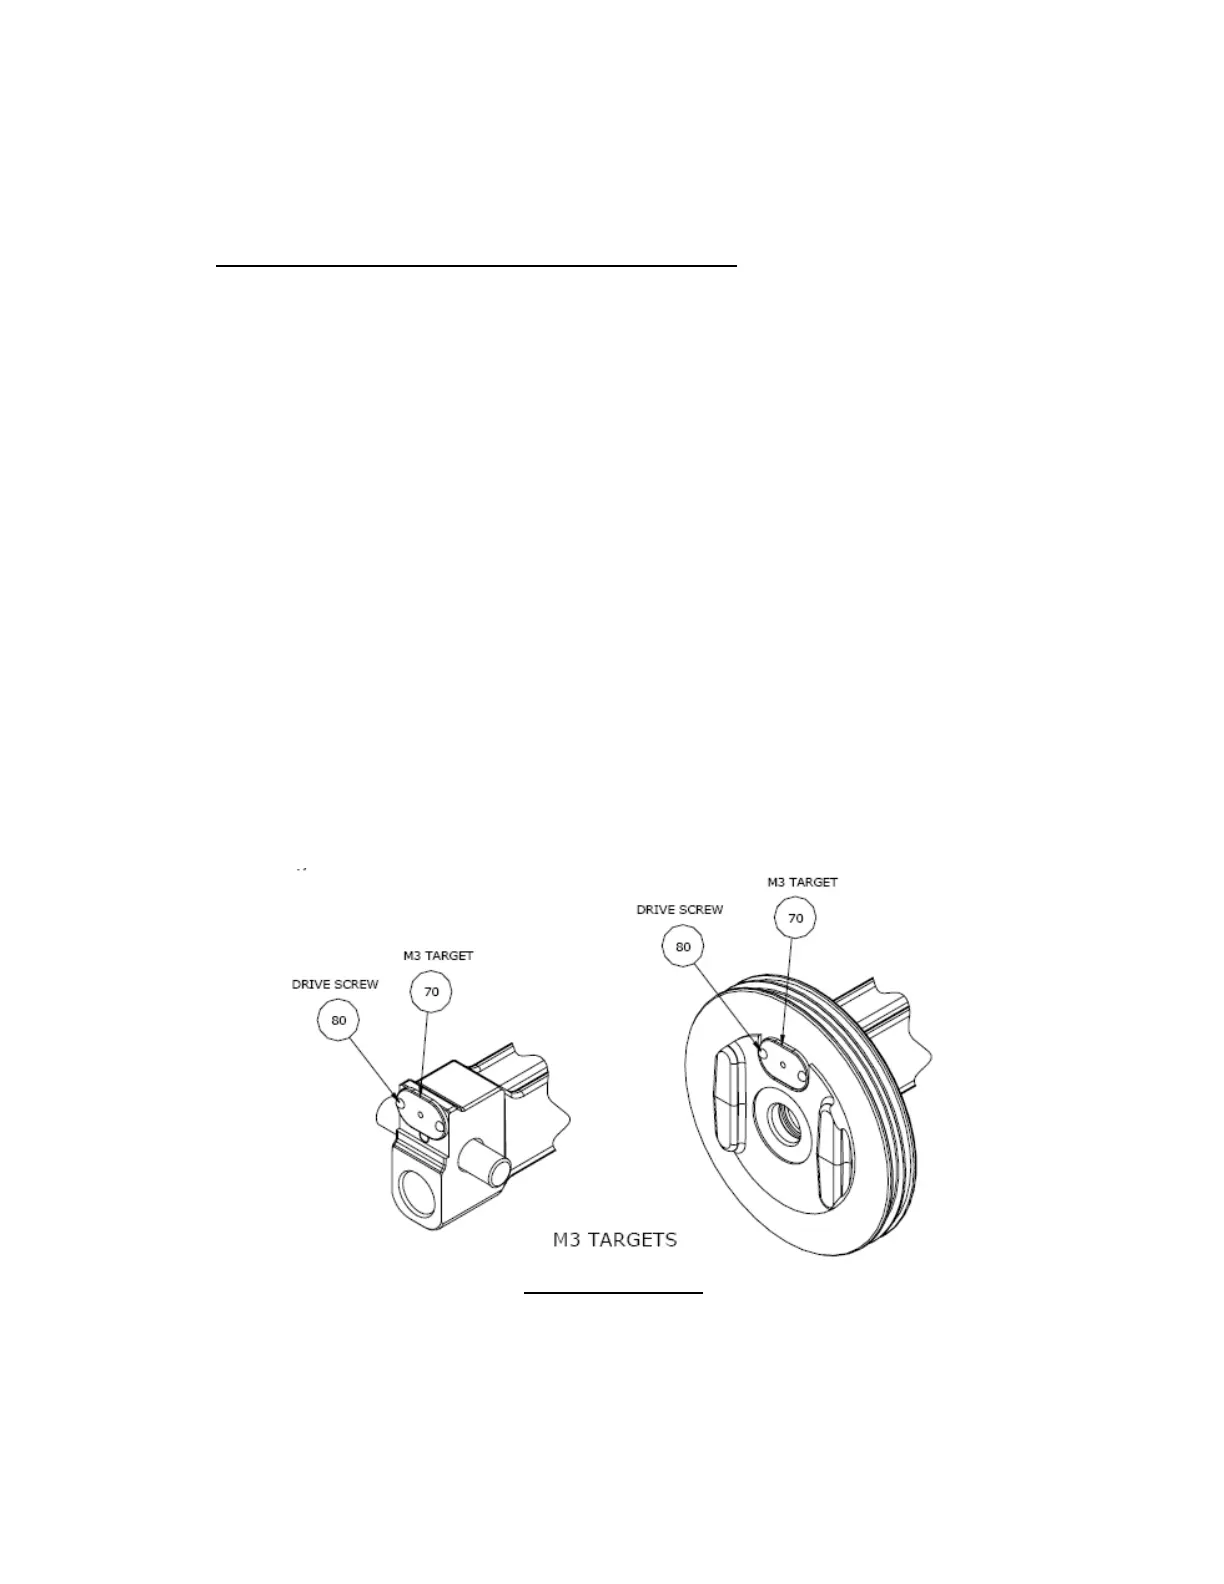
WARNING: The M3 cannot be installed on a standard CBA actuator unless the M3
targets are installed on the piston assembly as shown in Figure Number 2.
If the M3 is operated with a piston that does not have a target the groove
pin (12-20) is subject to failure.
5.5.5
Add the M3 targets to the piston assembly (4-50) per Figure Number 2 - M3 piston
targets.
FIGURE NUMBER 2
5.5.6 Reassemble the actuator per Section 3.2 steps 3.2.14 through 3.2.20, Section 3.3 steps
3.3.1 through to the end of Section 4 - Actuator Testing.
 Loading...