page 4 Accessory Installation Guide Qt X Controller
Install Wall Mount Bracket
For Qt X 805 controllers start at step 1. If you are converting a Qt X 800 controller
to a wall mounted unit with a 48V power supply, you will need to have both the
wall mount kit and the power supply kit. Start with Step 3.
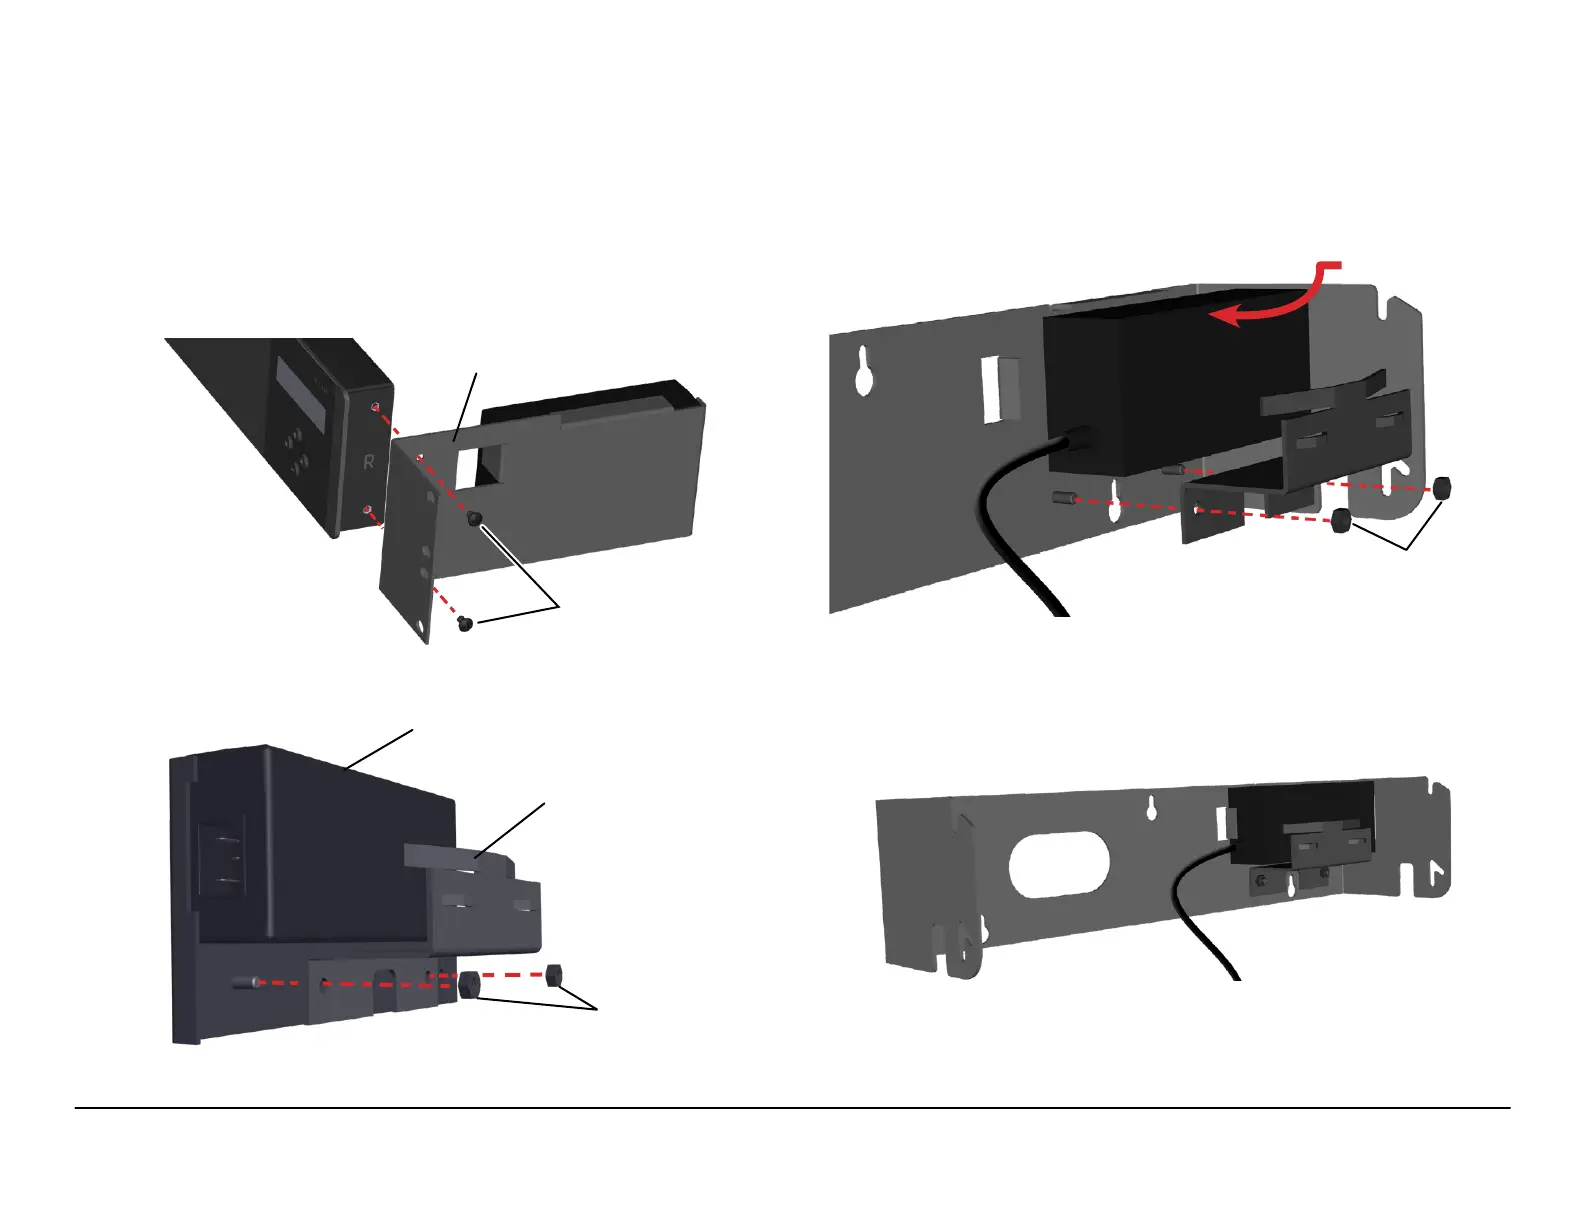
1. If necessary, remove the existing rack mount brackets from the controller and
reserve the M4 screws to attach the wall mount bracket (Figure 6).
2. Disconnect the power supply supporting bracket from the longer (R) rack
mount bracket (Figure 7). Reserve the hex nuts for reattachment to the wall
bracket.
Figure 8a. Attach bracket and power supply
Figure 8b. Assembled bracket with power supply
Figure 7. Remove bracket and power supply from long rack ear
Figure 6. Remove rack brackets from the controller
3. Attach the power supply bracket to the wall mount bracket with hex nuts on
the threaded studs loosely as shown. Insert the power supply with power
cord outlet located against the side hole provided for power cord access and
tighten the hardware (Figures 8a & 8b).
Long (R) rack ear with power supply
M4 screws
Power Supply
Bracket
Power Supply
M4 Hex Nuts
M4 Hex Nuts