Installing the Fender and Headlight on Ultra 1000
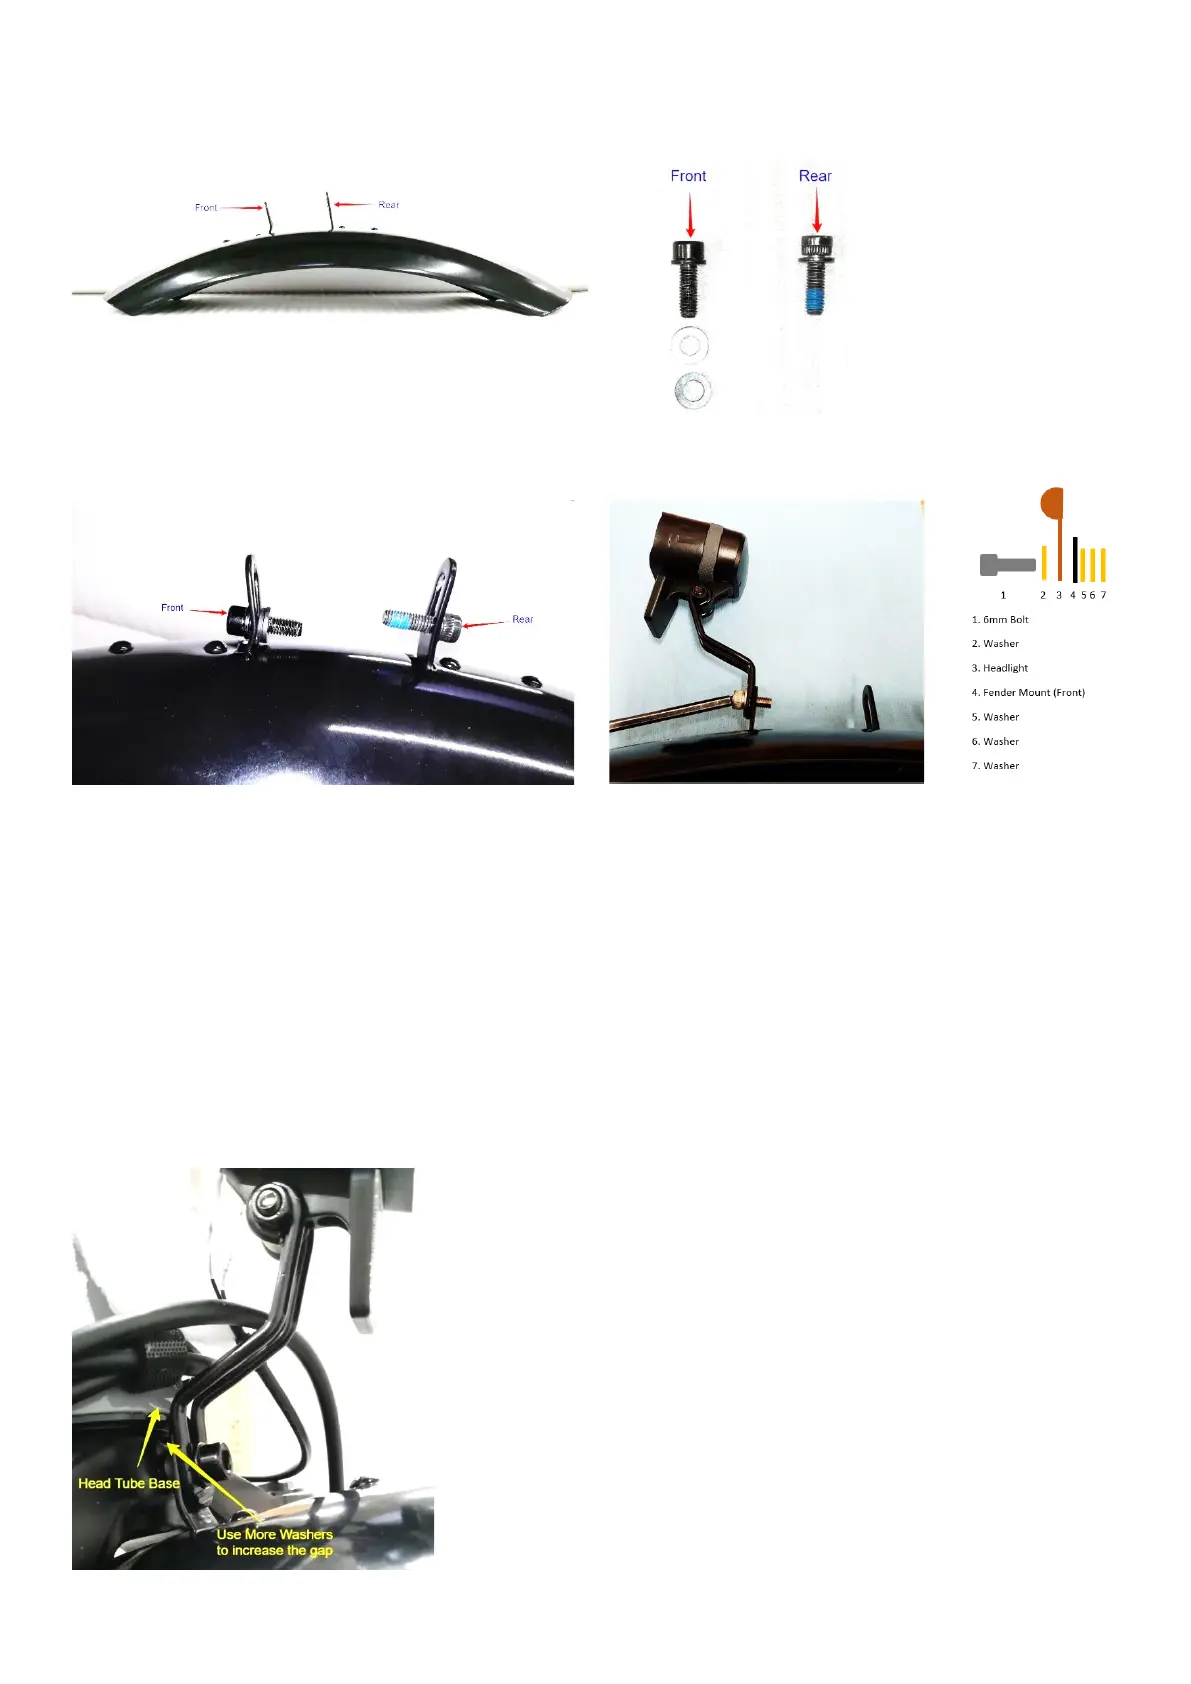
1. Note the Fender's front and Rear orientation first.
2. Note the supplied fitments. Use 2 or 3 additional washers for the front end of the fender so that the bolt
head moves away from the head tube's surface.
(3) (4)
3. The fender and light are installed at the fork crown together. One 6mm bolt and washer
through the front, and one 6mm bolt and washer through the back.
Note: Place additional washers on the front fitment bolt as shown in the pic.
4. If you are mounting the headlight place the 6mm bolt with washer through the light mount and then
through the front fender mount and thread into the front of the fork crown. Don't forget the additional
washers on the front bolt as mentioned previously.
5. Place the 6mm bolt with washers through the rear fender mount and thread in a couple of turns into the
back of the fork crown.
6. Now attach the front bolt and the headlight along with the
washers in the sequence as shown below.
7. Once both bolts are installed tighten completely.
8. Note that the headlight mount and fender mount should steer
clear of the head tube base as shown in the picture below, if
required add more washers to increase the spacing.
Pro Tip: If the headlight mount still rubs the head tube, bend the
fender mount gently using a pair of pliers.
 Loading...