MV PUSH EU Owner’s Manual
Part No 840514 5 840514_B_HI
ASSEMBLY INSTRUCTIONS
Your BILLY GOAT
®
MV Vacuum was shipped in one carton, completely assembled except for the Hood/Upper Handle
Assembly. Mounting hardware for the Hood/Upper Handle Assembly is temporarily installed on the lower handle and the
Housing Assembly.
DISCONNECT spark plug wire before assembling unit.
PARTS BAG & LITERATURE ASSY
Honda 6.5 Engine
Parts bag P/N-840190
Ty-wraps (2 ea)
Warranty card P/N- 400972, Owner’s Manual P/N-840244, General Safety and Warnings
Manual P/N-100294, Declaration of Conformity P/N-840204
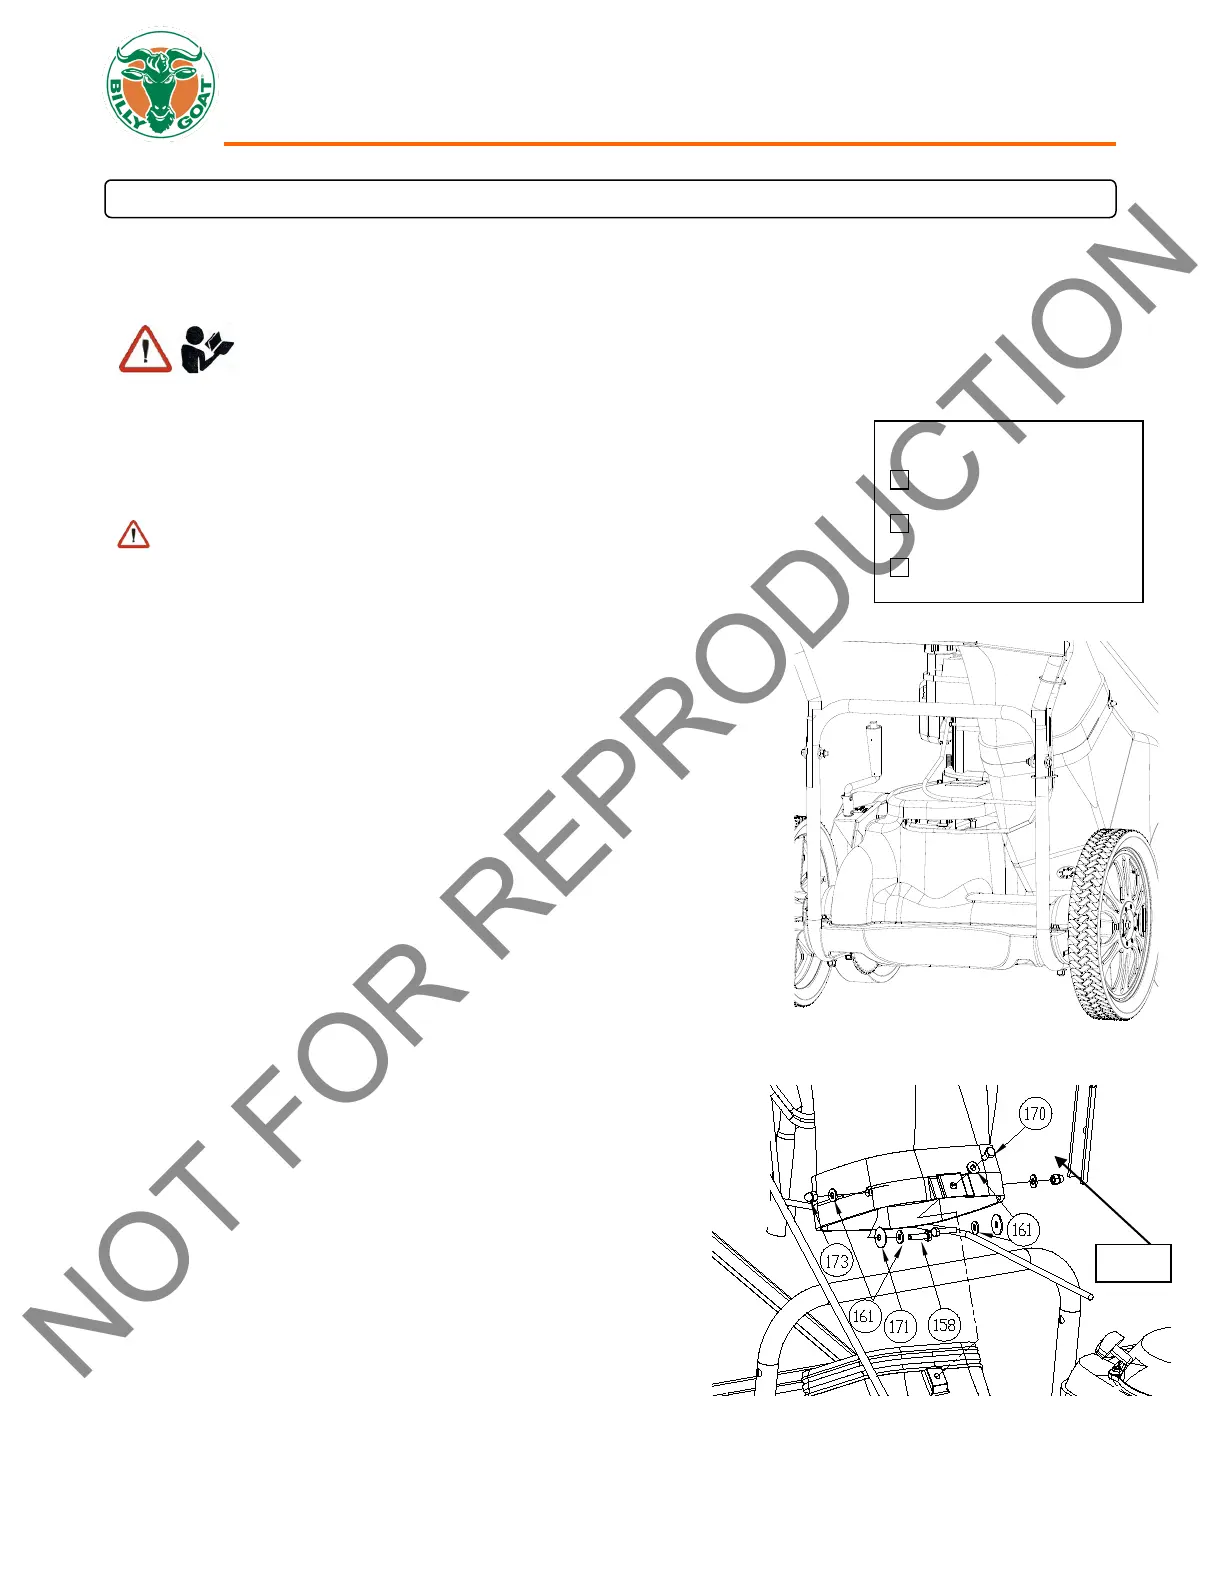
1. Attach hood assembly to the housing then hold in place during step 2.
NOTE: Be sure all cables are routed on the underside of the hood and
housing. (See Fig. 1)
2. Install (item 170) center bolt first when aligned with a nut on the housing.
(See Fig. 2)
3. Attach rest of hood assembly to the housing using corresponding
hardware. NOTE: You will have to insert the bolt/washer from the inside
by reaching through the hood. (See Fig. 2)
4. Attach upper handle brace to lower handle using corresponding
hardware. Then repeat this step on the other side. (See Fig. 3 next page)
5. Attach rod end (item 164) to the nozzle door rod then secure in place by
tightening jam nut. (See Fig. 4 next page)
6. Attach nozzle door rod to the nozzle door using corresponding hardware.
NOTE: It is easier to do this with nozzle door closed.
7. Attach rod end to rod (See Fig. 5 next page).
8. Attach nozzle door rod to the lever with nozzle door closed and lever in
hose kit position. NOTE: Check to see that the nozzle door opens and
closes all the way (see page 15). Tighten or loosen the rod end (item
164) for any adjustments. (See Fig. 4 and 5)
9. Install cable ty wraps. (See Fig. 6 next page)
10. Reconnect spark plug wire.
11. Attach the bag. (See Fig. 7 next page)
READ all safety instructions before assembling unit.
TAKE CAUTION when removing the unit from the box. The Hood/Upper Handle Assembly is attached to the
 Loading...