Copies of the I/B. Please reproduce them without any
changes except under special instruction from Bimar
(Italy). The pages must be reproduced and folded in
order to obtain a booklet A5 (+/- 148.5 mm width x 210
mm height). When folding, make sure you keep the good
numbering when you turn the pages of the I/B. Don’t
change the page numbering. Keep the language
integrity.
9
/
21
Assembly page 9/21
Fax +32 030 9904733
deformed when hot. Never use the appliance close to tubs or jets of water to avoid the risk of it
falling in.
• The heater must be fixed to a solid wall, constructed in fireproof and heatproof material. The
ceiling must also be fireproof and heatproof: the distances indicated in the previous paragraph refer
to structures with these characteristics.
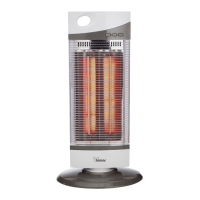
• The kit contains the following parts:
- Heater
- 2 nuts
- 2 washers
- Halogen lamp
- 2 flexible washers
- 3 screws for fixing to wall
- 2 screws
- 2 flexible safety washers
- 3 plastic dowels
• Before drilling the holes, make sure there are no pipes inside the wall. Mark the exact position of
the holes on the bracket, drill holes and insert dowels, then fix using the relative screws to lock
the bracket.
• For transport reasons, the halogen lamp is not connected (not inserted in the connectors, that is),
but in its own packaging inside the heater. Therefore it needs to be connected according to the
instructions below (suitable gloves should be worn to protect the hands and also to avoid damaging
the lamp, or leaving fingerprints on the glass or the reflector which must be perfectly clean):
- Unscrew the2 screws on the front frame, turn the frame to open it.
- Remove the glass with great care, and the gasket.
- Remove the lamp from its packaging and insert it in its housing, sliding it first into one
connector, then the other.
- Insert the gasket in the housing around the edge, and rest the glass centrally. To be sure the
appliance is waterproof, the gasket must adhere perfectly both to the edge and to the glass,
without any wrinkles.
- Close up the frame, and tighten the 2 screws, locking them to ensure watertightness.
Please note that watertightness of the appliance is NOT ensured if the gasket is not exactly and
correctly in place and if the frame is not locked properly.
Fasten the heater to the bracket using the
devices provided (see figure at side) and
adjust the tilt of the lamp according to the
area to be heated and the safety distances
indicated above. The screws must be locked
to ensure the appliance is firmly fixed.