PERFORMING A STUDY
(See Figure 4.)
NOTE: Oxygen input should not exceed eight psi. Oxygen input flow rate should be six to eight litters/minute not to exceed
50 liters/minute.
1. Using a source, position the patient in front of the scintillation camera. Ensure both lungs are within the crystal area.
2. Set the camera for Xe-133. Record all data on tape.
3. Turn the Power Switch, located on the patient side of the unit, to ON. (0 is OFF, 1 is ON.)
NOTE: Even after the Power Switch is set to the ON position, power will not be evident until the Timer has been turned ON.
4.
Place the Pulmonex II as close to the patient as possible and set the handle to the “Start” position.
5. Set “Patient Air Flow” control to 30 (an arbitrary figure that can be changed to accommodate the patient’s breathing pattern).
6. Press the button on the front panel to add Oxygen to the “To Patient” bag. Only add a small amount of Oxygen, about one
quarter full. (The bag will only move slightly, do not fill it up.) More Oxygen can be added later if it is required for the patient.
In many cases, it is possible not to add any Oxygen and perform the entire study on ambient air. In all cases, the Oxygen is
only to enrich the air in the circuit.
NOTE: T
o perform a study using ambient air
, turn the Pulmonex II ON using the timer and proceed to handle position #2 before
connecting the patient to the system. When the “To Patient” bag is one-quarter full, switch the handle back to position #1. To add
ambient air, turn the Air Flow up to 100, add the desired volume, and turn the Air flow back to 30. The system is now ready to use.
7. Make sure the system is in position #1.
8. Set the timer to nine minutes (an arbitrary figure that can be changed at any time depending on the study procedure you prefer).
9. Place the face mask over the patient’s face and attach mask retainer or mouthpiece and nose clip. Place a Vertex Cape on
the patient.
10.
W
ith the handle in the “Start” position. Instruct patient to breathe briefly while becoming accustomed to the face mask.
The
“From Patient” bag will move slightly as the patient exhales.
PERFORMING A STUDY -6-
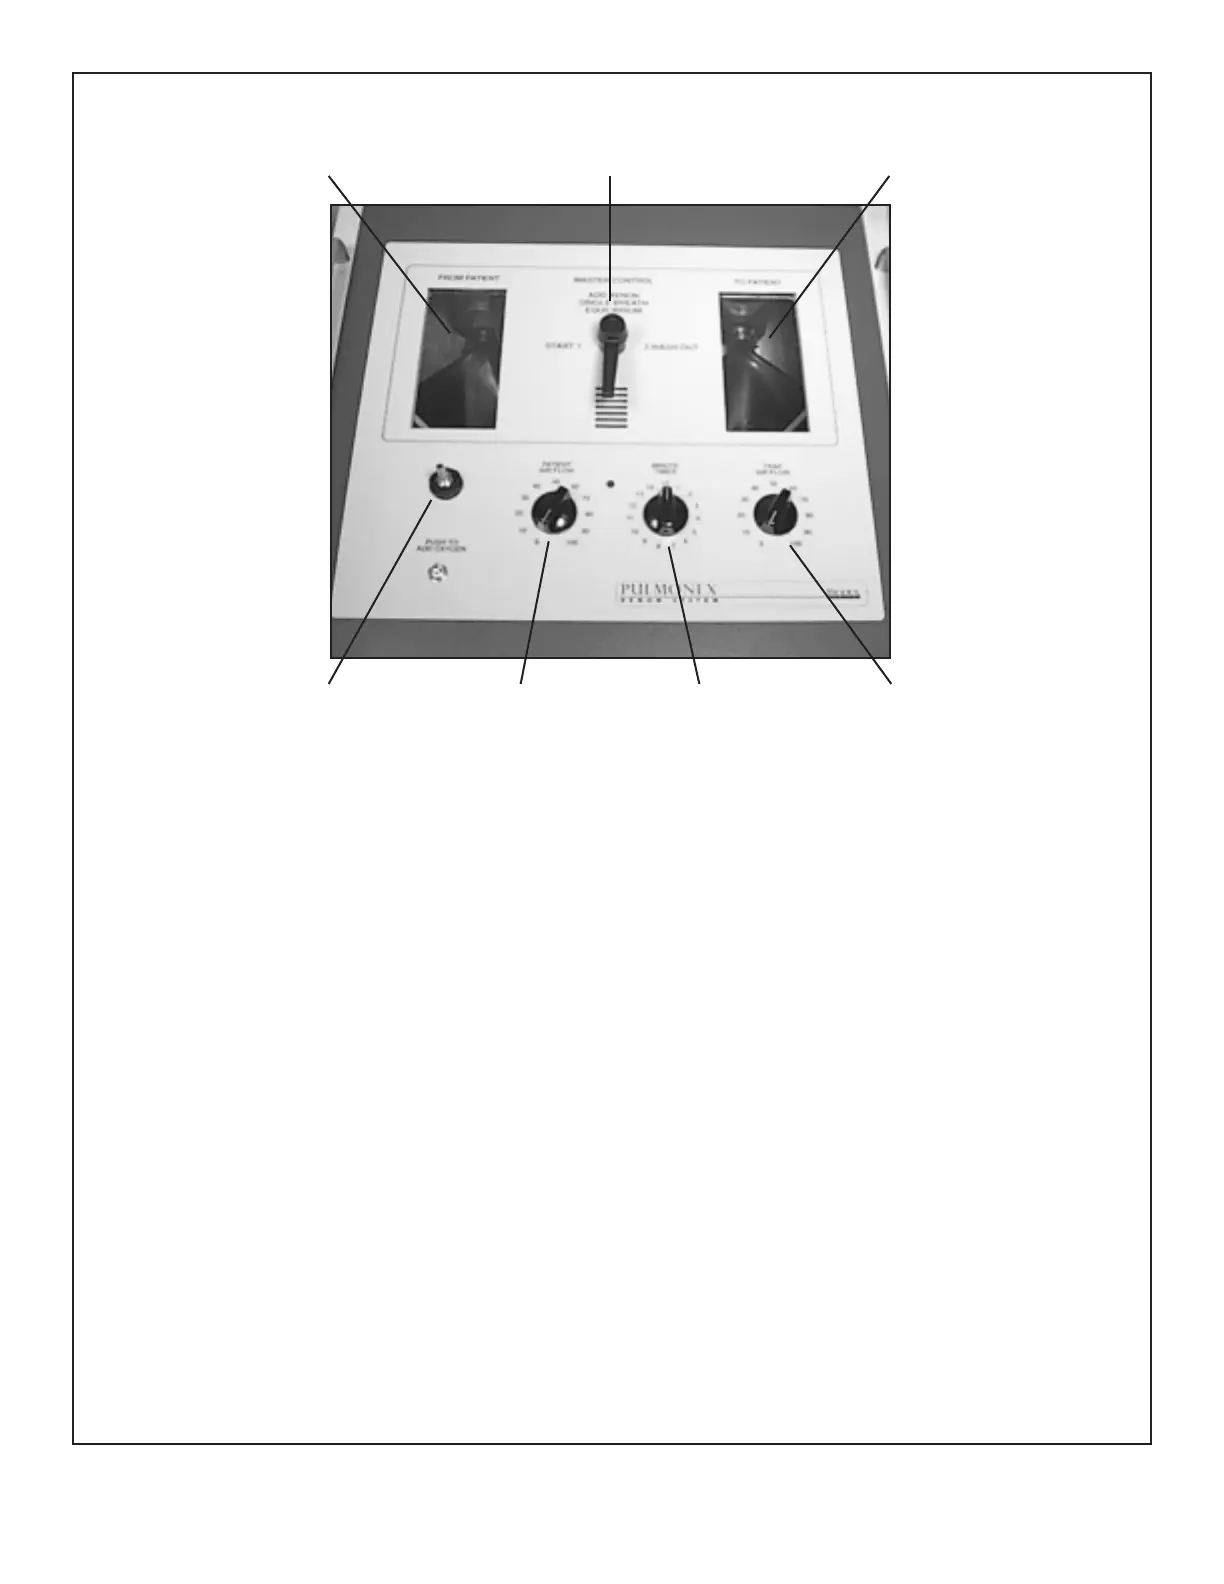
“From Patient” Bag Master Control Handle “To Patient” Bag
Oxygen Inlet Port Patient Air Flow Minute Timer Trap Air Flow
Figure 4.
The Pulmonex II
Display Panel