Do you have a question about the bioMerieux MINI VIDAS and is the answer not in the manual?
Defines the intended users and applications for the mini VIDAS Industry system.
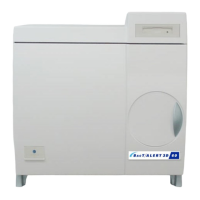
Highlights the analyzer's features, self-contained system, and supported immunoassay fields.
Explains the different types of statements used to alert users to important information.
Provides important statements applicable to all products regarding usage and safety.
Defines symbols that may appear on the instrument, package inserts, or packaging.
Details the instrument's compliance with emissions and immunity requirements.
Illustrates the positions and text of safety warning labels on the analyzer.
Outlines critical safety measures to prevent injury or instrument damage.
Provides guidelines for safe handling and usage of reagents.
Details precautions for sample handling and potential issues with SPR® dots.
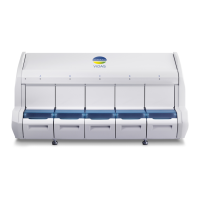
Provides an overview of the analyzer's components and overall design.
Describes the liquid crystal display screen and the functions of the keypad and keys.
Details the internally mounted thermal printer and its location.
Identifies and describes the ports and modules located on the rear of the analyzer.
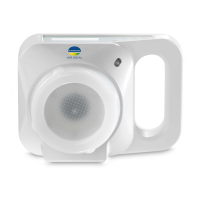
Explains the types of bar code readers and their functions.
Describes the function of memory cards for software updates and handling precautions.
Lists dimensions, weight, and space requirements for the analyzer.
Details voltage, consumption, power, fuse current, and heat emission.
Specifies installation type, category, pollution degree, and safety requirements.
Provides operating and storage temperature ranges for the analyzer.
Specifies the relative humidity requirements for operation and storage.
States the maximum operating altitude for the analyzer.
Indicates the sound level generated during analysis.
Details capacity, motors, and pumping mechanisms.
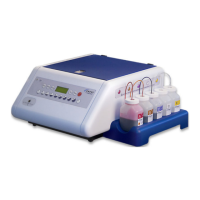
Lists optional hardware like external printers and unidirectional interfaces.
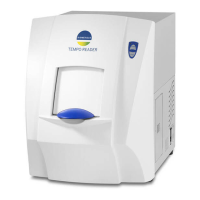
Describes accessories such as the VIDAS® Heat and Go instrument.
Provides specifications for VIDAS® SPR® and Single Reagent Strips.
Explains the components of VIDAS® Assay Kits and Single Reagent Strips.
Details the information found on the reagent strip label and its components.
Describes the Solid Phase Receptacle (SPR®) and its role in the assay.
Explains the purpose and availability of standards, calibrators, and controls.
Introduces the analyzer's function and basic principles.
Defines the sequence of operations for performing an analysis.
Explains the scientific principle behind a VIDAS® assay, including fluorescence measurement.
Describes the methods used by the analyzer to calculate assay results.
Details analysis methods for qualitative assays using single reagent strips.
Explains the calibration and recalibration processes for quantitative and qualitative assays.
Describes the main components and sections of the analyzer's operation.
Details the analyzer's sections, their capacity, and how they operate.
Explains the function and usage of the strip preparation tray.
Describes the microprocessor's role in storing and operating assay protocols.
Explains the temperature control systems for assays.
Describes the optical fluorimetric scanner used for chemical change detection.
Explains the CPU's control over operations, data analysis, and system verification.
Provides an overview of the analyzer's software and menu structure.
Illustrates the main menu, submenus, and program groups within the software.
Explains how to view the current status of the analyzer sections.
Describes how to access the online help function for menus and programs.
Explains how to use the '?' key to display error messages.
Details how to navigate long displays using the arrow keys or paging bar.
Provides instructions and cautions for unpacking the analyzer components.
Recommends keeping original packaging and storing equipment correctly.
Gives guidelines for selecting a suitable location, avoiding direct sunlight and heat.
Refers to safety precautions for making electrical connections.
Describes the verification test performed after installation.
Provides instructions for connecting an external bar code reader.
Details the procedure for turning on the analyzer and allowing it to warm up.
Explains the procedure for safely shutting down the analyzer.
Guides users through setting up analyzer configuration parameters.
Describes how to select the display language for the analyzer.
Explains how to set standard units for quantitative assay results.
Details how to enter and manage user IDs for reports.
Guides on defining a custom header line for assay reports.
Explains how to set the analyzer's date and time for reports.
Describes how to adjust the display contrast for better viewing.
Allows selection between the internal thermal printer and an external printer.
Guides on setting the format for dates and times displayed on reports.
Enables definition of character sets for inputting sample IDs.
Allows adjustment of the audible tone confirming keystrokes.
Allows adjustment of the volume for inactive key beeps.
Explains how to set initial and final volumes for error beeps.
Allows adjustment of the final volume for error beeps.
Describes how to enable display blinking for error alerts.
Configures various warnings concerning Master Lot data and standards.
Used when the analyzer is connected to a Laboratory Information System (LIS).
Allows creation of free text lines for normal ranges printed on reports.
Provides step-by-step instructions for loading paper into the internal printer.
Guides on how to print the current screen display.
Presents a visual overview of the standard workflow for running assays.
Covers managing job lists, defining run types, and checking assay compatibility.
Details the process of running assays, including master lot data entry.
Explains the simplified 'Load and Go' mode for running assays.
Describes the 'Defined' mode for setting up assays with specific parameters.
Guides on assigning a dilution factor to individual tests.
Details how to run and send internal quality controls for statistical processing.
Provides instructions on how to stop processing one or more sections.
Explains the automatic printing of assay reports upon run completion.
Describes how qualitative assay results are interpreted against thresholds.
Explains how quantitative results are determined using master curves.
Details how error messages are displayed on assay reports.
Guides on how to reprint stored assay reports.
Describes the process of validating results for upload to a Laboratory Information System.
Explains how to print a list of assays with loaded Master Lot Data.
Details how to place a section off-line or on-line.
Guides on modifying factory settings for keypad and display.
Describes simple tests to verify hardware components like display and keypad.
Explains how to update assay protocols using the complete range of VIDAS® reagents.
Guides on how to display the current software version of the analyzer.
Details the procedure for updating the analyzer's software using memory cards.
Provides instructions for carefully parking the analyzer's components.
Highlights the importance of preventive maintenance performed by bioMérieux technicians.
Covers routine maintenance operations to be performed by the user.
Outlines procedures for routine cleaning and disinfection of the analyzer.
Provides monthly cleaning instructions for the SPR® block.
Details cleaning instructions for reagent strip trays.
Provides instructions for cleaning the plastic trays.
Details cleaning instructions for the strip preparation trays.
Instructions for cleaning the instrument's outer covers.
Instructions for cleaning the analyzer's screen and keypad.
Instructions for cleaning the bar code reader.
Provides monthly instructions for cleaning the optical lenses.
Details monthly checks for the pipetting system's mechanisms.
Covers calibration and adjustments for the optical system.
Explains master curve creation and customer-performed calibration.
Describes how the analyzer indicates errors via beeps and blinking display.
Explains how to respond to and view error messages on the screen.
Lists possible error messages and procedures for recovery.
Provides instructions for manually entering bar codes when errors occur.
Lists and explains various other error messages and their causes.
Troubleshoots common issues with the bar code reader.
Explains errors that appear directly on assay reports and how to correct them.
Guides on troubleshooting issues with the internal printer.
Explains how to access the last ten stored error messages.
Provides equipment requirements and installation steps for an external printer.
Details the equipment required and installation steps for the bar code reader.
Overview of the analyzer's unidirectional interface for transmitting results.
Details LIS interface options, communication settings, and data formats.
Shows an example format of data uploaded from the analyzer.
Lists the packed and unpacked dimensions of older analyzer versions.
Specifies the packed and unpacked weight of older analyzer versions.
Details the required height, width, and depth for analyzer placement.
Lists electrical specifications like voltage, consumption, and power.
Specifies operating conditions including temperature, humidity, and altitude.
Details capacity, motors, pumping, temperature control, and accuracy.
Describes the detector, detection range, and automatic checking of the optics.
Provides specifications for VIDAS® SPR® and Single Reagent Strips.
Definition of a complete test procedure using immunological and fluorescent methods.
Definition of the designation for an assay used in the analyzer.
Property allowing assay types to utilize the same protocol.
Package containing reagents, SPRs, and inserts for an assay.
Process of adjusting a quantitative assay lot's standard curve.
An assay run where types, IDs, standards, and controls are defined prior to start.
Physical process where a substance emits light after exposure to specific wavelengths.
An assay run where strips are placed and run without prior definition.
Data supplied with assay lots for quality control and standard curves.
Slots in the analyzer for placing reagent strips and SPR® pairs.
Sequence of computer-controlled activities needed to perform an assay.
A tool for cleaning optical lenses to avoid optical drift.
| Type | Immunoassay Analyzer |
|---|---|
| Sample Capacity | Up to 12 samples at a time |
| Technology | ELFA (Enzyme-Linked Fluorescent Assay) |
| Reagent format | Ready-to-use reagent strips |
| Sample types | Serum, plasma, urine |
| Power supply | 100-240 V, 50/60 Hz |
| Test Menu | Infectious diseases |
| Connectivity | RS-232, USB |
| Operating Temperature | 18-30°C |
| Operating Humidity | 20-80% relative humidity, non-condensing |
| Throughput | Up to 36 tests per hour |