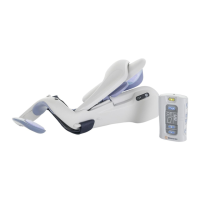
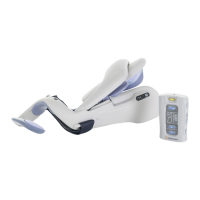
Connect the System Charger Set to the H200 Wireless Orthosis and the H200 Wireless
Control Unit simultaneously. Charge the H200 Wireless System daily.
Charging the H200 Wireless System
Manufactured by:
Bioness Neuromodulation Ltd.
8 Hanagar St.
Hod Hasharon 4501309
Israel
Worldwide Corporate Office
Bioness Inc.
25103 Rye Canyon Loop
Valencia, CA 91355
Telephone: 800-211-9136 or 661-211-9136
Email: info@bioness.com
Website: www.bioness.com
User's Reference Card
H200 Wireless Orthosis Displays
System On
Status Light
Flashes Green
Stimulation On
Stim Light
Flashes Yellow
Stimulation Paused
Stim Light
Steady Yellow
Faulty Electrode
Contact
Status Light Flashes Red
Hardware/Software
Error; Charging Error
Status Light Steady Red_
612-00106-001 Rev. D
11/2015
European Authorized Representative
Bioness Europe B.V.
Stationsweg 41
3331 LR Zwijndrecht, The Netherlands
Telephone: +31.78.625.6088
Website: www.bioness.com
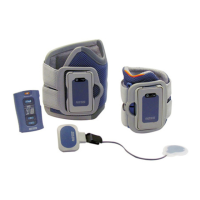
Putting on the H200 Wireless Orthosis
3 4 5 621
4
5
6
3
Wet and attach the cloth electrodes.
Position the Orthosis on a stable surface, and put your hand into the spiral end. The Thenar
(with attached electrode) should rest at the base of your thumb.
Position the wrist bridge comfortably on the back of your wrist.
Place your forearm in the Orthosis flexor support.
Close the extensor wing.
Fasten the wrist strap, if appropriate.
2
1
Control Unit Charging Displays
Flashes Yellow Low Battery
Rotating Green Circle Charging
Horizontal Green Line Fully Charged
Orthosis Charging Displays
Status Light Flashes
Yellow
Low Battery
Status Light Flashes
Yellow and Green
Charging
Status Light Steady
Green
Fully Charged
H200 Wireless
Orthosis
H200 Wireless
Control Unit
System
Charger Set
See User’s
Guide