RL39 - Repair instructions for changing the frame
Version 1.0, last revised 03/2016
49/58
It must not be possible to pull the shift cable further out of the gear hub by
pulling on the plastic locating sleeve.
If the shift cable has too much play, turn the twist grip to 1st gear. Reduce
the play in the shift cable by turning the adjusting nut on the twist grip.
If the shift cable is too tight/ taut (and the switch cannot be moved to gear
position 3 or the gear hub does not shift to 1st gear or shifts constantly
between 1st and 2nd gears), turn the twist grip to 1st gear. Then reduce the
tension of the shift cable with the aid of the adjusting nut on the twist grip.
Turn the twist grip to 3rd gear and check again whether there is any play in
the shift cable. Turn the crank and shift through all the gears several times.
When the tension of the shift cable is correctly adjusted, all the gears can be
engaged effortlessly.
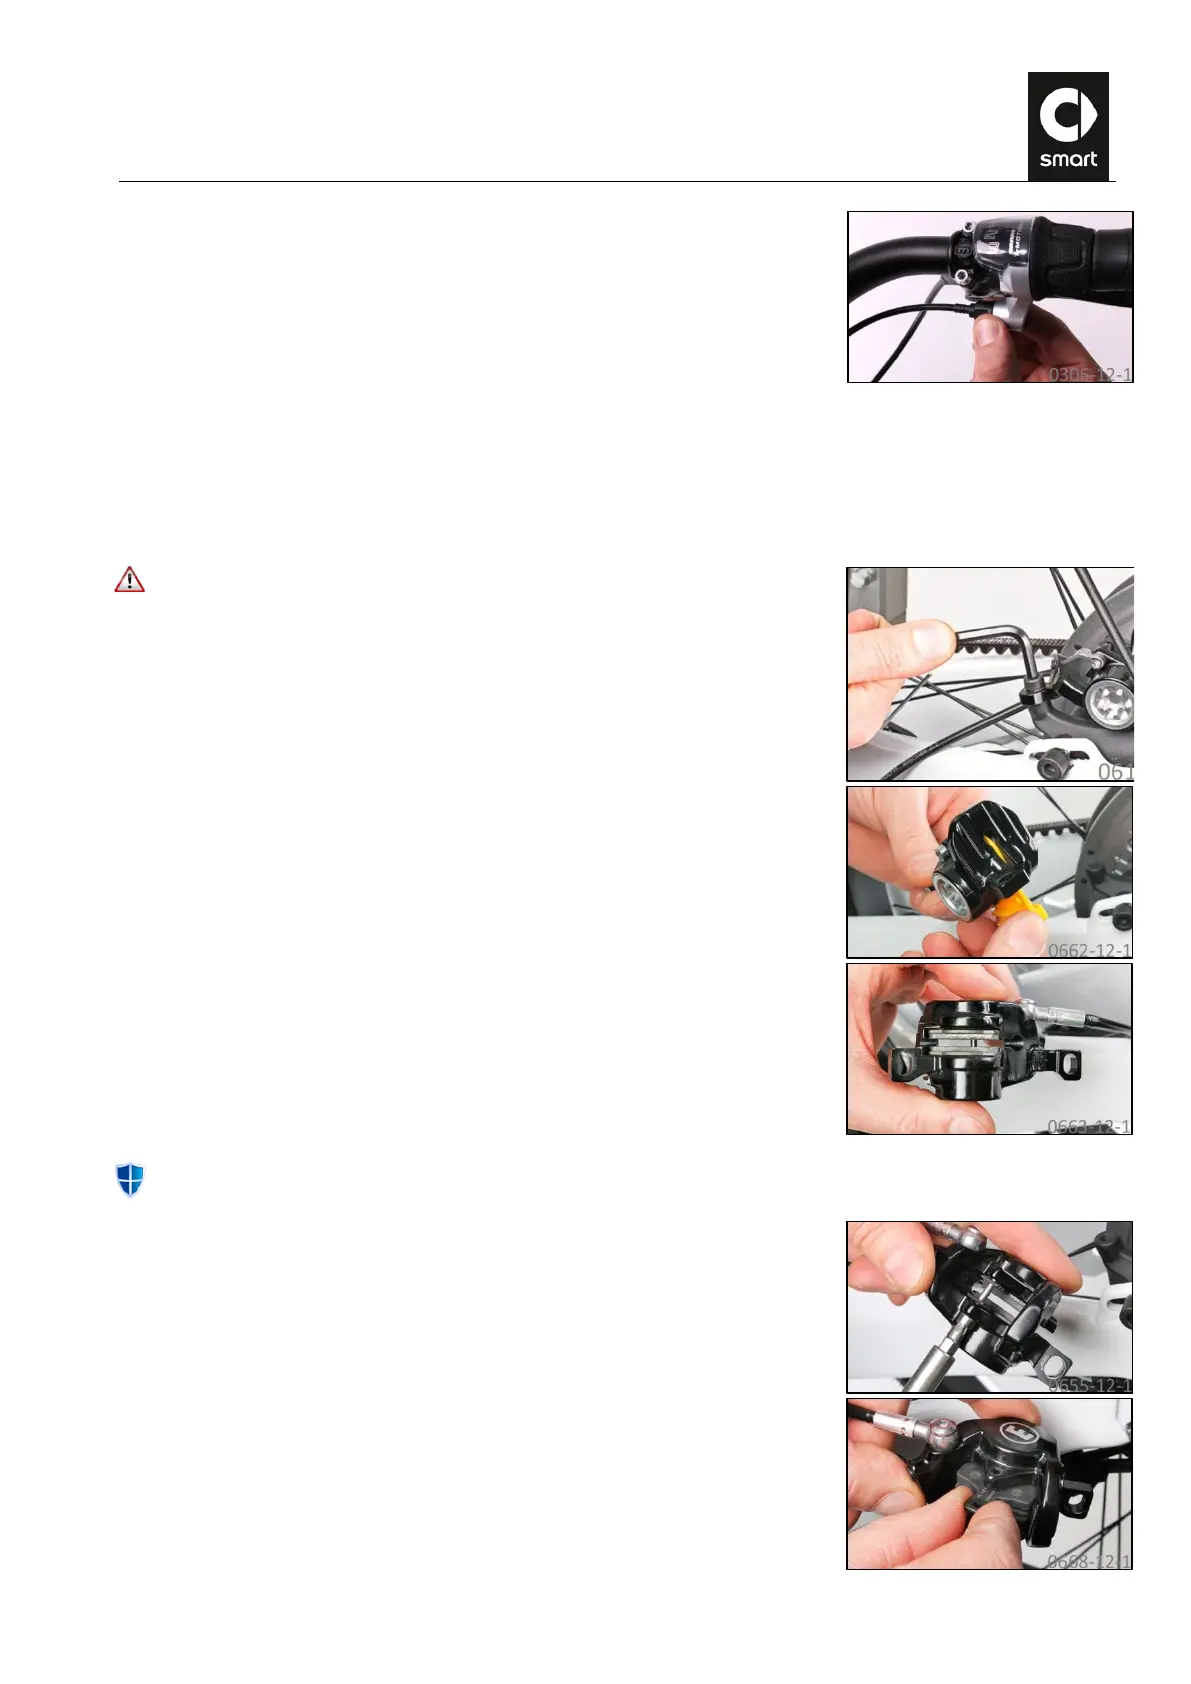
TT. Preparing the brake caliper
The following instruction applies on for the rear brake caliper:
Undo the two brake caliper retaining bolts using a size 5 Allen wrench and
remove the brake caliper.
With the brake pads installed, push back the pistons in the brake caliper with
the transport lock or with a broad screwdriver. Do not use force to do this. If
necessary, press from different sides until the slave pistons slide back
completely without great effort.
Never push back the pistons without the pads installed, otherwise they could be damaged.
Unscrew the brake pad retaining bolt using the T25 Torx wrench.
Lift the brake pads upwards out of the brake caliper.
 Loading...