NOTE: The temperature signal travels in a straight line from the remote sensor to the monitor.
The signal will not curve around an object. Please take this into consideration when mounting the
remote sensor.
The remote sensor can be placed on any
surface or mounted on a wall.
Wall Mount
4.0 Calendar and Clock Setup
1. Press and hold the SET button. Time zone will begin to
2. Press the
or button to toggle to the correct time zone.
3. Press the SET button to
4. DST and ON or OFF will Press
or button to select Daylight Savings Time to
be ON or OFF. Press the SET button to
5. 12/24 hour will begin to Follow steps 2 and 3 to set the correct 12/24 hour format,
hour, minutes, year, month, day, and barometer units.
5.0 Setting Alarm Time
1. Press the ALARM button once to enter alarm mode. will be displayed in the top right
corner of the screen.
2. Press the ALARM button again to activate or deactivate the alarm. When the alarm is
activated
will be displayed beside the hour digit.
3. Press and hold the ALARM button. The hour digit will begin to
4. Press the
or button to set the hour.
5. Press the ALARM button to
The minute digits will begin to
6. Press the
or button to set the minutes.
7. Press the ALARM button to
The clock will automatically return to regular mode.
8. When the alarm sounds press the SZN/LIGHT button, the alarm will sound again in
approximately 10 minutes. To turn off the alarm
press any other button, when
alarm sounds.
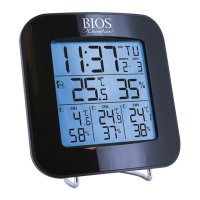
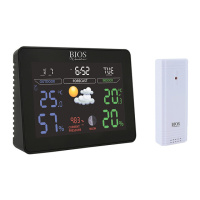
6.0 °C/°F Switchable
The default measurement for temperature is °C, press the / CF button to toggle between °C and °F.
7.0 Backlight
Press the SNZ/LIGHT button to turn the backlight on for a few seconds. To permanently have
the backlight on, use the adapter included with the unit.
Note: When using the adapter, you can adjust the brightness of the screen by pressing the
SNZ/LIGHT button.
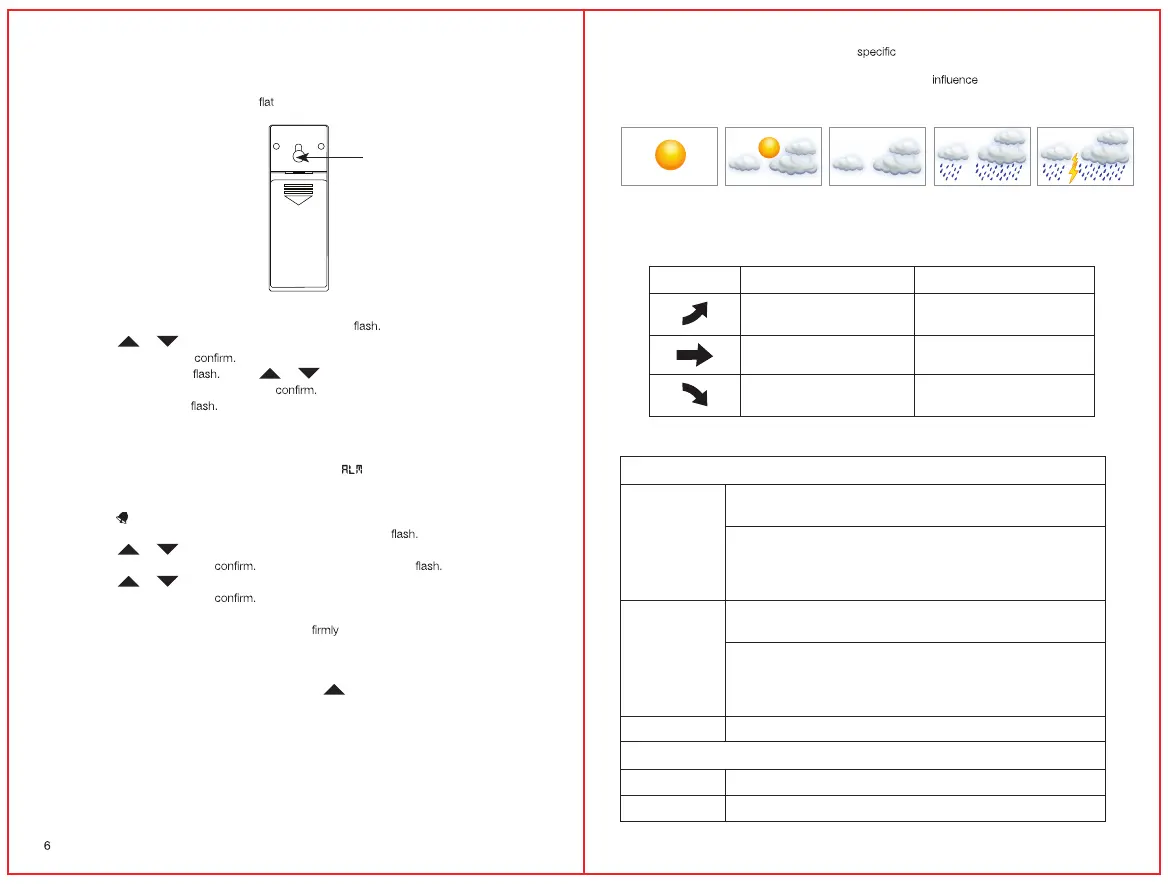
8.0 Weather Forecast
The forecast function in the weather station is based solely on barometric pressure and trend
recordings of general weather conditions associated with various pressure levels. It therefore has
7
a limited ability to forecast for the multitude of
conditions it will encounter. It provides
a general forecast of weather changes in the same way a wall barometer forecasts changes in
weather, however it does record and account for trends that
the forecast icon.
There are 5 weather forecast icons:
9.0 Moon Phase
The moon phase icon changes according to the date that is set.
10.0 Trend Arrows for Temperature and Barometric Pressure
Trend Arrow Temperature Barometric Pressure
When temperature increases
by 1°C / 2°F
When pressure rises by 2 hPa
within 1 hour
No change No change
When temperature decreases
by 1°C / 2°F
When pressure falls by 2 hPa
within 1 hour
11.0 Product Specifications
Temperature Measuring Range
Monitor
0°C to 50°C with ±1°C resolution
32°F to 122°F with ±2°F resolution
When temperature is above 50°C (122°F) monitor will display
maximum temperature (50°C / 122°F)
When temperature is below 0°C (32°F) monitor will display minimum
temperature (0°C / 32°F)
Remote Sensor
-40°C to 60°C with ±1°C resolution
-40°F to 140°F with ±2°F resolution
When temperature is above 60°C (140°F) monitor will display
maximum temperature (60°C / 140°F)
When temperature is below -40°C (-40°F) monitor will display
minimum temperature (-40°C / -40°F)
Accuracy ±2°C (±4°F)
Humidity Measuring Range
Monitor 20% - 99% RH
Remote Sensors 20% - 99% RH
 Loading...