Bird-X, Inc. has been recognized
worldwide as the bird and pest control
experts for more than 50 years.
WHY CONTROL PESTS?
Droppings are unsightly, unhealthy, and
potentially fatal.
Droppings cost money and time. “Cleaning up”
represents costs unrecoverable by revenues.
Pests are destructive and deface property.
USDA, OSHA, health boards and other
organizations can cite, fine or shut down
companies for pest mess problems.
PEST MANAGEMENT PROGRAM
A. Survey the pests and their entry, exit and
feeding habits.
B. Inspect your property. Discover what the pests
find attractive about your area, and if the same
conditions prevail in neighboring properties.
C. Remove inducements. Clean the area of all
evidence of pests and the residual scent.
Because pests and their droppings can cause
many diseases, use extreme caution when
removing them. Do not breathe or come into
direct contact with them. If you have questions
about how to do this safely, consult an expert.
Remove food spillage, garbage, nesting
material and other appealing items.
D. Maintain a clean and changing environment.
For maximum effectiveness, periodically repeat
C) above and relocate or reposition the unit,
vary the output, or turn it off for a short time.
E. Install early. It is always best to install the Solar
Yard Gard before “pest season” begins; as it is
easier to discourage them than to rout them out
once they have already established a pattern.
F. Consider alternate locations. Make educated
guesses as to where the pests will go when
they leave their current infestation area, and
consider purchasing units to cover these areas
as well.
MANUFACTURER’S WARRANTY
The Solar Yard Gard is warrantied against defects
in materials and workmanship for a period of six
months from the shipping date. At the option of Bird-
X, Inc., we will either replace or repair the defective
unit. Prior authorization and a returned goods
authorization (RGA) number will be necessary from
Bird-X, Inc.
NOTE: RETURNS ARE ACCEPTED ONLY WITH
AUTHORIZATION FROM OUR CHICAGO OFFICE.
SYNERGY AND OTHER PRODUCTS
For best results, Bird-X, Inc. always recommends
the Solar Yard Gard be used in conjunction with one
or more other products. The combination of different
types of control methods has proven to maximize
the effectiveness of pest animal control programs.
Two or more ifferent kinds of devices (Solar Yard
Gard plus netting and/or taste or smell aversion) will
produce a synergistic effect and will yield much
greater effectiveness than any single product alone.
Visit www.bird-x.com for more information on
companion products.
Copyright 2017 by Bird-X, Inc. All rights reserved.
Chicago, IL USA
www.bird-x.com solutions@bird-x.com
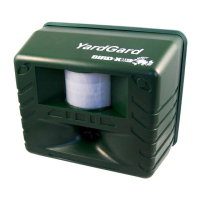
BIRD-X
SOLAR YARD GARD
Ultrasonic Pest Chaser
INSTRUCTIONS & PEST
MANAGEMENT GUIDE
PLEASE READ CAREFULLY TO OBTAIN THE
BEST RESULTS FROM YOUR UNIT.