Installing Indoors with a Countertop
Step #1: Verify there is proper space for the hand pump and pipe
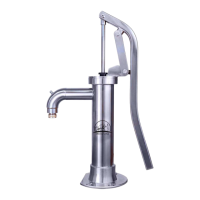
See Installation Measurement Detail to reference Bison Model 1900 Stainless Steel Pitcher Pump
measurements for a standard countertop installation. Review your countertop space above and below
where the pump is to be installed. Verify that there is proper clearance for the bottom flange (Detail A –
Item A) on the countertop and no obstructions for the anchor bolts (Detail A – Item B) and water pipe
(Detail A – Item C) underneath.
Step #2: Determine installation items needed
Tools: Drill, 3 ½” hole saw, 3/8” or 7/16” drill bit, 9/16” socket and ratchet (or wrench) and 5/32” Allen wrench.
Anchor bolts – Determine the thickness of the countertop plus ¼” for the thickness of the bottom flange
(Detail A – M1). Add at least another ½” for the nut and washer to that total. This measurement
determines the minimum length of anchor bolt that you require. If purchased, the Installation Kit
includes (4) 3/8” x 2 ½” long stainless steel carriage bolts and stainless steel washers and nuts.
Reducing Bushing – The Model 1900 comes standard with a stainless steel 2” NPT female connection.
Determine the diameter of the incoming pipe providing the water source to the pump. If your incoming
water pipe is less than 2” NPT, then a Reducing Bushing will need to be installed in the hand pump prior
to installation. Bison Pumps offers a stainless steel reducing bushing to downsize from 2” to 1 1/4” or 1”
NPT pipe (Details K & L – Items 21,22). See Detail L or “Other Accessories” at the end of this manual for
ordering information.
Ball Valves and Tees – If you are connecting into a system that has some type of electric pump then you
will likely need at least two ball valves and one tee. See Details B-1, B-2, B-3 & C for possible installation
methods. Bison Pumps recommends Brass or Stainless Steel Ball Valves to ensure that the vacuum is not
lost through a non-metal Ball Valve.
Step #3: Identify proper location, mark and drill holes
Determine the exact location you would like to place the Bison Model 1900 Stainless Steel Pitcher Pump
on the countertop. Refer to Detail D for a standard installation near a sink. Placing the pump near the
sink allows the pumped water to flow directly into the sink. Do not place the pump underneath cabinets
(or other overhead items) that could cause pumping action restrictions.
Once you have determined the exact location of the hand pump, mark a line along the entire perimeter
of the bottom flange (Detail D – Item A). From the center of the straight edge line (Detail D – Item B),
measure 2 ¾” to the center of the hole and mark the location (Detail D – M1). Drill a clearance hole at
Model 1900 Owner's Manual Rev C