Do you have a question about the BITMAIN AntMiner S9 and is the answer not in the manual?
The AntMiner S9 is a high-performance cryptocurrency mining device, representing Bitmain's latest iteration in the AntMiner S9 series. Its primary function is to mine cryptocurrencies, specifically those that utilize the SHA-256 hashing algorithm, such as Bitcoin. The device is designed for both individual enthusiasts and larger mining operations, offering a balance of power and efficiency.
At its core, the AntMiner S9 leverages a state-of-the-art BM1387 custom-made chip, fabricated using advanced 16nm technology. This technological foundation allows the miner to achieve high hash rates, which is crucial for competitive cryptocurrency mining. The design emphasizes ease of setup, with all AntMiner S9 units being tested and configured by Bitmain prior to shipping. This pre-configuration aims to streamline the initial deployment process for users, allowing them to get their miners operational quickly.
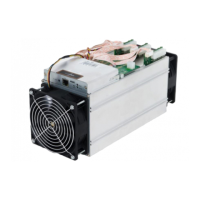
The physical structure of the AntMiner S9 comprises several key components that work in concert to facilitate its mining operations. The main body of the miner houses the hash boards, which are the core processing units containing the BM1387 chips. These hash boards are responsible for performing the complex cryptographic calculations required for mining. To manage the heat generated by these intensive operations, the device incorporates both front and rear fans, ensuring efficient cooling and maintaining optimal operating temperatures for the internal components.
A dedicated controller board manages the overall operation of the miner. This board includes several important interfaces and indicators. For power connectivity, there are multiple PCI-e connectors. Nine of these connectors are specifically for the hash boards, with each hash board requiring a set of three PCI-e connectors. It is crucial that each hash board is powered by the same power supply unit (PSU) to prevent potential damage and ensure system stability. An additional PCI-e connector is located on the controller itself, providing power to the control logic.
Network connectivity is established through an Ethernet connector, allowing the miner to communicate with mining pools and the internet. For user interaction and status reporting, the controller front panel features an IP Report pushbutton. When pressed and held for approximately five seconds, this button triggers the display of the miner's IP address on a connected computer screen, simplifying network identification. Other indicators on the front panel include an SD Card Slot, a Fault Indicator, and a Normal Operation Indicator, providing visual feedback on the miner's status. A Reset Button is also present, which can be used to restore the miner to its default settings.
Setting up the AntMiner S9 involves several steps, starting with connecting the power supply. Users must provide their own ATX power supply. Once the power cables are connected to all PCI-e connectors on both the hash boards and the controller, the network cable is connected to the ETH port. The PSUs are then connected to a power wall outlet. If multiple PSUs are used, it is important to power up the PSU connected to the controller after the other PSUs have been powered up to ensure proper sequence and avoid issues.
After physical connections are made, the miner's software configuration begins. This involves using a utility called IPReporter.zip, which is supported by Microsoft Windows. Users download and extract this file, then run IPReporter.exe as an Administrator. The utility allows users to select options for identifying the miner, such as "Shelf, Step, Position" for farm miners or "Default" for home miners. Clicking "Start" and then pressing the IP Report button on the miner's controller board will display the miner's IP address. This IP address is then entered into a web browser to access the miner's web interface.
Upon accessing the web interface, users log in using default credentials (typically "root" for both username and password). Within the "Network" section, users have the option to assign a Static IP address, if desired, and then save and apply the changes.
The core mining configuration takes place in the "Miner Configuration" section, specifically under "General Settings." Here, users define the mining pools by entering their URLs. The AntMiner S9 supports up to three mining pools, with a decreasing priority from pool 1 to pool 3. Lower priority pools are only utilized if higher priority pools become offline. Users also enter their worker ID and password for the selected pool.
To protect the miner from potential damage, an optional setting allows users to configure the miner to "Stop running when temperature is over 80°C." If this option is not selected, the miner will continue to operate even at temperatures exceeding 80°C. Another configurable feature is the fan speed. Users can choose to "Customize the fan speed percentage" to manually control the fan speed. It is recommended to set the fan speed above 60% to maintain the PCB temperature below 80°C and the chip temperature below 115°C. If manual control is not selected, the fan speed will automatically adjust based on the hash board temperatures.
Beyond general settings, the AntMiner S9 also allows for modification of its operating frequency. In the "Miner Configuration" section, under "Advanced Settings," users can select a frequency value. The default frequency for the AntMiner S9 varies depending on the model, corresponding to different hash rates (e.g., 550MHz for 11.85TH/s, 600MHz for 12.93TH/s, and 650MHz for 14.00TH/s). After making any configuration changes, users must click "Save & Apply" to save the settings and restart the miner.
Monitoring the miner's operational status is essential for ensuring optimal performance. This is done through the "Miner Status" section of the web interface, under "AntMiner." Here, users can view various metrics, including the number of chips detected in the chain (ASIC#), the ASIC frequency setting, the hash rate of each hash board (GH/S(RT)), and the temperatures of both the PCB (Temp(PCB)) and the chips (Temp(Chip)). The "ASIC status" provides a quick visual indication of the chips' health, using "O" for OK, "X" for error, and "-" for dead. This section also displays a summary of the miner's overall performance, including elapsed time, average hash rate, found blocks, local work, utility, and best share. Detailed information about each mining pool, such as URL, user status, difficulty, accepted shares, and rejected shares, is also available.
Maintenance features include the ability to administer the miner's firmware and settings. Users can check their current firmware version in the "System" section, under the "Overview" tab, where the "File System Version" indicates the firmware date.
Upgrading the system involves navigating to the "System" section and clicking "Upgrade." It is critical to ensure that the AntMiner S9 remains powered throughout the upgrade process, as a power failure during this time could necessitate returning the device to Bitmain for repair. To perform an upgrade, users click the "Browse" button to select the firmware upgrade file and then click "Flash image." The system will confirm if the firmware can be upgraded and proceed with the flashing process. Once the upgrade is complete, users are prompted to either "Reboot" the miner to activate the new firmware or "Go Back" to continue mining with the current firmware, with the new firmware loading upon the next restart. During the upgrade process, users can choose to "Keep settings" to retain their current configurations or clear this checkbox to reset the miner to default settings.
Another administration feature is modifying the login password. This is done in the "System" section, under the "Administration" tab. Users enter their current password, then their new password twice for confirmation, and click "Save & Apply."
For more drastic troubleshooting or a fresh start, the AntMiner S9 offers a way to restore initial settings. This involves turning on the miner and allowing it to run for five minutes. Then, on the controller front panel, the "Reset" button is pressed and held for ten seconds. Resetting the miner will reboot it and restore all its default settings. A successful reset is indicated by the red LED automatically flashing once every 15 seconds.
| Hashrate | 13.5 TH/s |
|---|---|
| Power Consumption | 1323W |
| Power Efficiency | 0.098 J/GH |
| Chip Type | BM1387 |
| Chip Quantity | 189 |
| Rated Voltage | 11.60 ~ 13.00V |
| Cooling | 2x 12038 fans |
| Operating Temperature | 0°C to 40°C |
| Network Connection | Ethernet |
| Dimensions | 350mm(L) x 135mm(W) x 158mm(H) |
| Weight | 4.2 kg |
| Noise Level | 76 dB |
| Frequency | 600MHz |
| PSU Requirement | APW3++ |