EasyManua.ls Logo

Bizerba GLM-I 100 User Manual

Bizerba GLM-I 100
50 pages
To Next Page IconTo Next Page
Page #1 background imageLoading...
Page #1 background image
7UDQVODWLRQRIRULJLQDORSHUDWLQJLQVWUXFWLRQV HQ
$OOH5HFKWHYRUEHKDOWHQ
$OOULJKWVUHVHUYHG
7RXVGURLWVUpVHUYpV
5HVHUYDGRVWRGRVORVGHUHFKRV
7XWWLLGLULWWLULVHUYDWL

%L]HUED*PE+&R.*
%DOLQJHQ
32%R[
%DOLQJHQ*HUPDQ\
7HOHSKRQH)D[
(PDLO PDUNHWLQJ#EL]HUEDFRP
,QWHUQHW KWWSZZZEL]HUEDFRP
2SHUDWLQJLQVWUXFWLRQV*/0, &RQWHQWV
HQ
&RQWHQWV 3DJH
$ERXWWKHVHLQVWUXFWLRQV
 &RQWHQWV
 6DIHNHHSLQJ
 7DUJHWJURXS
 $GGLWLRQDODSSOLFDEOHGRFXPHQWV
 6\PEROVXVHG
 +RZQRWHVDQGLQIRUPDWLRQDUHGHSLFWHG
 +RZVDIHW\ZDUQLQJVDUHGLVSOD\HG
 9LHZLQJRIPHQXFDOOXS
$ERXWWKHGHYLFH 
 2YHUDOOYLHZRIGHYLFH 
 'HYLFHW\SHV 
 ,GHQWLILFDWLRQSODWH 
 ,QWHQGHGXVH 
 1RWHVRQYHULILFDWLRQ 
 2SHUDWLQJFRQGLWLRQV 
 2QVLWHPDLQVSRZHUVXSSO\ 
 &RQQHFWLQJOLQHVWRH[WHUQDOGHYLFHV 
 :LUHOHVV/$1GHYLFHQHWZRUN 
 *XDUDQWHH 
 'LVSRVDO(QYLURQPHQWDOSURWHFWLRQ 
6DIHW\LQVWUXFWLRQV 
 5HTXLUHPHQWVLPSRVHGRQRSHUDWLQJSHUVRQQHO 
 3URWHFWLYHDQGVDIHW\GHYLFHV 
 0DLQVZLWFK 
 3ODWHVRQGHYLFH 
 6RXUFHVRIULVNUHODWHGWRWKHV\VWHP 
 $XWRPDWLFDOO\VWDUWLQJFRPSRQHQWV 
 &RQYH\RUEHOWV 
 3XVKHUWRSDFNDJHHMHFWLRQ 
 3DFNDJHHMHFWRU 
 0HWDOGHWHFWRU 
 6FDQQHUDQGFRGHFKHFNXQLW 
 0HGLFDOLQIRUPDWLRQIRUSHUVRQVZLWKDFWLYHLPSODQWV 
Question and Answer IconNeed help?

Do you have a question about the Bizerba GLM-I 100 and is the answer not in the manual?

Bizerba GLM-I 100 Specifications

General IconGeneral
Print TechnologyThermal transfer / Direct thermal
Max Print Width104 mm
ConnectivityUSB, Ethernet
Max. Label Diameter300 mm
Print Resolution300 dpi
Print Speed100 mm/s
Power Supply100 - 240 VAC, 50/60 Hz

Summary

About these instructions

1.5.2 How safety warnings are displayed

Details the signal words and meanings of safety warnings.

About the device

2.4 Intended use

Defines the proper and intended applications for the device.

2.6 Operating conditions

Details environmental and installation requirements for device operation.

Safety instructions

3.1 Requirements imposed on operating personnel

Specifies qualifications, training, and age for operators.

3.2 Protective and safety devices

Emphasizes the importance of not modifying or bypassing safety features.

3.4 Sources of risk related to the system

General overview of potential hazards during operation.

3.4.1 Automatically starting components

Hazards associated with unexpected component activation.

3.4.3 Pusher to package ejection

Specific hazards associated with the pusher mechanism.

3.4.4 Package ejector

Risks related to the package ejector component.

3.4.5 Metal detector

Hazards from metal detectors, especially for individuals with implants.

3.4.6 Scanner and code check unit

Safety precautions concerning laser beams from scanners.

3.4.7 Medical information for persons with active implants

Specific guidance for individuals with medical implants.

Equipment description

4.1 Automatic labeler

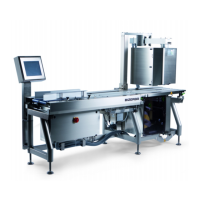
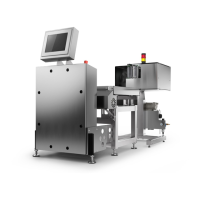
Description of the automatic labeling function and its components.

Operating elements

5.1 Keys and status display on device

Describes the device's keys and operational status LEDs.

5.4 GT-12C keys

Details the specific functions and operations of the GT-12C keypad.

5.7 Softkeys

Explains how softkeys are displayed, selected, and their various functions.

5.8 Setting user language

Procedure for changing the device's display and menu language.

5.13 Registration and management of data

Introduction to saving and managing data within the device.

5.13.1 Entering and saving text

Steps for inputting and saving text data.

5.13.2 Recording and saving numerical value

Process for entering and saving numerical inputs.

5.13.3 Data for current production or saving into database

Options for storing data for immediate use or database.

5.13.4 Recording parameter number

How to record parameter numbers for data entries.

5.13.5 Editing table

Detailed instructions on editing various types of table attributes.

5.13.6 Saving and closing table

Procedures for saving and closing edited tables.

5.14 Using text editor

Introduction to the integrated text editing functionality.

5.14.3 Selecting character size

How to choose and apply different font sizes.

5.14.4 Selecting text alignment

Options for aligning text within paragraphs.

5.14.5 Inserting further control characters

How to add special control characters for formatting.

Permission concept

6.1 Mode levels and passwords

Explains access control through mode levels and password protection.

Customer specific functions

7.3 Setting up and using Quick keyboard

Configuration and operation of the quick keyboard feature.

Preparatory work

9.1 Adjusting labeler to package height

Instructions on setting the labeler height for package accuracy.

9.10 Calibrating label light barrier

Procedure for automatically calibrating the label light barrier.

Operation

10.1 Switching on device

Detailed steps for powering on the device and initial checks.

10.2 Switching off the device

Procedures for properly shutting down the device.

10.4 Call up article

How to select and load articles for labeling into the system.

10.4.1 Calling up article via PLU number and customer number, if available

Methods for retrieving articles using PLU and customer identifiers.

10.6 Labeling

Steps to initiate and commence the labeling process.

Troubleshooting

11.1 Troubleshooting through Reset

Methods for resolving device issues by performing a reset.

11.1.1 Executing a package reset

Specific steps for performing a package reset to clear errors.

Maintenance

12.2 Safety measures

Critical safety precautions to be observed during maintenance activities.

Related product manuals