RELM Wireless Page 3
KNG MOBILE INSTALLATION GUIDE
4 HARDWARE MOUNTING
4.1 WIRING
Once the equipment location is chosen, determine the best routing for cables
and wires to connect the system. Use a rubber grommet to protect the wires
when passing through sheet metal. Avoid any route that subjects the wire to
pinching, cutting, or high heat from the engine or other vehicle components.
Avoid splicing into old or existing power lines.
The radio must be used with a 12 volt, NEGATIVE GROUND electrical system.
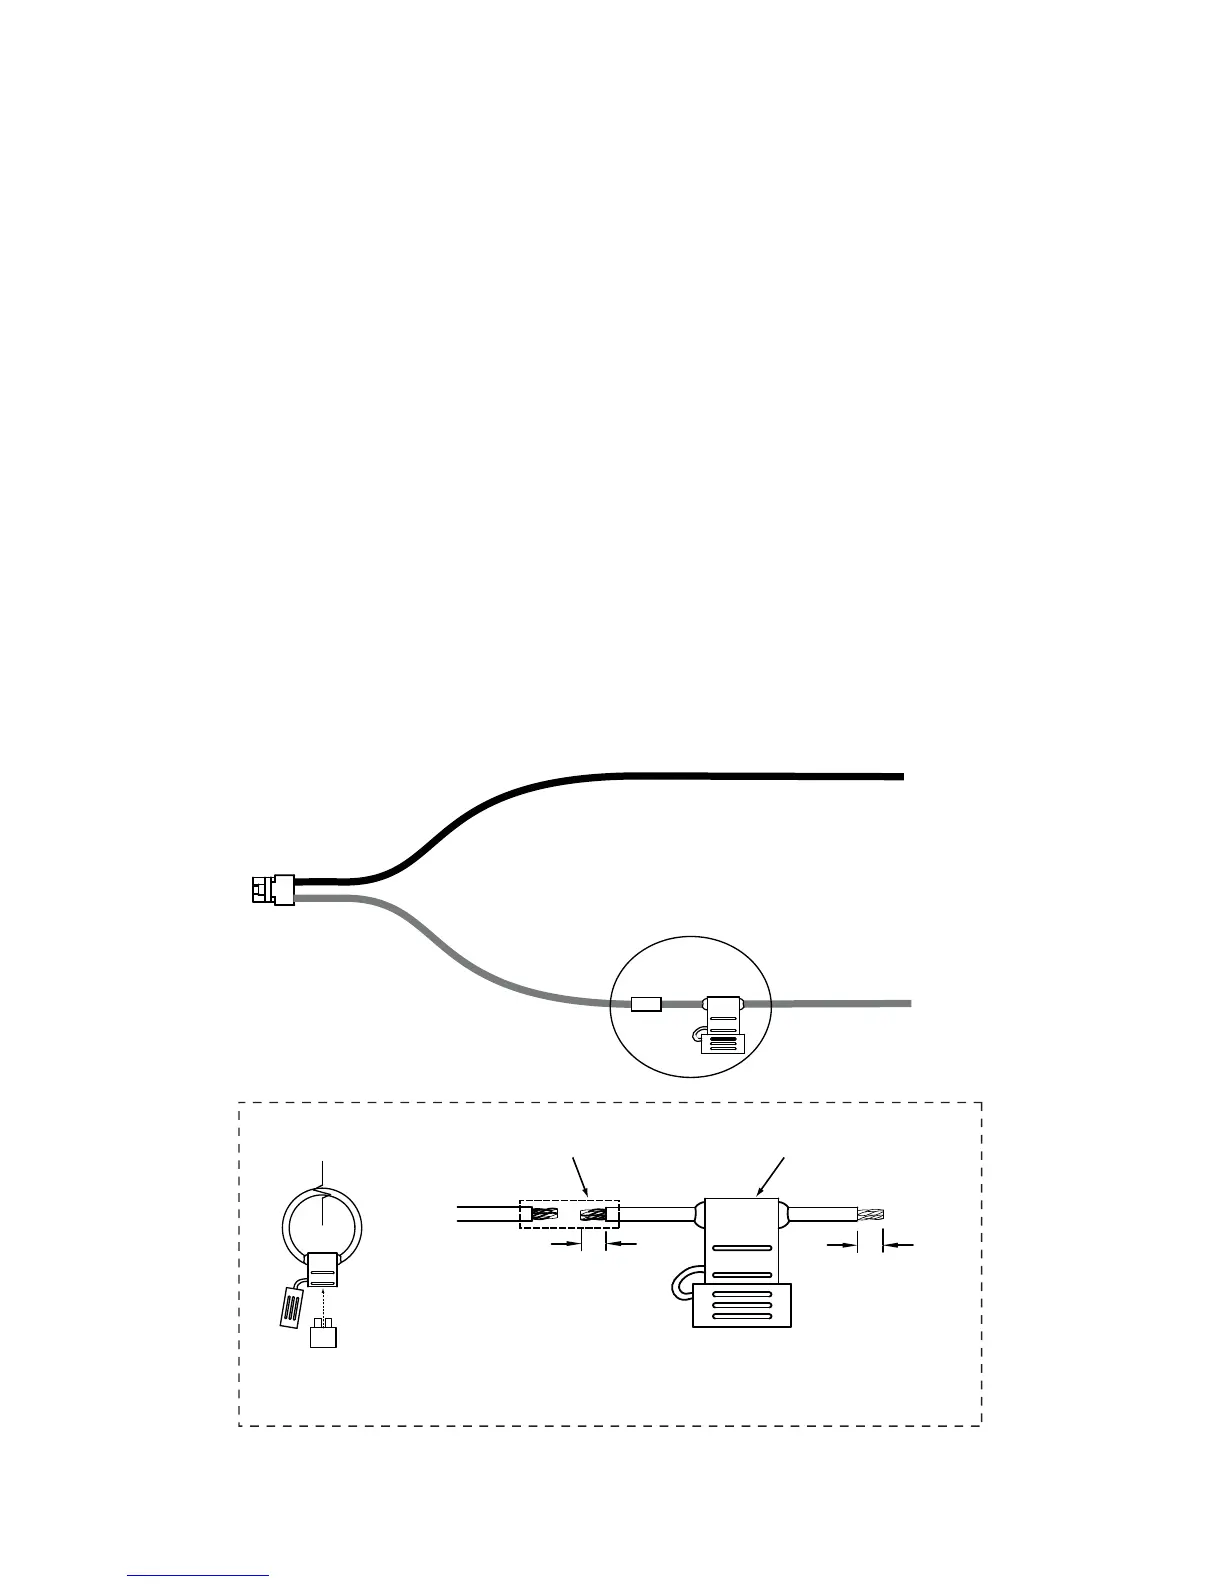
Carefully route the A+ wiring assembly from the radio connection to the 1.
battery compartment.
Using the supplied barrel crimp, attach the fuse holder (Item 4) as close to 2.
the battery as possible as shown in fi gure 1.
(NOTE: Only use 30 Amp rated fuses on the A+ line for dash mount/radio
core power cord. Only use 7 1/2 Amp rated fuse on the A+ line for remote
head power cords.)
Connect the red power lead (with fuse assembly) to the vehicles POSITIVE 3.
battery terminal. Using other positive voltage points is not recommended.
Connect the black lead to a good ground point on the chassis. Connection 4.
to the negative battery terminal is not recommended.
CUT HERE
Chasis
Ground
Vehicle
Battery
Red Wire
Black Wire
See Detail
3/4”
To Vehichle
Battery (+)
Red Wire
to Radio
1/4"
Barrel Connector (Item 7)
Fuse Holder (Item 4)
DETAIL
- Install the fuse holder (Item 4) As close to the vehicle battery as possible.
- Strip one end to 1/4” and one end to 3/4”
- Fold the 3/4” exposed wire in half and crimp to red wire of the power cable
assembly using the barrel crimp connector (Item 7)
Blade Fuse
(Item 5)
Figure 1 - Power Cable Assembly
 Loading...