6
Fig. A
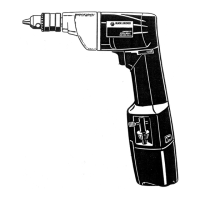
8. Charger
9. Charger receptacle
10. Charging indicator
11. End of charge indicator
Assembly
Warning! Before assembly, remove the battery from the tool.
Fitting and removing the battery (fig. B)
◆ To fit the battery (7), line it up with the receptacle on the
tool. Slide the battery into the receptacle and push until
the battery snaps into place.
◆ To remove the battery, push the release button (12) while
at the same time pulling the battery out of the receptacle.
Fitting the battery cap (fig. C)
Warning! Fit the cap (13) to the battery (7) for transportation
and storage.
Fitting and removing a drill bit or screwdriver bit (fig. D)
This tool is fitted with a keyless chuck to allow for an easy
exchange of bits.
◆ Lock the tool by setting the forward/reverse slider (2) to
the centre position.
◆ Open the chuck by turning the sleeve (14) with one hand
while holding the tool with the other.
◆ Insert the bit shaft (15) into the chuck.
◆ Firmly tighten the chuck by turning sleeve (14) with one
hand while holding the tool with the other.
This tool is supplied with a double-ended screwdriver bit in
the bit holder (6).
◆ To remove the screwdriver bit from the bit holder, lift the
bit from the recess.
◆ To store the screwdriver bit, firmly push it into the holder.
Use
Warning! Let the tool work at its own pace. Do not overload.
Charging the battery (fig. A)
The battery needs to be charged before first use and whenever
it fails to produce sufficient power on jobs that were easily done
before.
When charging the battery for the first time, or after prolonged
storage, it will only accept an 80% charge. After several charge
and discharge cycles, the battery will attain full capacity.
The battery may become warm while charging; this is normal
and does not indicate a problem.
Warning! Do not charge the battery at ambient temperatures
below 4 °C or above 40 °C. Recommended charging
temperature: approx. 24 °C.
Using the 3 hr charger
◆ To charge the battery (7), remove it from the tool and slide
the charger receptacle (9) onto the battery.
◆ Plug in the charger (8).
The battery will become warm while charging. After approx.
3 hours of charging, the battery will be sufficiently charged for
use in regular applications. After approx. 6 hours of charging,
the battery will be fully charged.
◆ Remove the charger receptacle from the battery.
Using the 1hr charger
◆ To charge the battery (7), remove it from the tool and
insert it into the charger (8). The battery will only fit into
the charger in one way. Do not force. Be sure that the
battery is fully seated in the charger.
◆ Plug in the charger.
◆ Check if the red charging indicator (10) lights up. If the
green end of charge indicator (11) lights up now instead,
the battery is too hot and cannot be charged. If this
happens, remove the battery from the charger, let the
battery cool down for approx. 1 hour and re-insert it.
After approx. 1 hour of charging, the red charging indicator (10)
will stop lighting and the green end of charge indicator (11) will
light up. The battery is now fully charged.
◆ Remove the battery from the charger.
Selecting the direction of rotation (fig. E)
For drilling and for tightening screws, use forward (clockwise)
rotation. For loosening screws or removing a jammed drill bit,
use reverse (counterclockwise) rotation.
◆ To select forward rotation, push the forward/reverse
slider (2) to the left.
◆ To select reverse rotation, push the forward/reverse slider
to the right.
◆ To lock the tool, set the forward/reverse slider into the
centre position.
Selecting the operating mode or torque (fig. F)
This tool is fitted with a collar to select the operating mode
and to set the torque for tightening screws. Large screws and
hard workpiece materials require a higher torque setting than
small screws and soft workpiece materials.
The collar has a wide range of settings to suit your
application.
◆ For drilling in wood, metal and plastics, set the collar (4)
to the drilling position by aligning the symbol /drillsymb/
with the marking (17).
◆ For screwdriving, set the collar to the desired setting. If
you do not yet know the appropriate setting, proceed as
follows:
◆ Set the collar (4) to the lowest torque setting.
◆ Tighten the first screw.
 Loading...