6
ENGLISH
(Original instructions)
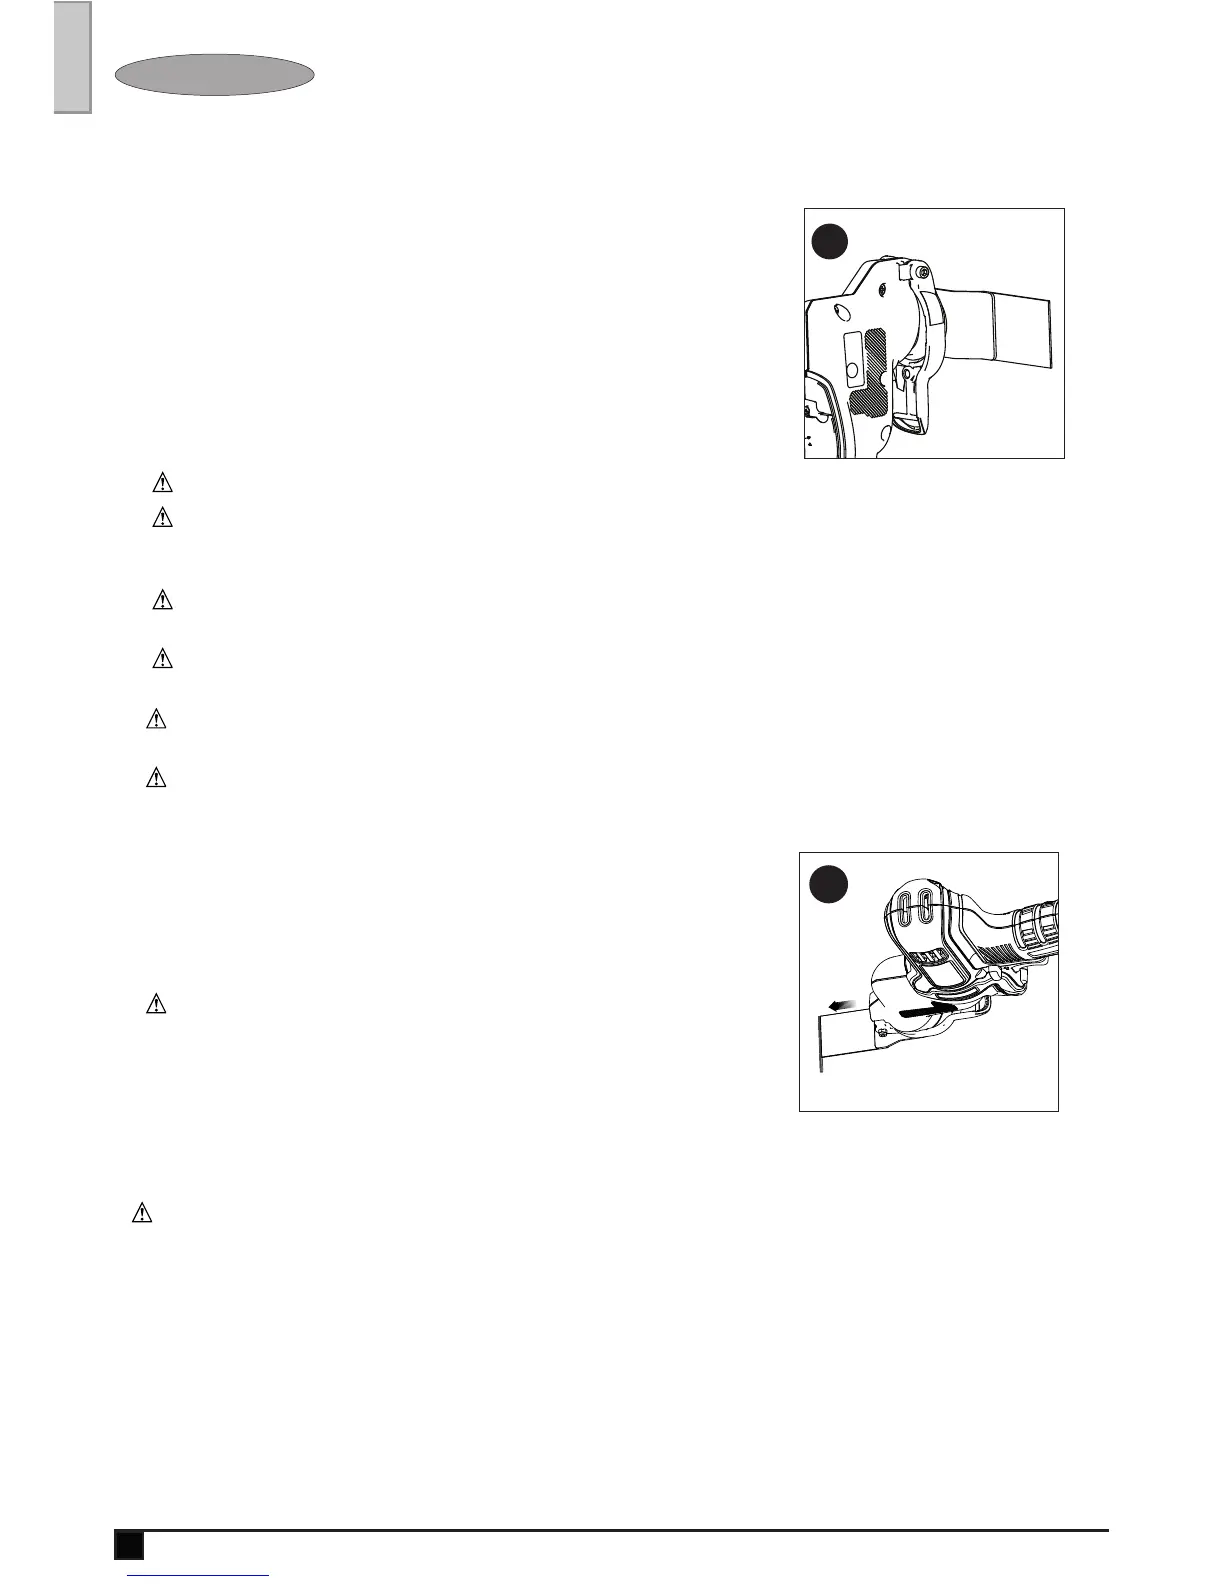
INSTALLING/REMOVING ACCESSORIES
This tool features a tool-free accessory changing system. This allows
for faster accessory changes without the need for wrenches or hex
keys like other oscillating tool systems.
•Graspthetoolandsqueezetheaccessoryclampingleveras
shown in figure A.
• Cleananyresidualdebrisfromthetoolshaftandtheaccessoryholder.
•Slidetheaccessoryintotheaccessoryholdermakingsurethe
accessory engages all eight pins on the holder and is flush with the
surface of the holder.
•Releasetheaccessoryclamplever.
• Someaccessories,suchasscrapersandbladescanbemountedat
an angle if required as shown in figure B.
PLUNGE CUTTING - fIGURE C
wARNING:
Hold saw firmly with both hands for all cutting operations.
wARNING:
Inspect work area for hidden electrical wiring, gas pipes or water pipes before
making blind or plunge cuts. Failure to do so may result in electrical shock, fire, explosion, or
property damage.
wARNING:
ALWAYS use safety glasses. Everyday eyeglasses are NOT safety glasses. Also use
face or dust mask if cutting operation is dusty. ALWAYS WEAR CERTIFIED SAFETY EQUIPMENT.
wARNING:
CUT HAZARD. Before cutting any type of material, be sure it is firmly anchored
or clamped to prevent slipping.
B
wARNING:
CUT HAZARD. Let the tool work at its own pace. Do not overload, blade
breakage may occur.
wARNING:
CUT HAZARD. This tool has no provision to lock the switch in the ON position,
and should never be locked in the ON position by any other means.
To make a cut:
•Clearlymarkthedesiredcuttingarea.
•Toswitchthetoolon,pullthevariablespeedtriggeronthepower
unit. The tool speed depends on how far you pull the trigger.
•Switchthetoolonbeforeapplyingpressureandslowlyfeedthe
plunge cut blade into the workpiece at the marked location.
wARNING:
CUT HAZARD. Ensure the blade is not in contact
with cutting surface before starting saw.
•Advancethebladealongthecuttinglineuntilcutiscompleted.
Don’t force the tool; let the blade cut at its own speed.
•Toswitchthetooloff,releasethetrigger.
NOTE: Always use the appropriate type of saw blade for the work piece material and type of cut.
Cut only with sharp blades; they cut cleaner, faster and put less strain on the motor while cutting.
C
SANDING
wARNING:
fire hazard. When working on metal surfaces, do not use a vacuum cleaner
because sparks are generated. Wear safety glasses and a dustmask. Due to the danger of fire, do not
use your sander to sand magnesium surfaces. Do not use for wet sanding.
• Toswitchthetoolon,pullthevariablespeedtriggeronthepowerunit.Thetoolspeeddependson
how far you pull the trigger.
• Toswitchthetooloff,releasethetrigger.
NOTE: Do not rest fingers on platen during use. Move it in long sweeping strokes across the
surface, letting it do the work. Light pressure is all that is required for sanding. Excessive pressure
will slow the tool and produce inferior results. Check your work often, product is capable of removing
material rapidly. Excessive force will reduce the working efficiency and cause motor overload.
Replacing the sanding sheet regularly will maintain optimum working efficiency.
NOTE: Always ensure the workpiece is firmly held or clamped to prevent movement. Any movement
of the material may affect the quality of the sanding finish.
 Loading...