EasyManua.ls Logo

Black & Decker Spacemaker SCM1000BD User Manual

Black & Decker Spacemaker SCM1000BD
16 pages
To Next Page IconTo Next Page
To Previous Page IconTo Previous Page
Page #13 background image
13
CARE AND CLEANING
CLEANING:
Follow the directions below to clean your coffeemaker after each use.
1. Make sure your coffeemaker is unplugged and cool.
2. Open your coffeemaker’s filter basket lid and remove the brew basket.
3. If remaining, throw away the used paper filter and coffee grounds.
4. Wash the brew basket and carafe by hand in warm, soapy water or on
the top rack of your dishwasher (ensure carafe is applicable below).
5. Wipe the outside of the coffeemaker, power cord and carafe plate with a
soft, damp cloth.
6. To clean the inside of the filter basket lid, open the filter basket lid and
wipe any surfaces with a damp cloth.
Note: Do not use abrasive cleansers or scouring pads on this product.
Never immerse the coffeemaker in water.
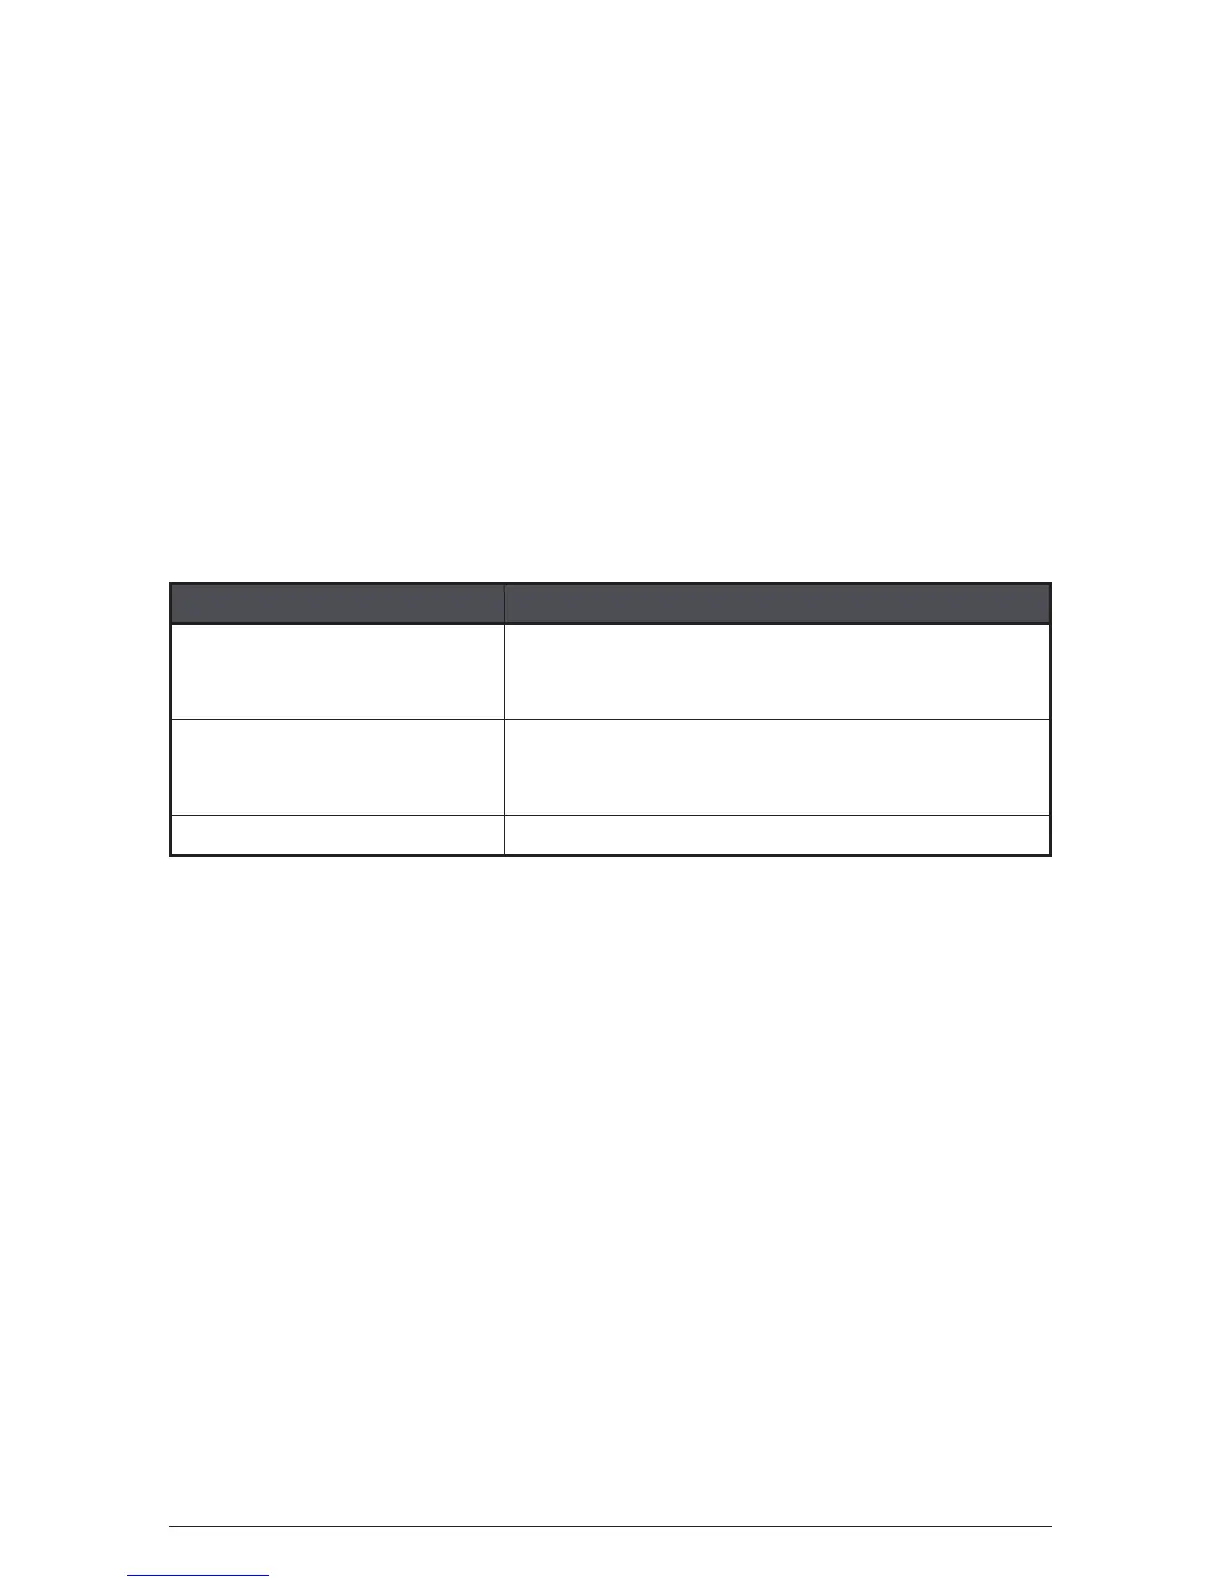
COFFEEMAKER PART CLEANING INSTRUCTIONS
Housing
Carafe Plate
Power Cord
Wipe with a soft, damp cloth.
Carafe Lid
Brew Basket
Glass Carafes
Wash by hand in warm soapy water,
or in the dishwasher (top rack only).
Thermal Carafes Wash by hand in warm soapy water
DESCALING WITH VINEGAR:
To remove mineral build up that can affect the taste and quality of your
coffee, descaling your coffeemaker with vinegar every 3 to 6 months is
recommended. To descale, follow the instructions below:
1. Open the filter basket lid and fill the water reservoir approximately half
way with white vinegar. Fill the remaining half of the water reservoir
with cool water.
2. Place a paper filter into the brew basket, close the lid and check to
ensure the empty carafe is placed on the carafe plate.
3. Push the POWER button to start the brewing cycle.
4. After approximately half the cleaning mixture has brewed into the
carafe, press the POWER button again to turn OFF the unit.
5. Let soak for a minimum of 15 minutes and then press POWER again to
turn the coffeemaker on.
6. Brew the remaining cleaning mixture into the carafe.
7. Following ‘Cleaning’ instructions from above.
8. Run a full brew cycle using only water. You may want to repeat this step
more than once.
9. Wash the brew basket and carafe as instructed above.

Questions and Answers:

Black & Decker Spacemaker SCM1000BD Specifications

General IconGeneral
BrandBlack & Decker
ModelSpacemaker SCM1000BD
CategoryCoffee Maker
LanguageEnglish

Summary

Important Safeguards

General Safety Precautions

Essential safety guidelines for operating the appliance to prevent fire, electric shock, and injury.

Safety Features Overview

Details on product safety features like the grounded plug, tamper-resistant screw, and electrical cord.

Getting to Know Your Coffeemaker

Mounting Your Coffeemaker

Installing Your SpaceMaker

Installation Getting Started

Initial steps for unpacking, registering, and preparing the coffeemaker for installation.

Choosing an Installation Location

Advice on selecting the optimal and safe location for mounting the appliance.

Determining Cabinet Type for Installation

Guidance on identifying suitable cabinet types for under-cabinet mounting.

Standard Installation for Flat Cabinets

Detailed procedure for mounting the coffeemaker on flat bottom cabinets.

Programming Your Coffeemaker

Setting the Digital Clock

Steps to set the current time on the coffeemaker's digital display.

Setting the Auto Brew Delay

How to program the coffeemaker for automatic brewing at a specified time.

Activating Auto Brew Delay

Instructions on how to enable and use the programmed auto brew function.

Using the 1-4 Cup Setting

Information on optimizing brewing for smaller quantities of coffee.

Before Brewing

Brewing Coffee

Care and Cleaning

Routine Cleaning Procedures

Step-by-step instructions for cleaning coffeemaker parts after each use.

Descaling With Vinegar

Method for removing mineral buildup to maintain coffee taste and quality.

Troubleshooting Common Issues

Need Help and Warranty Information

Two-Year Limited Warranty Details

Overview of warranty coverage, period, exclusions, and how to get support.

Related product manuals