Do you have a question about the Black & Decker VPX1301 and is the answer not in the manual?
Read all warnings to prevent electric shock, fire, and injury. Save instructions for future reference.
Keep work area clean and well lit. Avoid explosive atmospheres. Keep children and bystanders away.
Match plugs to outlets, avoid body contact with grounded surfaces, do not expose to rain or wet conditions.
Stay alert, use PPE, prevent unintentional starting, do not overreach, dress properly.
Use correct tool for application, do not force. Disconnect power before adjustments. Store properly.
Hold tool by insulated grips. Secure workpiece with clamps. Keep hands from cutting area.
Keep blades sharp. Be aware of hot blades and hidden wiring/pipes.
Wear dust mask. Supervise children. Protect bystanders from dust.
Declared vibration values measured per EN 60745. Actual use may differ.
Tool is double insulated. Check power supply matches voltage. Replace damaged cords.
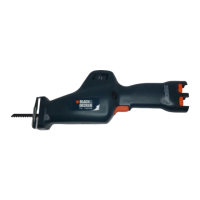
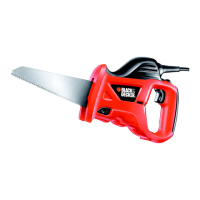
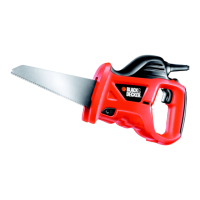
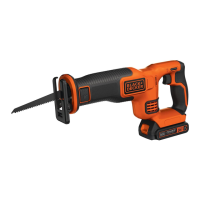
Lists lock-off switch, trigger switch, blade clamp lever, shoe, and blade.
Insert battery pack into compartment until it clicks. Ensure correct orientation.
Press release button and pull battery pack out of compartment.
Charge between 10-40°C. Indicator light shows status. Charge time 5-6 hours.
Indicator light shows charging status. Fast flashing indicates a problem.
Connect up to 4 chargers in series using power-in/out cords.
Slide lock-off button to back, pull trigger switch. Release trigger to turn off.
Push clamp lever, insert blade, release lever. Blades may be hot after use.
Let blade run freely, apply gentle pressure, keep shoe against workpiece for control.
Use caution cutting overhead. Anticipate falling branches and debris.
Use suitable blades. Clamp thin sheet metal with scrap wood. Use oil. Cut piping circumference.
Mark cut, fit pocket blade, rest shoe at angle, feed blade slowly into workpiece.
Do not use on unstable surfaces. Cut downward and away from body, close to branch.
Clean ventilation slots and motor housing. Avoid abrasives/solvents. Never immerse tool in liquid.
Replace plug safely. Connect brown to live, blue to neutral. No earth connection.
Do not dispose of with household waste. Make available for separate collection. Recycle batteries.
Lists voltage, speed, stroke length, power source, blade clamp, application.
Declares conformity to 98/37/EC, EN 60745, EN55014, EN61000. Lists sound and vibration values.
24-month guarantee for defects in materials/workmanship. Exclusions apply.
| Brand | Black & Decker |
|---|---|
| Model | VPX1301 |
| Category | Saw |
| Language | English |