8 BLACKRIDGE 2.5HP AIR COMPRESSOR BLACKRIDGE 2.5HP AIR COMPRESSOR 9
To drain oil
1. Loosen and remove the drain bolt and drain oil into a funnel / bottle and
dispose of in an appropriate manner.
2. Once drained, replace and tighten the drain bolt.
3. Wipe up any oil spills.
4. Fill up to the top red dot on the sight glass with fresh clean oil.
NOTE: Use oil type SAE30.
PIC. 12
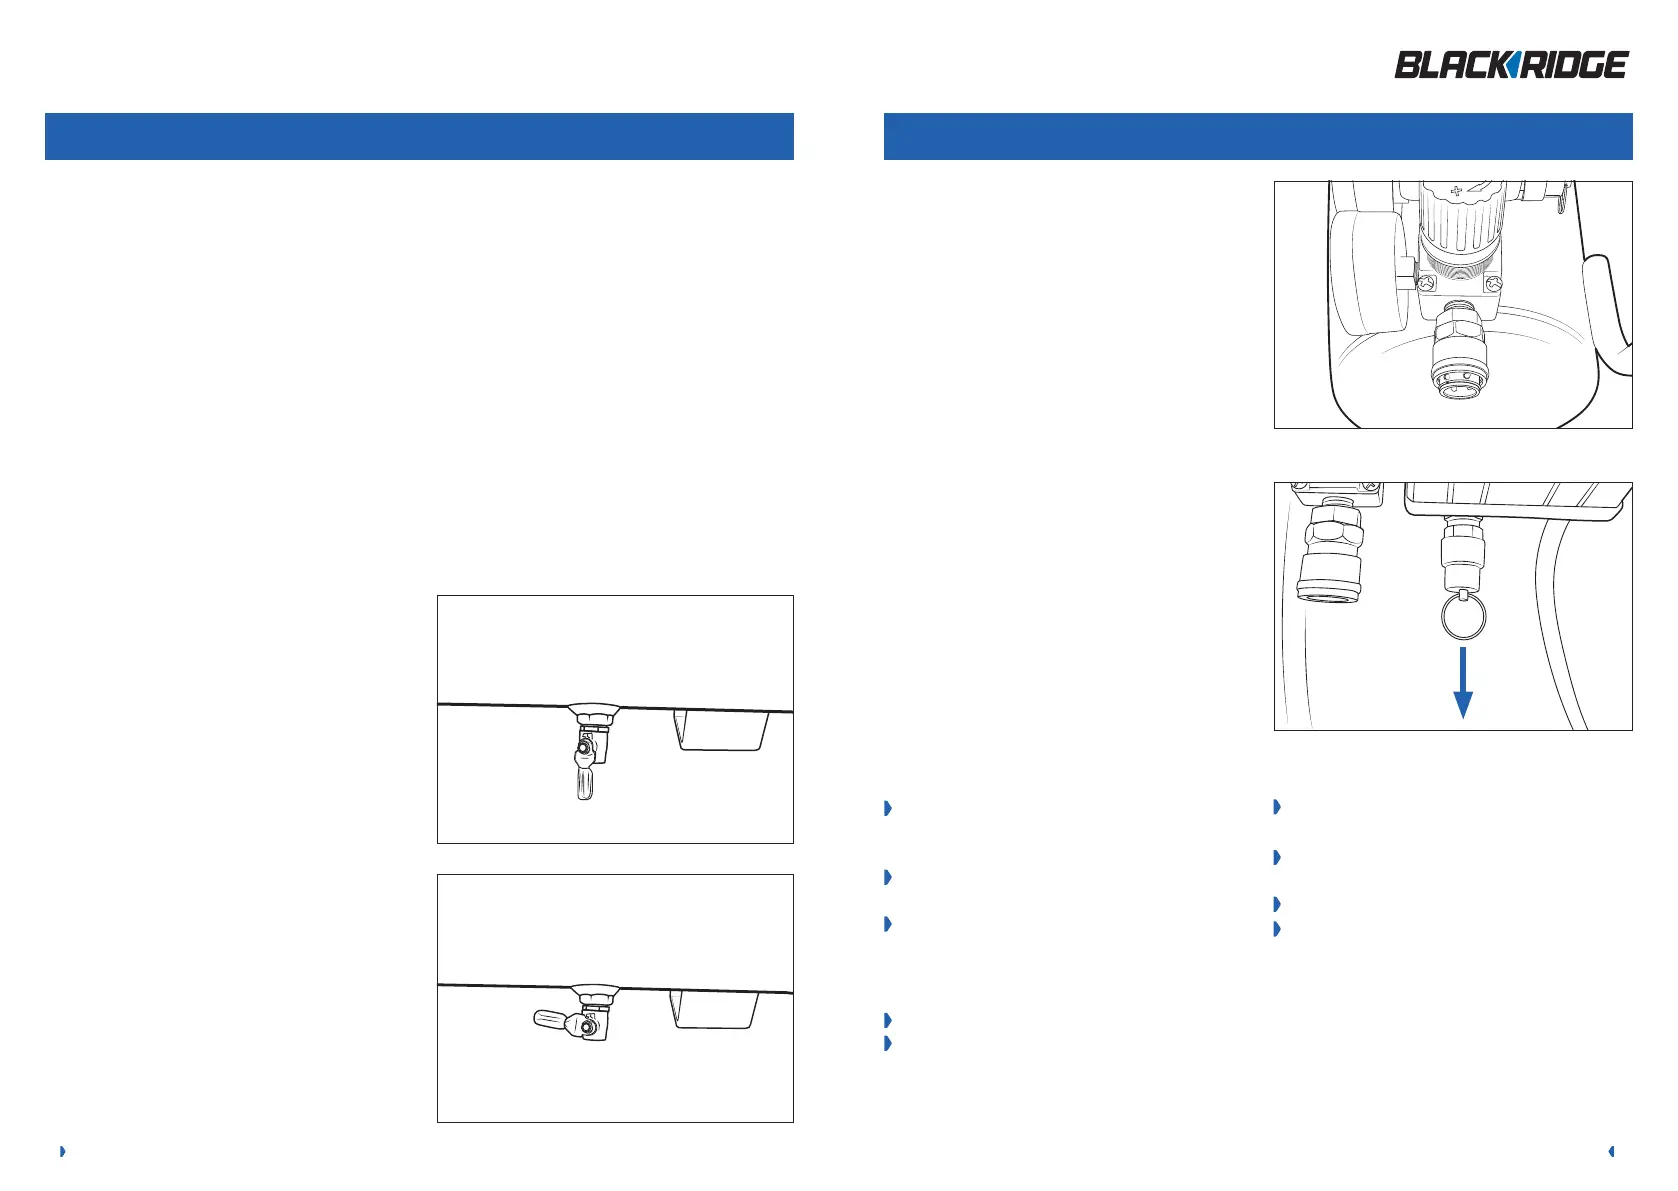
Drain tap
After use, slowly open the drain tap to drain excess air and any
moisture. The excess air will also help purge the moisture. Leave
the drain tap open when air compressor is not in use, so any
moisture can continue to drain.
To open the drain tap pull the lever down to vertical. Pic. 12.
To seal the drain tap push the lever up to horizontal. Pic. 13.
NOTE: Remember to seal the drain tap before starting the
air compressor.
5. MAINTENANCE
PIC. 13
Daily: before use After use After every 50 hours of use
1. Check the oil level. 1. Disconnect from main power. 1. Replace the air filter.
2. Seal the tank drain
tap.
2. Open the tank drain
tap.
2. Drain oil completely and replace
with fresh oil.
3. Check safety valve operation. 3. Wipe down the air compressor.
4. Store safely and securely.
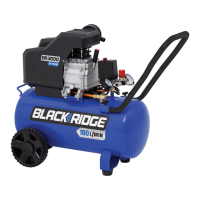
Air fitting outlet
This air compressor is fitted with a ‘Nitto style’ (female) socket.
1. Slide the outer collar backwards.
2. Push in the ‘Nitto style’ male plug (not included).
3. Release the collar.
4. Fully and completely push the ‘Nitto style’ male plug
(not included) into the ‘Nitto style’ female socket
until it clicks and outer collar moves forward.
Note: This air compressor has a maximum pressure of 8
bar. Always regulate the air pressure to match your air tool.
Different air tools require different operating pressures. Always
check with the tool manufacturer if unsure.
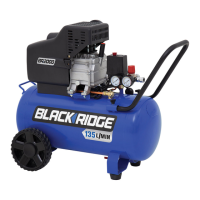
Safety valve
NOTE: When checking the safety valve ALWAYS wear safety
glasses.
To check the operation of the safety valve the air tank will need
to be full. Gently pull the ring outwards. This should release air
under pressure. Release the ring and this should stop the air
out flow immediately, once pressure decreases, Pic. 15.
If the safety valve does NOT work in this manner, STOP the air
compressor immediately and have the air compressor checked
/ serviced by an authorised service facility.
PIC. 14PIC. 14
PIC. 15PIC. 15
PIC. 14
PIC. 15
TROUBLESHOOTING
If your air compressor does not start
Check that you have plugged the power lead into a
standard 240V 10Amp power point and turned the
switch ON.
Check that you have turned on the air compressor
by lifting the ON/OFF button UP.
The air tank may be full. Use your air tool and the
air compressor should start when the pressure
decreases to 85PSI.
If your air compressor does not build up pressure
Check that the tank drain tap is sealed.
Air filter could dirty or blocked, replace air filter.
If these tips do not work please have your unit
checked by an authorised service centre.
Call SMART MARKETING GROUP PTY. LTD.
for your closest centre:
AUSTRALIA: 1300 660 457
NEW ZEALAND: 0800 474 876
If your air compressor smells like burnt oil
Check the oil level as it may be low.
If your air compressor does not hold pressure
Check your hose and tool for leaks and
fix as appropriate.
Check that drain valve is sealed.
Check Nitto style fitting with soapy water mix and if
bubbles then call Smart Marketing Group for options.
OPEN
CLOSED
PULL TO CHECK
 Loading...