BLACKSTONEPRODUCTS.COM/SUPPORT
ENGLISH
| OWNER’S MANUALASSEMBLY GUIDE
Make sure the front pins are
seated in the holes, then push
the griddle top back.
❶❶
Place the two front pins into
the front locking holes and push
the griddle top back.
❷❷
Then, set the two rear pins
into the rear holes.
❶❶
Place the two front pins into
the front locking holes and push
the griddle top back.
❷❷
Then, set the two rear pins
into the rear holes.
Make sure the front pins are
seated in the holes, then push
the griddle top back.
Make sure the front pins are fully
seated in the holes, then push
the griddle top forward to lock
the griddle in place.
Make sure the front pins are fully
seated in the holes, then push
the griddle top forward to lock
the griddle in place.
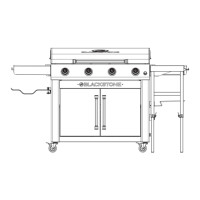
MODELS:
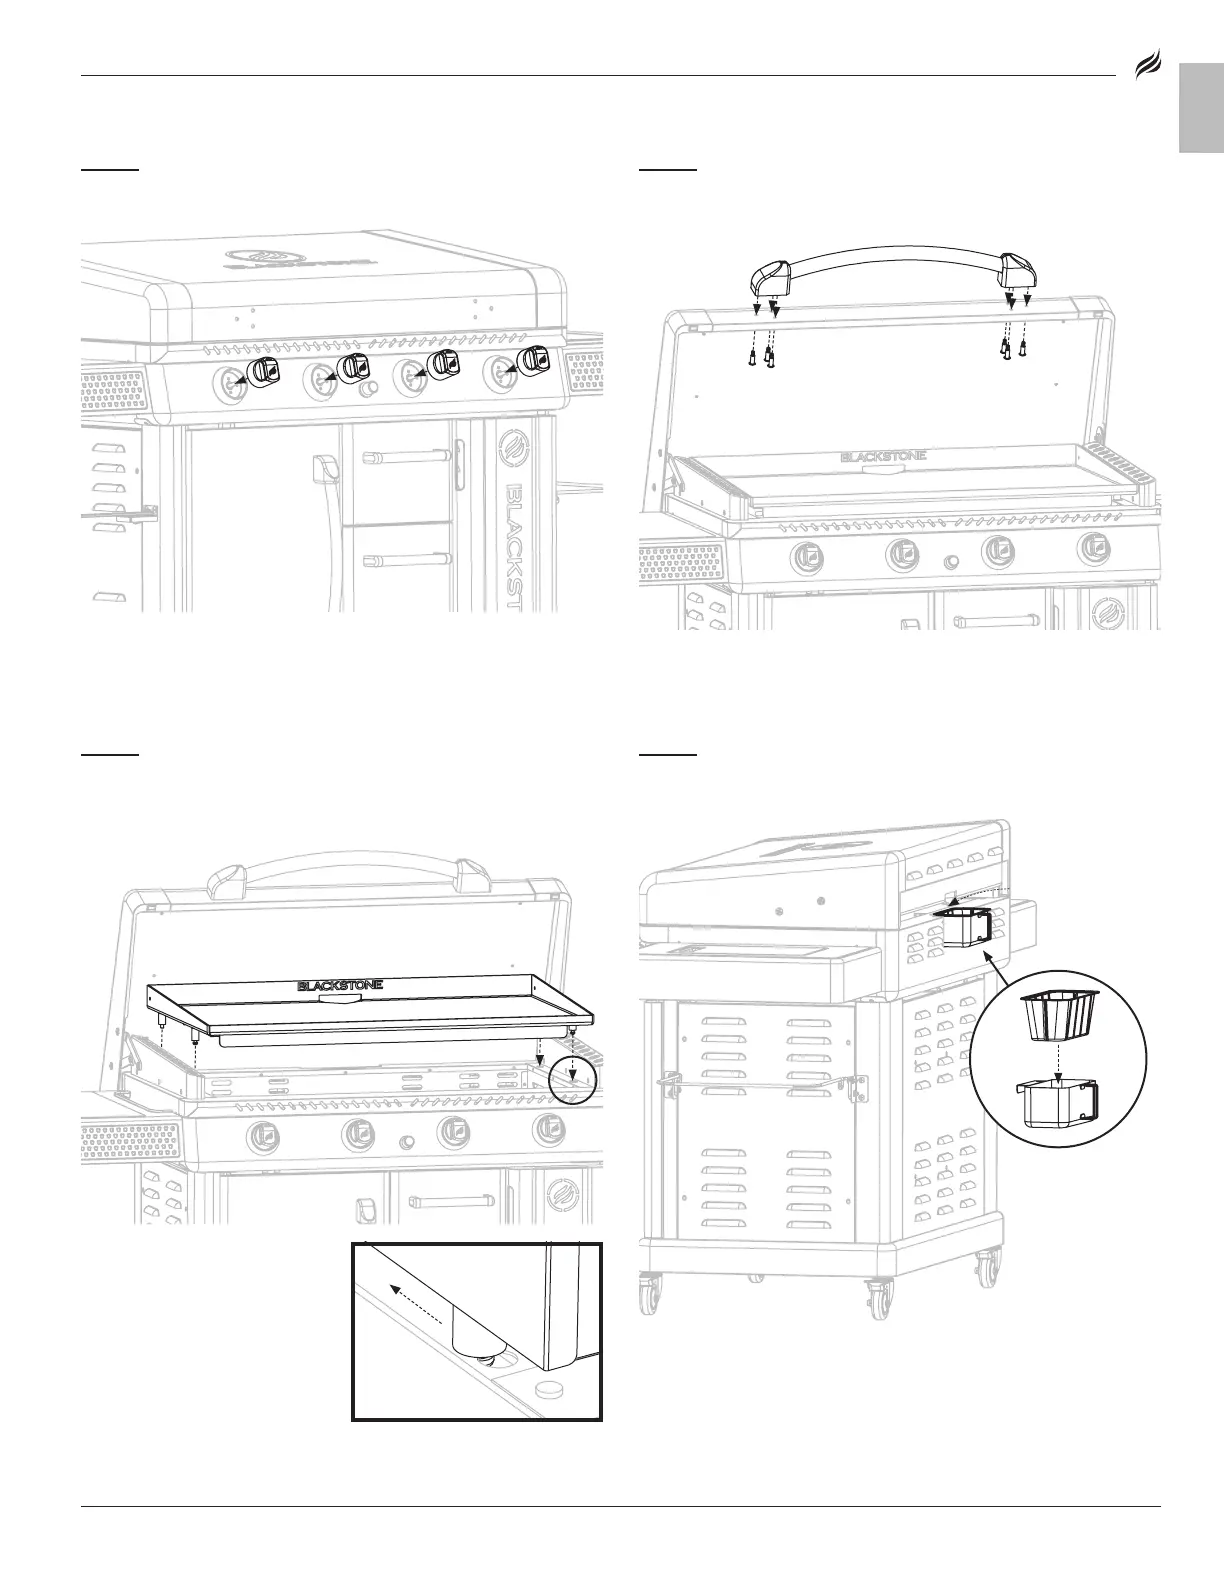
STEP 30
Install the four (4) control knobs by pushing them into place
in the OFF position.
STEP 31
Insert the hood handle into the two (2) handle standos.
Use six (6) large M6 step bolts [f.] to attach the handle to the
griddle hood.
STEP 32
Open the hood. With the help of another person, place
the griddle top on the main body by aligning the four (4) pins to the
holes of the body.
STEP 33
Hang the rear grease cup with grease cup liner on the back
of the unit.