ENGLISH
BLACKSTONEPRODUCTS.COM/SUPPORT
OWNER’S MANUAL | ASSEMBLY GUIDE
ASSEMBLY INSTRUCTIONS
Find a large, clean area to assemble your appliance.
Remove all packing material before assembling.
CAUTION
Sharp edges. Wear gloves while assembling.
NOT INCLUDED (OPTIONAL):
Two (2) D batteries
ELECTRIC REQUIREMENTS:
120V 60Hz
MODEL:
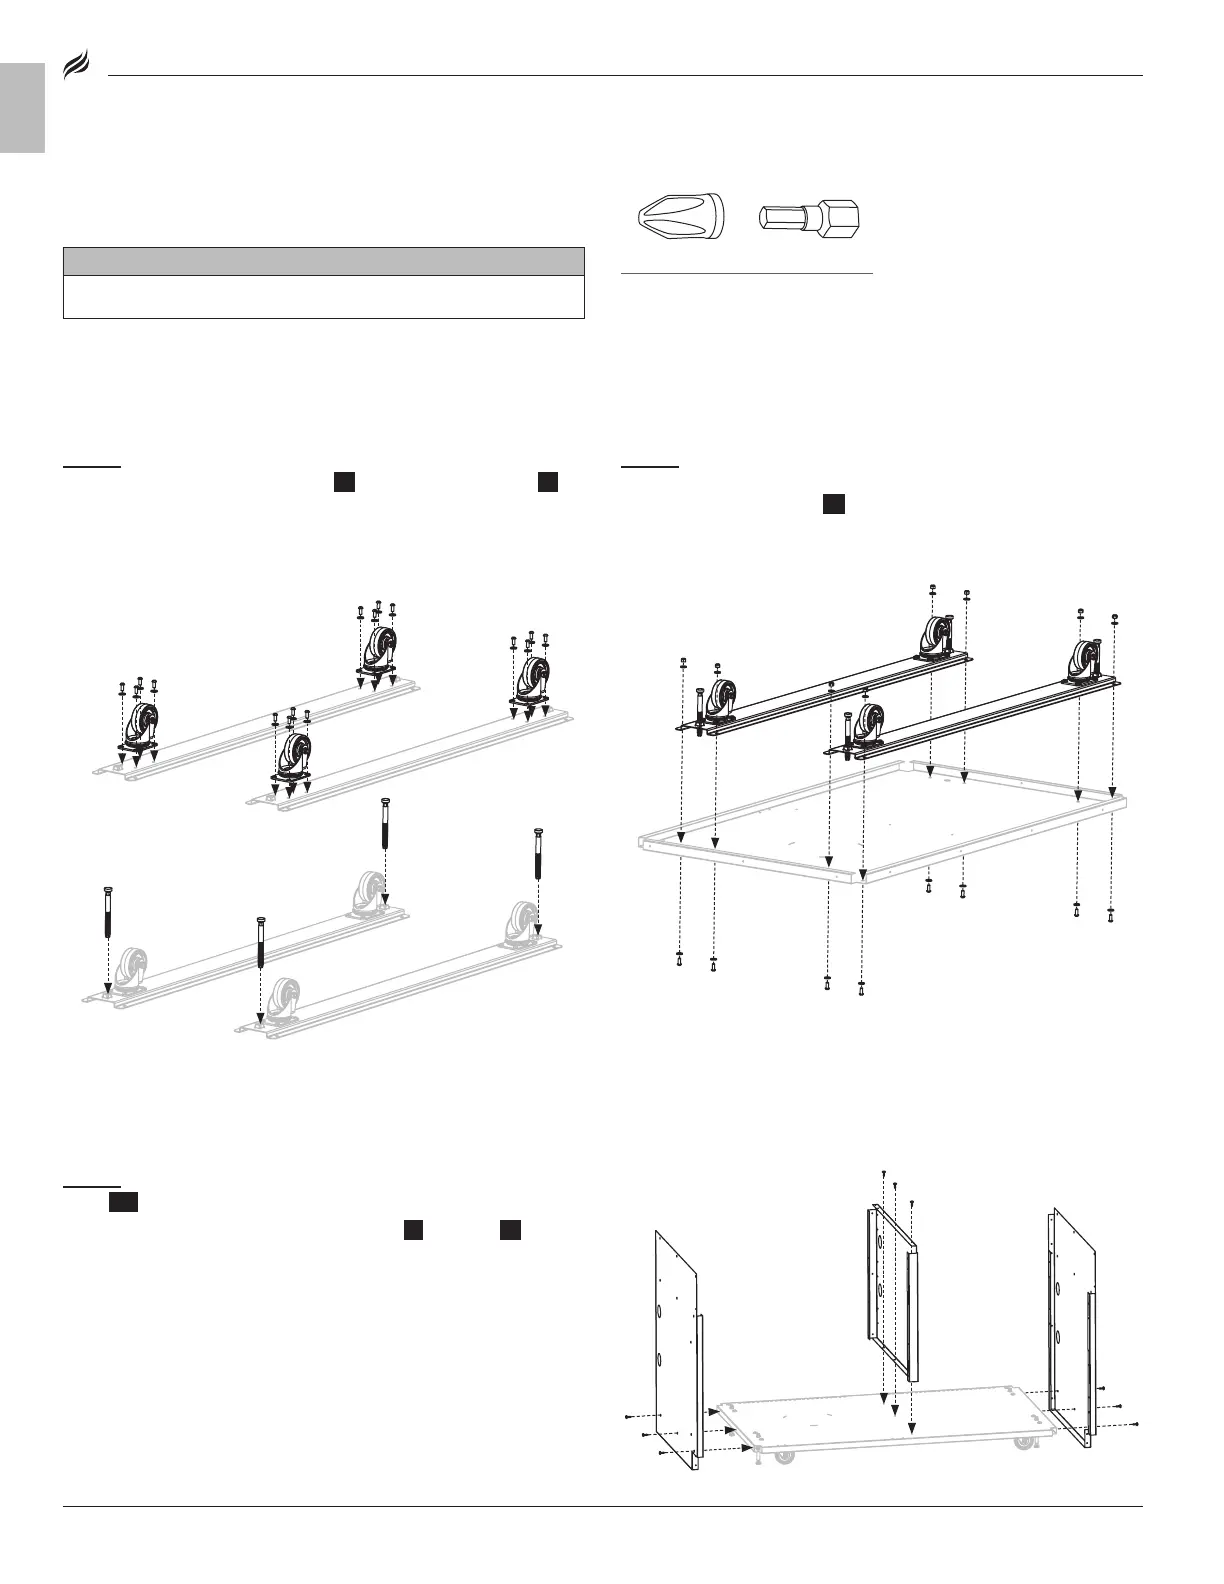
STEP 01
Use sixteen (16) zinc bolts [i.] and sixteen (16) zinc washers
[g.] to attach four (4) caster wheels {6} to two (2) caster plates {7}.
Screw four (4) leveling feet [a.] into the caster plates so that they
extend above the wheels.
STEP 02
Use eight (8) zinc bolts [i.], sixteen (16) zinc washers [g.],
and eight (8) zinc lock nuts [h.] to attach the caster plates to the
underside of the cart base {4}.
TOOLS NEEDED:
Phillips driver, H4 Hex driver &
Impact driver
STEP 03
Use three (3) large screws [e.] to attach the center cabinet
panel {24} to the cart base.
Use six (6) large screws [e.] to attach the left {1} and right {2} cabinet
panels to the cart base.
[g.] × 16
[i.] × 16
[e.] × 15
[g.] × 16
[h.] × 8