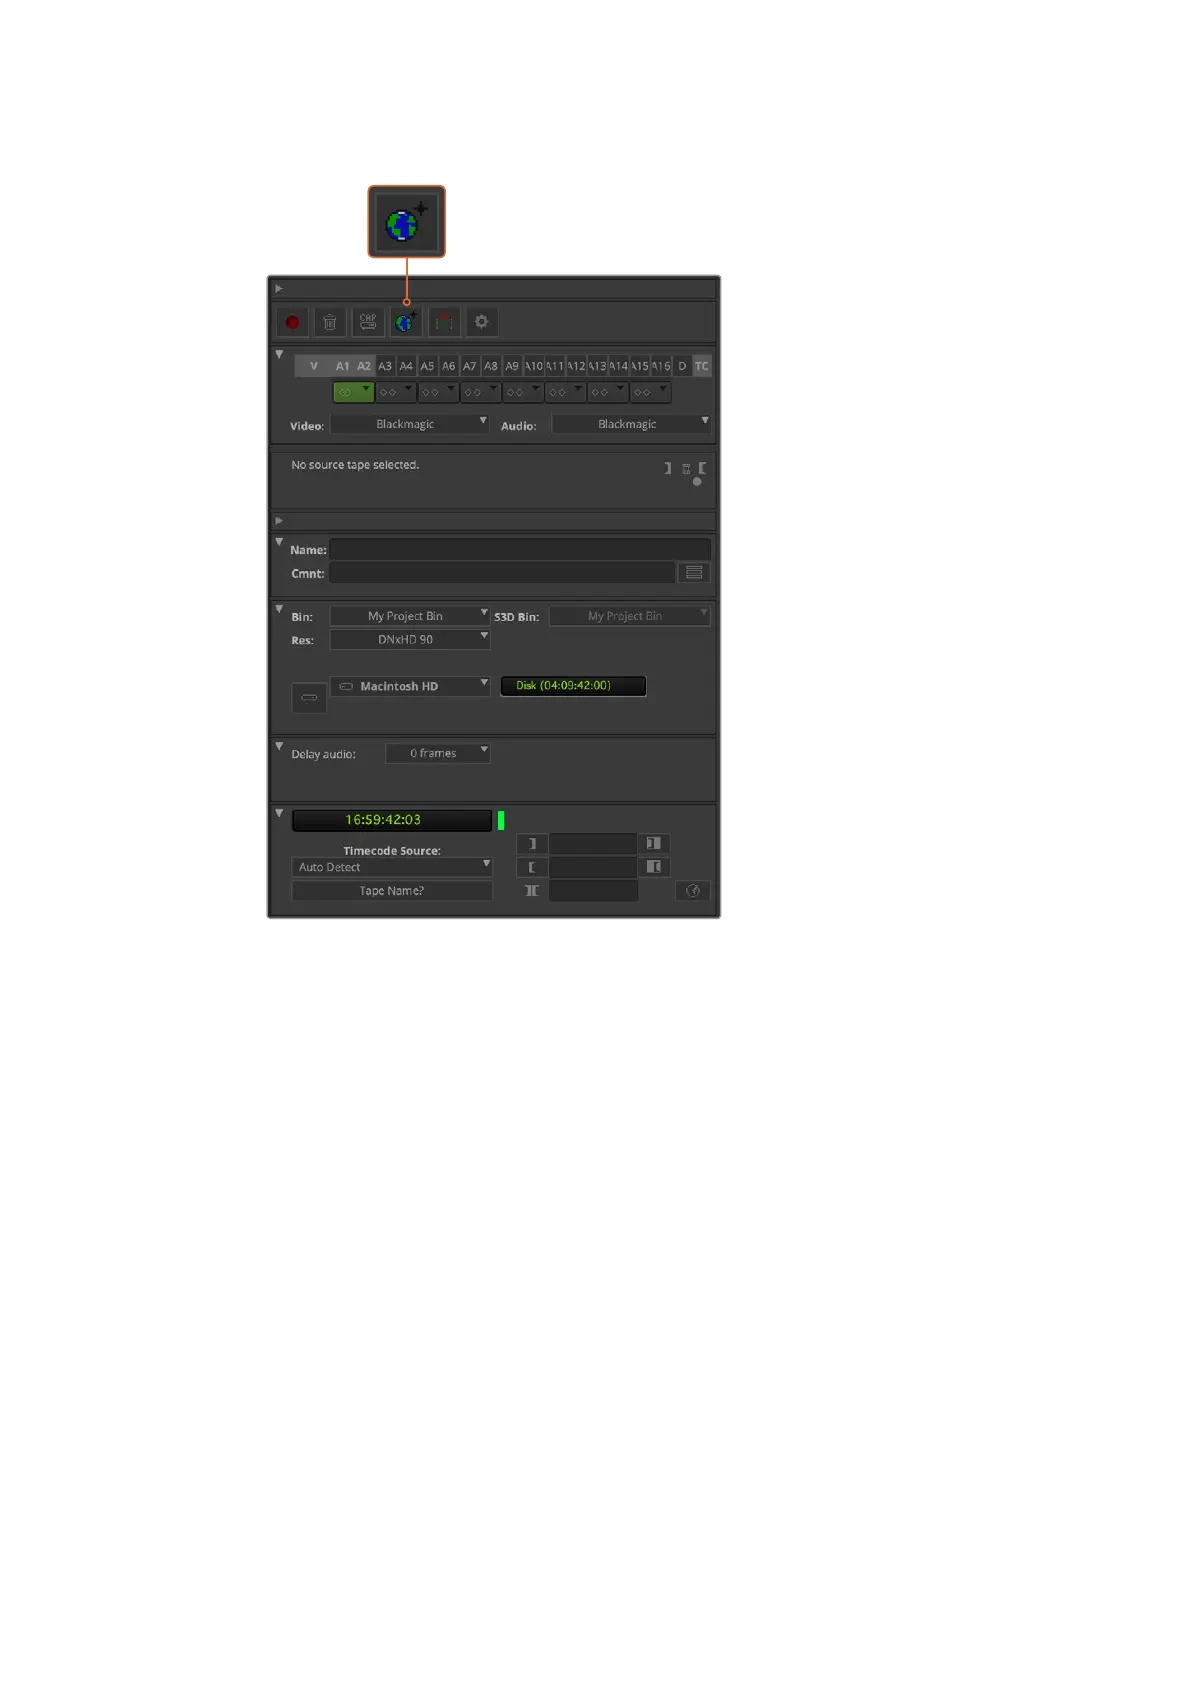
Set up the ‘capture tool’ to capture video without deck
control by clicking the ‘toggle source’ button.
3 Select the video and audio source tracks you wish to capture. These are labeled
‘V’and ‘A1’, ‘A2’, etc. Using the dropdown menus below, select Blackmagic for both
video and audio.
4 Use the ‘bin’ menu to select a target bin from the list of open bins.
5 From the resolution menu labeled ‘res’, choose which codec you wish to use for your
captured clips. In this example, select DNxHD175x for 10-bit HD video.
6 Select the disk storage for your captured video and audio. Use the ‘single/dual drive
mode’ button to choose if video and audio will be stored together on a single drive
or on separate drives. Select the drives for your captured media from the ‘target
drives’ menu.
7 Click the ‘tape name?’ button at the bottom of the window to open the ‘select tape’
dialog box. Add a tape name, or select from the list if you’ve used the tape before.
8 Ensure your video and audio source is ready or playing and then click the ‘capture’
button. The capture button will flash red while recording. Click the capture button
again to end the capture.
46Using your Favorite 3rd Party Software
 Loading...