5
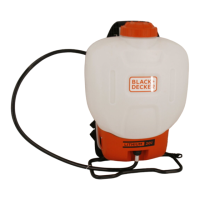
Nozzle Functionality and Uses
Foaming Nozzle
• Spot spraying in or around ower
beds, trees, and shrubs.
• Edging along fences, driveways, and
walkways.
• Killing brush such as poison ivy, poison
oak, kudzu, and wild blackberry.
• Preparing garden beds for planting of
ornamentals and vegetables.
Red High-Volume Nozzle
• Replacing lawns. Kills lawn and weeds
before planting a new lawn.
• Preparing large areas for planting of
ornamental and vegetable gardens.
Adjustable Cone Nozzle
• Spot spraying in ower beds,
walkways, driveways, and patios,
around trees and shrubs.
• Edging along fences, driveways, and
walkways.
• Killing brush such as poison ivy, poison
oak, kudzu, and wild blackberry.
Yellow Low-Volume Nozzle
• Precision spraying in conned areas
such as gardens and ower beds.
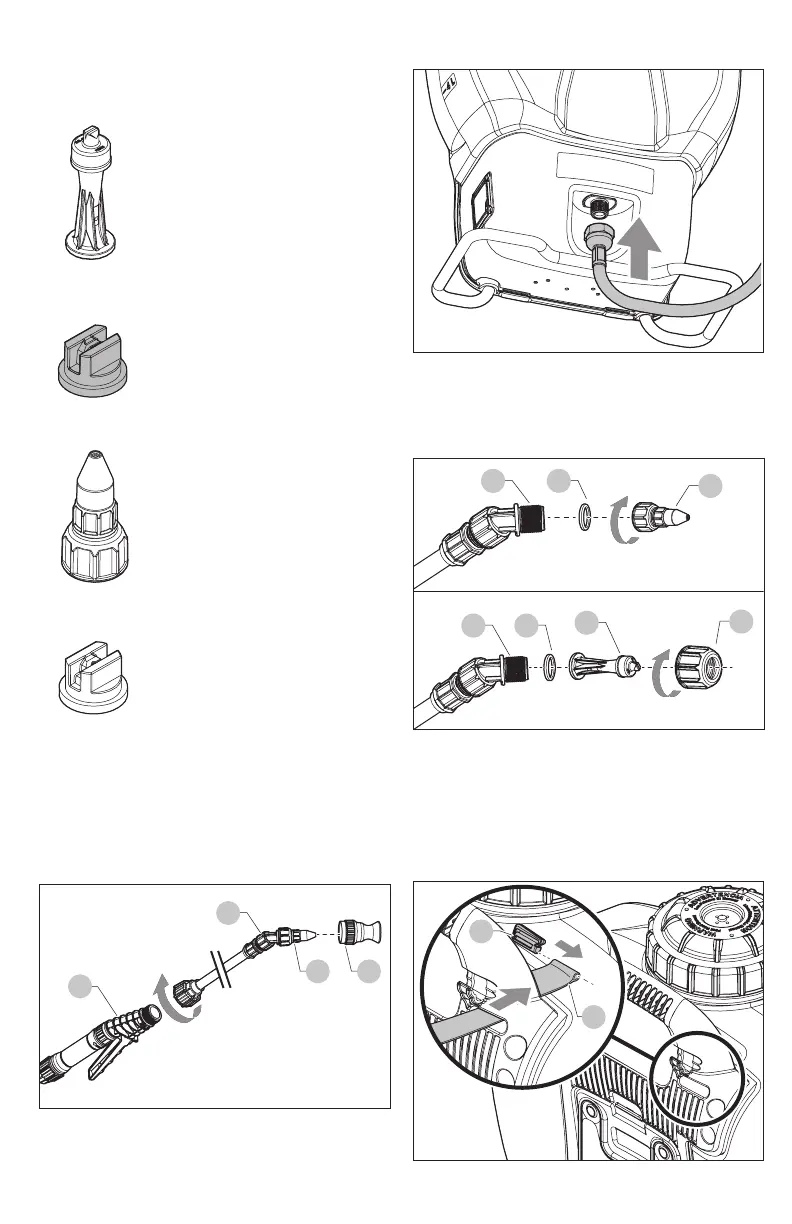
Assembling the Sprayer
1. Install the wand (C) onto the shut-o assembly
(B) and tighten the nut (1) on the wand (C) to
secure together.
2. (Optional) Use the Dry-Touch adapter for a no
contact, chemical free adjustment.
C
DE
B
3. Attach the shut-o assembly to the sprayer body.
Attaching a Nozzle
Attach your selected nozzle (E – G) onto the end of the
wand (C) using a at washer (I) and tighten securely
using the cap nut (H).
C I
C I
G
E
H
Attaching the Harness
1. For each side, remove the small plastic clips (1) from
the two shoulder strap loops and thread each loop
through the slots at the top of the handle.
2. Replace the clips (1) through the loops and pull the
strap securing the two shoulder straps in place.
1
L