9
ENGLISH
(Original instructions)
Removing lter (Fig. L)
u Lift and remove the lift away dust canister (6) from the
chassis (17) as shown in gure I.
u Place the dust canister over a trash bin and press the
dust canister lid release button (6a) to empty the dust
canister as shown in gure J.
u Grasp the agitator wheel housing (21) and pull up
to remove.
u Remove the lter (22), from the agitator wheel housing
(21) as shown in gure L.
u Shake off or lightly brush any loose dust from the lter.
u Install the the lter (22), into the agitator wheel
housing (21).
u Install the agitator wheel housing (21) onto the dust
canister, until it “clicks” rmly into position.
Cleaning the lters
u Once the lter and pre-lter are removed from the dust
canister shake off or lightly brush any loose dust from
the pre-lter and lter.
u Rinse out the dust canister (6) with warm soapy water.
u Wash the lters with warm soapy water.
u Ensure the lters are completely dry before retting
(24hrs).
u Follow instructions in the “Removing pre-lter and
Removing lter” sections for assembly instructions.
Note: Maximum dust collection will only be obtained with
clean lters and an empty dust canister.
If dust begins to fall back out of the product after it is
switched off, this indicates that the dust canister is full
and requires emptying or that there is a blockage somewhere.
u Wash the lters regularly using warm, soapy water and
ensure that they are completely dry before using again.
The cleaner the lter is, the better the product will perform.
u It is very important that the lters are completely dry
and correctly in position before use.
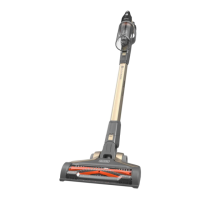
Removing and clearing the rotary brushes
(Fig. M)
Warning! To reduce the risk of injury from moving parts,
disconnect battery before cleaning or servicing.
u To remove the rotary brush (23) from the oor head (8)
depress the release button (24) as shown in gure M.
u Lift the rotary brush from its locked position.
u The rotary brush (23) can now be removed.
u Clean the rotary brush, and reinstall. Ensure it is secured
in its locked position before operating.
Storage
The unit can be safely stored using the wall storage bracket
(5a) available through your service department.
as shown in gure N.
Maintenance
Your BLACK+DECKER cordless appliance has been designed
to operate over a long period of time with a minimum of main-
tenance. Continuous satisfactory operation depends upon
proper tool care and regular cleaning.
Warning! Before performing any maintenance on cordless
appliances:
u Remove the battery.
u Unplug the charger before cleaning it. Your charger does
not require any maintenance apart from regular cleaning.
u Regularly clean the ventilation slots in your appliance/
charger using a soft brush or dry cloth.
u Regularly clean the motor housing using a damp cloth. Do
not use any abrasive or solvent-based cleaner.
Replacing the filters
The lters should be replaced every 6 to 9 months and when-
ever worn or damaged. Replacement lters are available from
your BLACK+DECKER dealer.
u Remove the old lters as described above.
u Fit the new lters as described above.
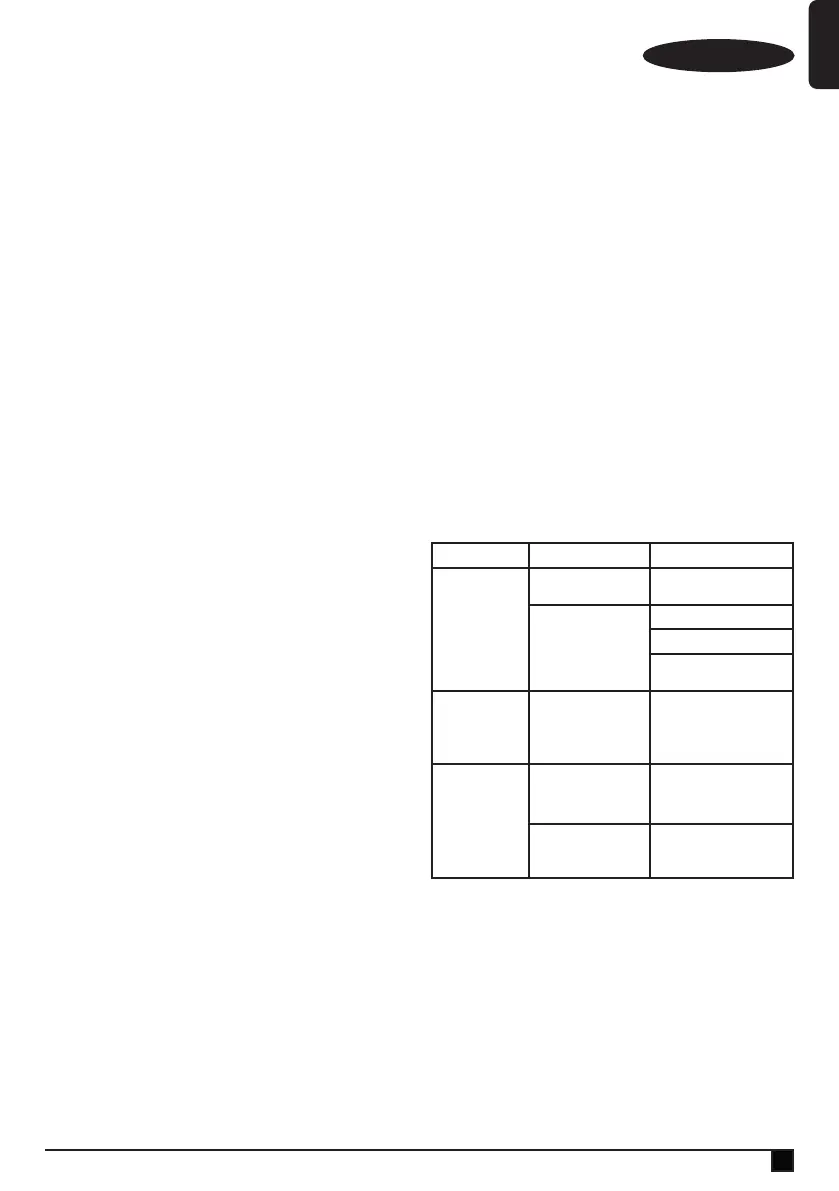
Trouble shooting
Problem Possible Cause Possible solution
Unit will not
start.
Battery pack not
charged.
Check battery pack charging
requirements.
Blockage.
Check oorhead tube.
Check extension tube.
Check between extension
tube and bowl
Beater bar stops
working.
Obstruction.
The unit is equipped with
a beater bar overload protec-
tion feature. Remove and
clean the beater bar of all
debris and obstructions
Battery pack will
not charge.
Charger not plugged in.
Plug charger into a working
outlet. Refer to Important
Charging Notes for more
details.
Surrounding air
temperature too hot or
too cold
Move charger and battery
pack to a
4 °C or below +40 °C.
Protecting the environment
Z
Separate collection. Products and batteries
marked with this symbol must not be disposed of
with normal household waste.
Products and batteries contain materials that can be recov-
ered or recycled reducing the demand for raw materials.
Please recycle electrical products and batteries according to
local provisions. Further information is available at
www.2helpU.com