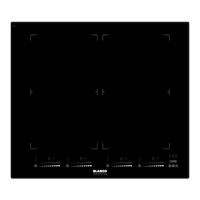
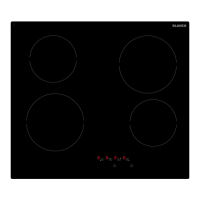
Turning On and Turning Off the Cooktop Appliance
NOTE: Do not operate the cooktop without first placing a suitably sized cooking vessel on the appropriate
cooking zone. If the correct sized cooking vessel is not placed on the cooking zone, the Cooking Zone Power
LED Display (12) will stay blank. Settings can be changed with the Power Slide Touch Control (05) on that
cooking zone, but the zone will not work (the Cooking Zone Power LED Display will show “U”, or alternate
with the setting until the pot is replaced).
If the appliance is in Stand-By-Mode, it is put into Operating-Mode by pressing the On/Off Power touch control
(01) for at least 1 second. A beep signal indicates the successful operation acoustically, with a small indicator
above the touch control being lit.
The Power Slide LED Indicators (06) on each cooking zone will light up. If suitable cookware is on a cooking
zone, the Cooking Zone Power LED Display will show “0”.
If there is no operation within 20 seconds, all the Power Slide LED Indicators and the indicator above the
On/Off Power touch control will turn off, and the appliance will be re-set into Stand-By-Mode.
If the On/Off Power touch control is pressed for more than 1 second (in Operating-Mode), the appliance is
switched off and is set into the Stand-By-Mode again. The appliance can be turned off by pressing the
On/Off Power touch control at any time. The small indicator above the touch control will also turn off.
If there is any residual heat remaining in a cooking zone, this will be indicated in the corresponding
Cooking Zone Power LED Display as a red “H”.
Note: All cooking zones have a pre-set limit on the length of time they will run without any setting changes
(table further in the manual).
Operating A Cooking Zone
1. With the appliance in Operating-Mode, choose a cooking zone and place suitable cookware on the zone
so that the Cooking Zone Power LED Display shows “0” or “H” if it is hot.
2. The power level can now be set between 1-9-P by touching the Power Slide Touch Control (05) for that
cooking zone (the Cooking Zone Power LED Display will show the power valve and the Power Slide LED
Indicator (06) will give a graphical representation of the power level). The Power Slide Touch Control can
be operated by either touching the sensor at some point (lower values to the left), or placing a finger on
the sensor and sliding it left and right. The last point of every Power Slide LED Indicator to the right is the
Boost Function (explained further in the manual).
Each cooking zone can be turned on or adjusted in the same way.
The cooking zone power works on a thermostat system. This means that the cooking zone will switch on
and off in order to remain at the chosen Power Level. NOTE the cooking zone will remain on for longer
periods if a higher power level is chosen, alternatively the cooking zone will be on less regularly on lower
power level settings.
Turning Off Individual Cooking Zones
A cooking zone can be turned off by adjusting the power to 0. This is done by pressing the sensor between
the Melting, Keep Warm & Boil Control Function Touch Control (03) and the leftmost position of the Power
Slide LED Indicator.
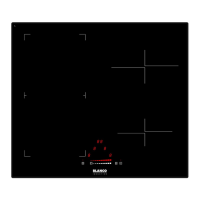
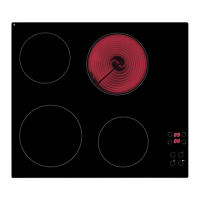
The Boost and Super Boost Functions
The Boost and Super Boost functions are available on all cooking zones. It is used to speed up the initial heat
up time (say boil a pot of water) and only runs for a short time (10 minutes, after which the cooking zone
power level will return to 9).
1. For the Boost Function, select a cooking zone and press the right most section of the Power Slide Touch
Control (04) once, so the Cooking Zone Power LED display changes from the current value to “P”. The
Boost Function is now active (the Power Slide LED Indicators (06) are all lit).
2. The Super Boost Function uses even more power than the Boost Function. Once the Boost Function has
been activated, press the right most section of the Power Slide Touch Control again. The Cooking Zone
Power LED display will start to flash ii, ll, P, indicating the function is now active.
Note: The Boost and Super Boost functions use significantly more power than the nominal power (see
appliance details). If used in conjunction with other cooking zones, the max power available on the other
cooking zones may be reduced to keep power usage within the total allowed. Due to the high power
usage, use these functions on a maximum of 2 cooking zones at any one time.
To disable the either function, press the Power Slide Touch Control somewhere else along its length and the
cooking zone will adjust back to normal operation.
4