INSTRUCTIONS FOR ASSEMBLY AND IN-
STALLATION OF THE BATHTUB SCREEN
Attention! The assembly by two specialists is
recommended.
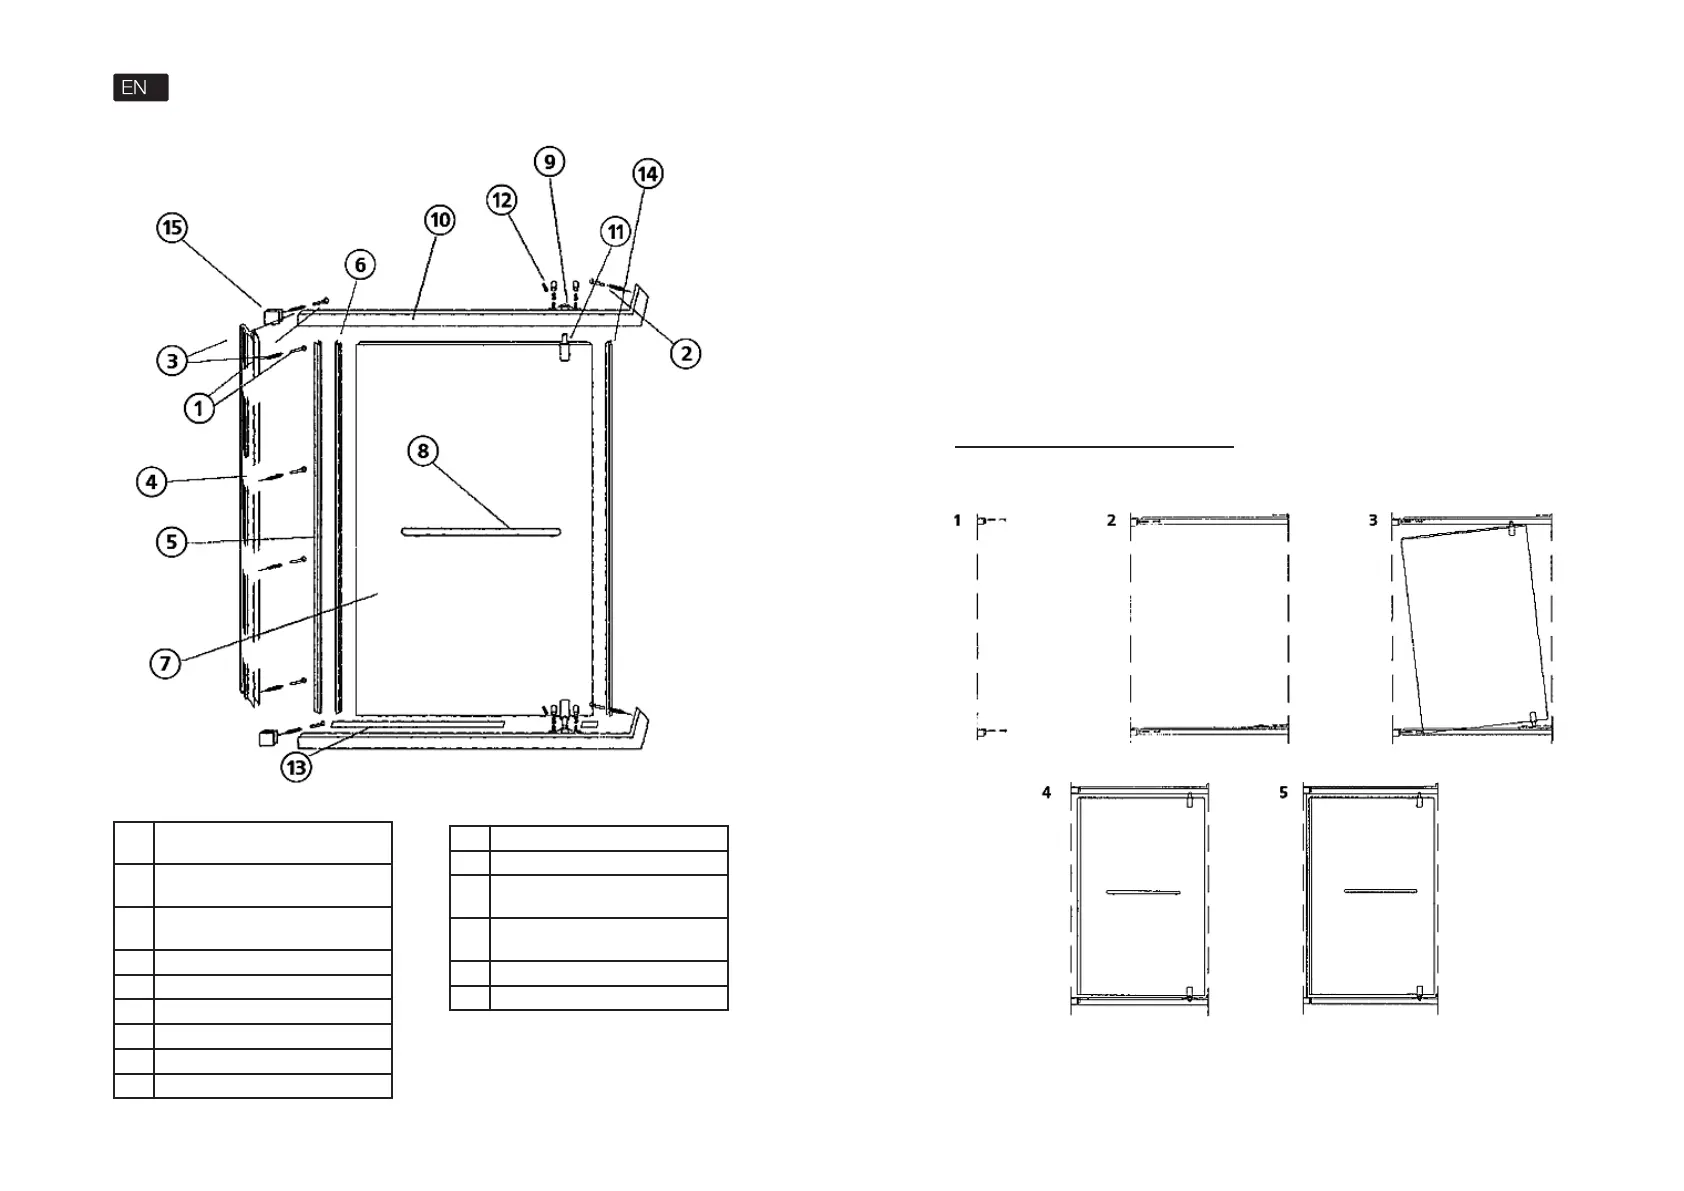
Delivery set:
1. Fitting of the wall-mounted prole
(tapper+self-drilling screw) – 4 sets.
2. Fitting for the prole (tapper+self-drilling
screw) – 2 sets.
3. Fitting of the overhanging support
(tapper+self-drilling screw) – 2sets.
4. Wall-mounted prole – 1pce.
5. Magnet strap – 1pce.
6. Magnet sealer for the door – 1pce.
7. Glass door – 1pce.
8. Door handle – 1set.
9. Unmoving part of the door hinge – 2pcs.
10. Prole– 2pcs. (upper + lower)
11. Door hinge – 2pcs.
12. Fitting screw of the hinge to the –prole
– 4pcs.
13. Sealer for the lower edge of the door
– 1pce.
14. Side sealer – 1pce.
15. Overhanging support – 2pсs.
Attention!
Frame height for door installation is 2005 mm, frame
width for screen installation Bliss 8 – 800 mm, Bliss
9 – 900 mm.
Assembly and installation.
1. Mark location of the overhanging supports at the
wall, drill holes at the wall and install overhanging
supports, having fastened them with self-drilling
screws.
Attention! Overhanging supports are to be
installed according to the one vertical line.
2. Install proles (upper and lower) into overhanging
supports, mark holes for self-drilling screws to fasten
the proles t the right wall. Remove the proles and
prepare holes for fastening of the right parts of the
proles and install tappers into them
3. Install upper and lower prole and fasten them.
4. Install hinges onto the door.
5. Install unmoving part of the hinge onto the lower
prole
Assembly demonstration:
ATTENTION! After the assembly some time should be given for the sealer to harden. It is prohibited to use the
product during 24 hours after the nishing of the installation works.
6. First install the door into the lower prole rst,
then into the upper one
7. Install magnet strap onto the door
8. Install the door into the vertical position
9. Install side sealer and sealer for the lower edge
of the door
10. Install door handle
11. Insert magnet srap into the wall-mounted prole
12. Close the door, adjust the prole so that the door
is moving and fasten it
13. Mark holes for fastening of the wall-mounted
prole, prepare holes and fasten the wall-mounted
prole to the wall
14. Seal the joints of the metal frame and a wall
by a silicone sealer (any silicone sealer that meets
the properties of ph-neutrality, colorlessness and
antifumigal action can be used).
 Loading...