EasyManua.ls Logo

Blix Vika + - User Manual

Blix Vika +
2 pages
Print Icon
To Next Page IconTo Next Page
Loading...
Assembly Guide
Vika +
®
Assembly video available
at support.blixbike.com
View on phone or desktop!
Recommended Torque Values
Tighten bolts to torque specifications to prevent the bolts from slipping.
Do not extend any components including the
stem or seat post beyond the minimum insertion
markings, which are etched into the seat post
and stem. Before using the bike, check that the
saddle post quick release bolt is closed and
firmly tightened. Secure all hardware properly or
it may become loose and result in serious injuries.
Step 7:
Install the pedal marked “L” on the le side of
the bike and pedal marked “R” on the right
side (side with chain and gears).
Tighten the pedals securely by turning the
pedals towards the front of the bike with a
wrench as seen in the assembly video at
support.blixbike.com. Install carefully to not
damage the thread.
Step 8:
Adjust the seat post to desired height and
firmly tighten the seat post clamp.
Step 9:
Inflate the tires to the recommended
pressure 40-65 PSI, indicated on the tire
sidewall.
Question and Answer IconNeed help?

Do you have a question about the Blix Vika + and is the answer not in the manual?

Summary

Vika+ Assembly Guide

Install Pedals

Install the pedal marked "L" on the left side and "R" on the right side, tightening securely towards the front.

Adjust Seat Post

Adjust the seat post to the desired height and firmly tighten the seat post clamp.

Inflate Tires

Inflate tires to the recommended pressure of 40-65 PSI indicated on the tire sidewall.

Recommended Torque Values

Tighten bolts to torque specifications to prevent slipping, ensuring hardware is secured properly.

Bike Assembly Steps

Unpack and Inspect Bike

Remove bike from box, unpack, cut zip-ties, and verify all included items are present.

Prepare Handlebar Stem

Rotate handlebar stem upwards and tighten knob firmly, then insert upper part to lower stem.

Assemble Frame and Light

Secure the frame latch after unfolding, then install the front light to the fender.

Connect Front Light Cable

Connect the front light cables, ensuring the white marked cable connects to minus (-).

Overview

This document serves as an assembly guide for the Blix Vika+ electric bike, providing step-by-step instructions for setting up the bike from its packaged state to a ride-ready condition. It emphasizes the importance of proper assembly for safety and optimal performance.

Function Description

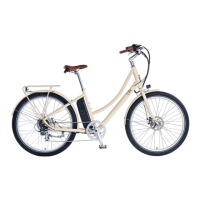
The Blix Vika+ is an electric bike designed for personal transportation. Its primary function is to provide an assisted cycling experience, making it easier for riders to cover distances, climb hills, and commute. The bike features a foldable frame, which enhances its portability and storage convenience. Key components include a frame, handlebars, seat post, pedals, wheels, a battery, a charger, and a front light. The electric assist function is powered by a battery, which drives a motor to supplement the rider's pedaling effort. The bike is designed for ease of assembly by the user, though it strongly recommends consulting a qualified bike mechanic for comprehensive assembly, service, and maintenance.

Usage Features

The Blix Vika+ offers several features aimed at enhancing the user experience and ensuring safe operation.

  • Foldable Design: A significant feature is its foldable frame, which allows for compact storage and easier transport. The assembly process includes unfolding the frame and securing a latch at the center. Two magnets are included to keep the bike folded when not in use.
  • Adjustable Components: The bike is equipped with adjustable components to accommodate different rider preferences and body types. The seat post can be adjusted to the desired height, and the handlebar stem's height can also be adjusted. These adjustments are crucial for ergonomic riding and comfort.
  • Electric Assist: While not explicitly detailed in the assembly steps, the presence of a battery and charger indicates the bike's electric assist capability. This feature reduces the physical effort required for cycling, making it accessible to a wider range of users and suitable for various terrains.
  • Lighting System: A front headlight is included, which connects to the bike's electrical system. This enhances visibility for the rider and makes the bike more visible to others, especially in low-light conditions. The assembly guide provides specific instructions for installing and connecting the front light.
  • Tire Inflation: The guide specifies the recommended tire pressure (40-65 PSI), which is crucial for safe riding, optimal performance, and tire longevity. Users are instructed to inflate the tires to this range, which is also indicated on the tire sidewall.
  • Pedal Installation: The pedals are marked "L" for left and "R" for right, ensuring correct installation. They are designed to be tightened securely by turning them towards the front of the bike, which helps prevent loosening during use.
  • Safety Markings: The bike includes minimum insertion markings etched into the seat post and stem. These markings are critical safety indicators, preventing users from extending components beyond a safe limit, which could lead to structural failure or injury.
  • Quick Release Mechanism: The saddle post features a quick release bolt, allowing for easy adjustment of the saddle height. The guide emphasizes the importance of ensuring this bolt is closed and firmly tightened before riding to prevent the saddle from shifting.

Maintenance Features

While the document primarily focuses on initial assembly, it touches upon aspects that contribute to the bike's maintenance and longevity.

  • Torque Specifications: The guide provides a table of recommended torque values (in Nm) for various bolts, including the seat post clamp, saddle, pedals, crank bolts, handlebar, stem, and rear wheel. Adhering to these specifications is vital for preventing bolts from slipping, ensuring component security, and avoiding damage to the bike's parts. This is a key maintenance practice that prevents premature wear and potential safety hazards.
  • Regular Checks: The document implicitly encourages regular checks by stating, "Before using the bike, check that the saddle post quick release bolt is closed and firmly tightened. Secure all hardware properly or it may become loose and result in serious injuries." This highlights the importance of pre-ride inspections to ensure all components are secure.
  • Professional Consultation: The guide strongly recommends consulting a qualified bike mechanic for assembly, service, and maintenance. This suggests that while basic assembly can be done by the user, professional expertise is valuable for ensuring the bike's long-term health and safety, especially for more complex maintenance tasks or if issues arise.
  • Damage Prevention: Instructions like "Install carefully to not damage the thread" when installing pedals emphasize careful handling during assembly to prevent damage that could lead to future maintenance issues or component replacement.
  • Component Integrity: The warning about not extending components beyond minimum insertion markings is a critical maintenance point. Ignoring this can lead to structural failure, which would require significant repair or replacement of parts.
  • Tire Care: The instruction to inflate tires to the recommended pressure is a fundamental aspect of tire maintenance, contributing to tire lifespan and preventing flats.
  • Hardware Security: The general advice to "Secure all hardware properly" is a broad maintenance instruction that applies to all fasteners on the bike, ensuring that components remain in place and function as intended.

In summary, the Blix Vika+ assembly guide provides essential information for setting up the bike, highlighting its user-friendly features like adjustability and foldability, and underscoring critical safety and maintenance practices to ensure a reliable and enjoyable riding experience.

Blix Vika + Specifications

General IconGeneral
Frame MaterialAluminum Alloy
ForkSteel
Wheel Size20 inches
Motor250W Rear Hub Motor
RangeUp to 45 miles
Gears7-speed Shimano
BrakesMechanical Disc Brakes
Weight55 lbs
Pedal Assist Levels5 levels
TypeFolding Electric Bicycle
Tires20"
Top Speed20 mph
DisplayLCD Display
ThrottleYes

Videos

How to turn on Blix Vika + bicycle headlight & taillight

Related product manuals