2 3
INSTALLING THE ROUTER TABLE ASSEMBLY
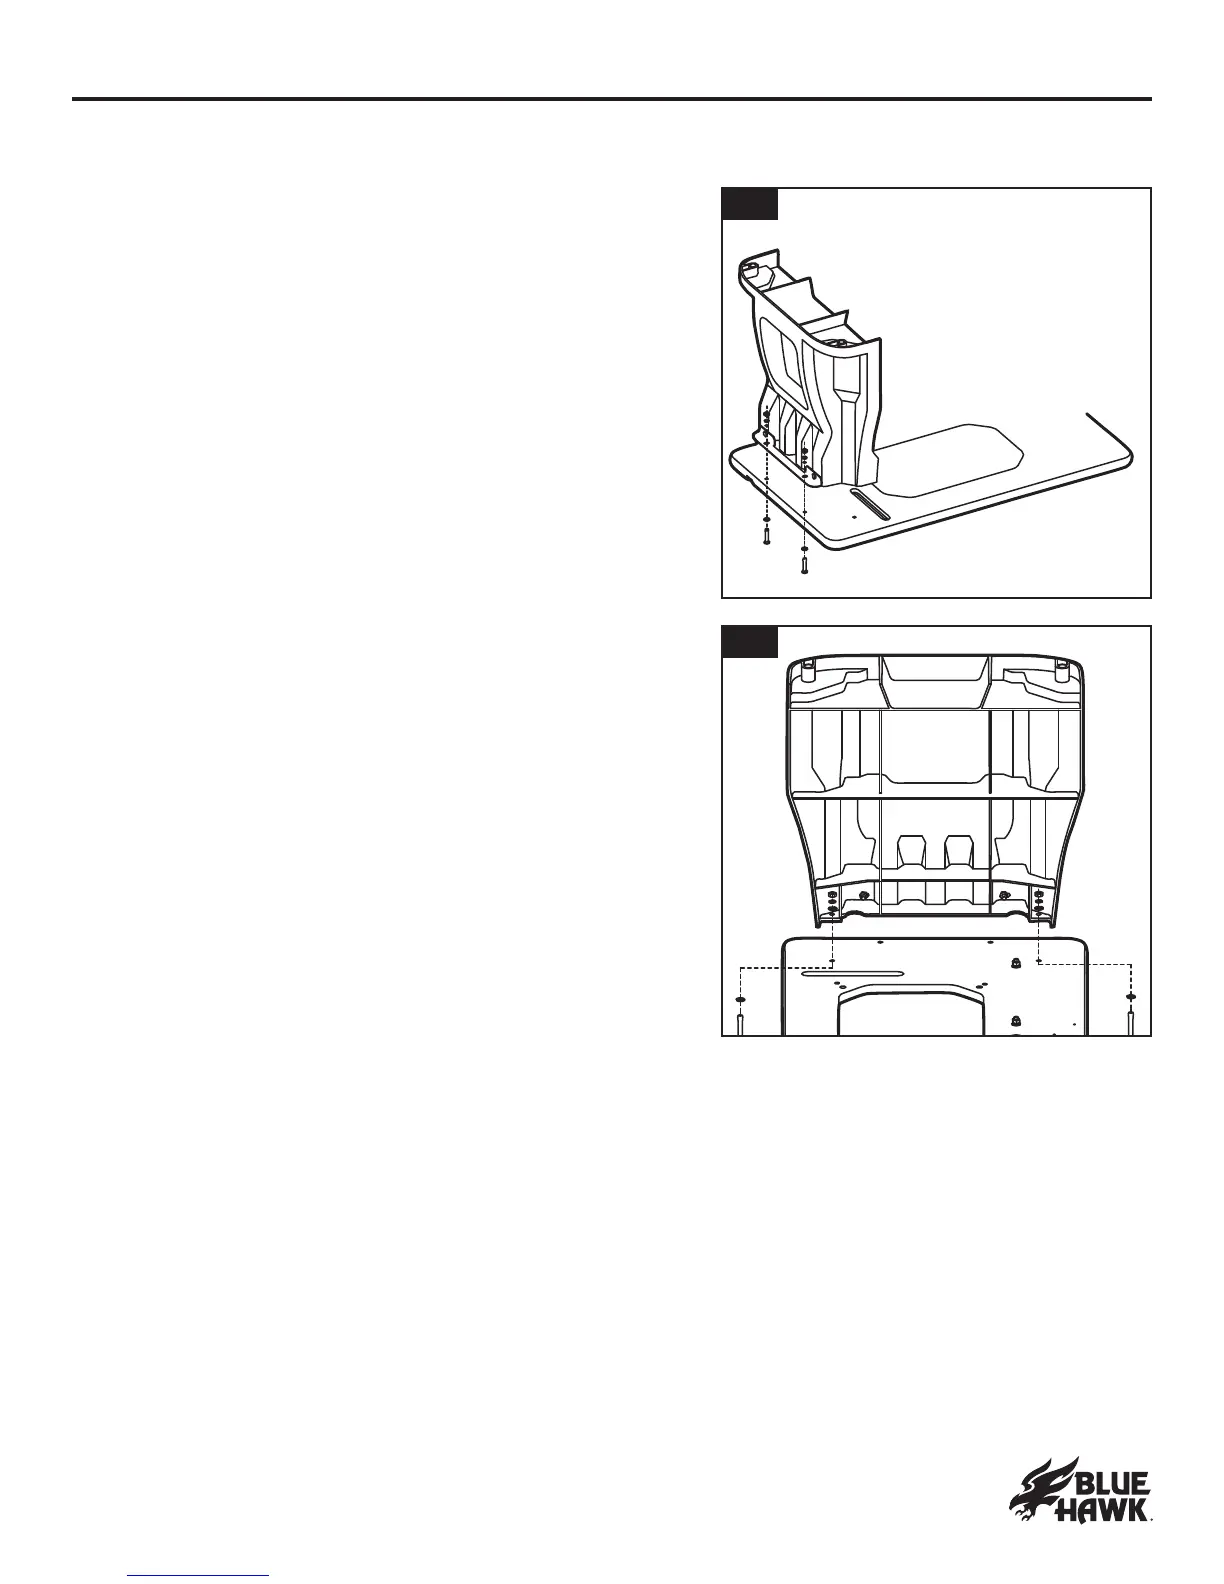
21. ATTACHING THE LEGS TO THE TABLETOP
a. Place the router table surface assembly on a at, level
su r f a ce, wi t h t h e u n d er si d e of t h e t a b l e f a ci n g u p .
b . P osi t i on t h e l eg s a g a i n st t h e u n d er si d e of t h e t a b l et op
su r f a ce a s sh own .
c. P osi t i on on e sh or t en d of t h e t a b l e so t h a t i t ex t en d s
b ey on d t h e ed g e of t h e wor k su r f a ce f a r en ou g h t o
g a i n a ccess t o t h e f ou r h ol es i n t h a t en d of t h e r ou t er
t a b l e su r f a ce a ssemb l y .
d . A l i g n t h e t wo ou t er most h ol es on t h e r ou t er t a b l e
su r f a ce a ssemb l y wi t h t h e h ol es i n t h e l eg b r a ck et .
e. P l a ce a sma l l wa sh er on t o ea ch of t wo sh or t p a n - h ea d
scr ews. I n ser t t h e sh or t p a n - h ea d scr ews u p t h r ou g h
t h e ou t er h ol es i n t h e r ou t er t a b l e su r f a ce a ssemb l y
a n d t h r ou g h t h e h ol es i n t h e l eg b r a ck et . P l a ce a
sma l l wa sh er , a sp r i n g wa sh er , a n d a sma l l n u t on t h e
t h r ea d s of ea ch scr ew t h en t i g h t en t h e n u t s.
f . P l a ce a sma l l wa sh er on t o ea ch of t wo l on g p a n -
h ea d scr ews. I n ser t t h e l on g p a n - h ea d scr ews u p
t h r ou g h t h e ot h er t wo h ol es on t h e r ou t er t a b l e su r f a ce
a ssemb l y a n d t h r ou g h t h e cor r esp on d i n g h ol es i n
t h e l eg . P l a ce a sma l l wa sh er , a sp r i n g wa sh er , a n d
a sma l l n u t on t h e t h r ea d s of ea ch scr ew t h en t i g h t en
t h e n u t s.
g . R ep ea t wi t h t h e ot h er l eg .
21a
21b