(/wp-content/uploads/2019/03/heavy-tutorial-13.jpg?x62571)
Install New Thruster Guards
To install the new thruster guards, you will need the following parts and tools:
1 Bag of 12 M4x16mm screws
1 Bag of #4×0.5” Thread forming screws
8 x Heavy Guard Mounting Brackets
2 x Heavy Guards
1 x Threadlocker
1 x #1 Phillips head screwdriver
1. Apply one drop of threadlocker to each of the M4x16mm screws. Roll the screws around on a paper towel to evenly
spread the threadlocker and to remove excess threadlocker.
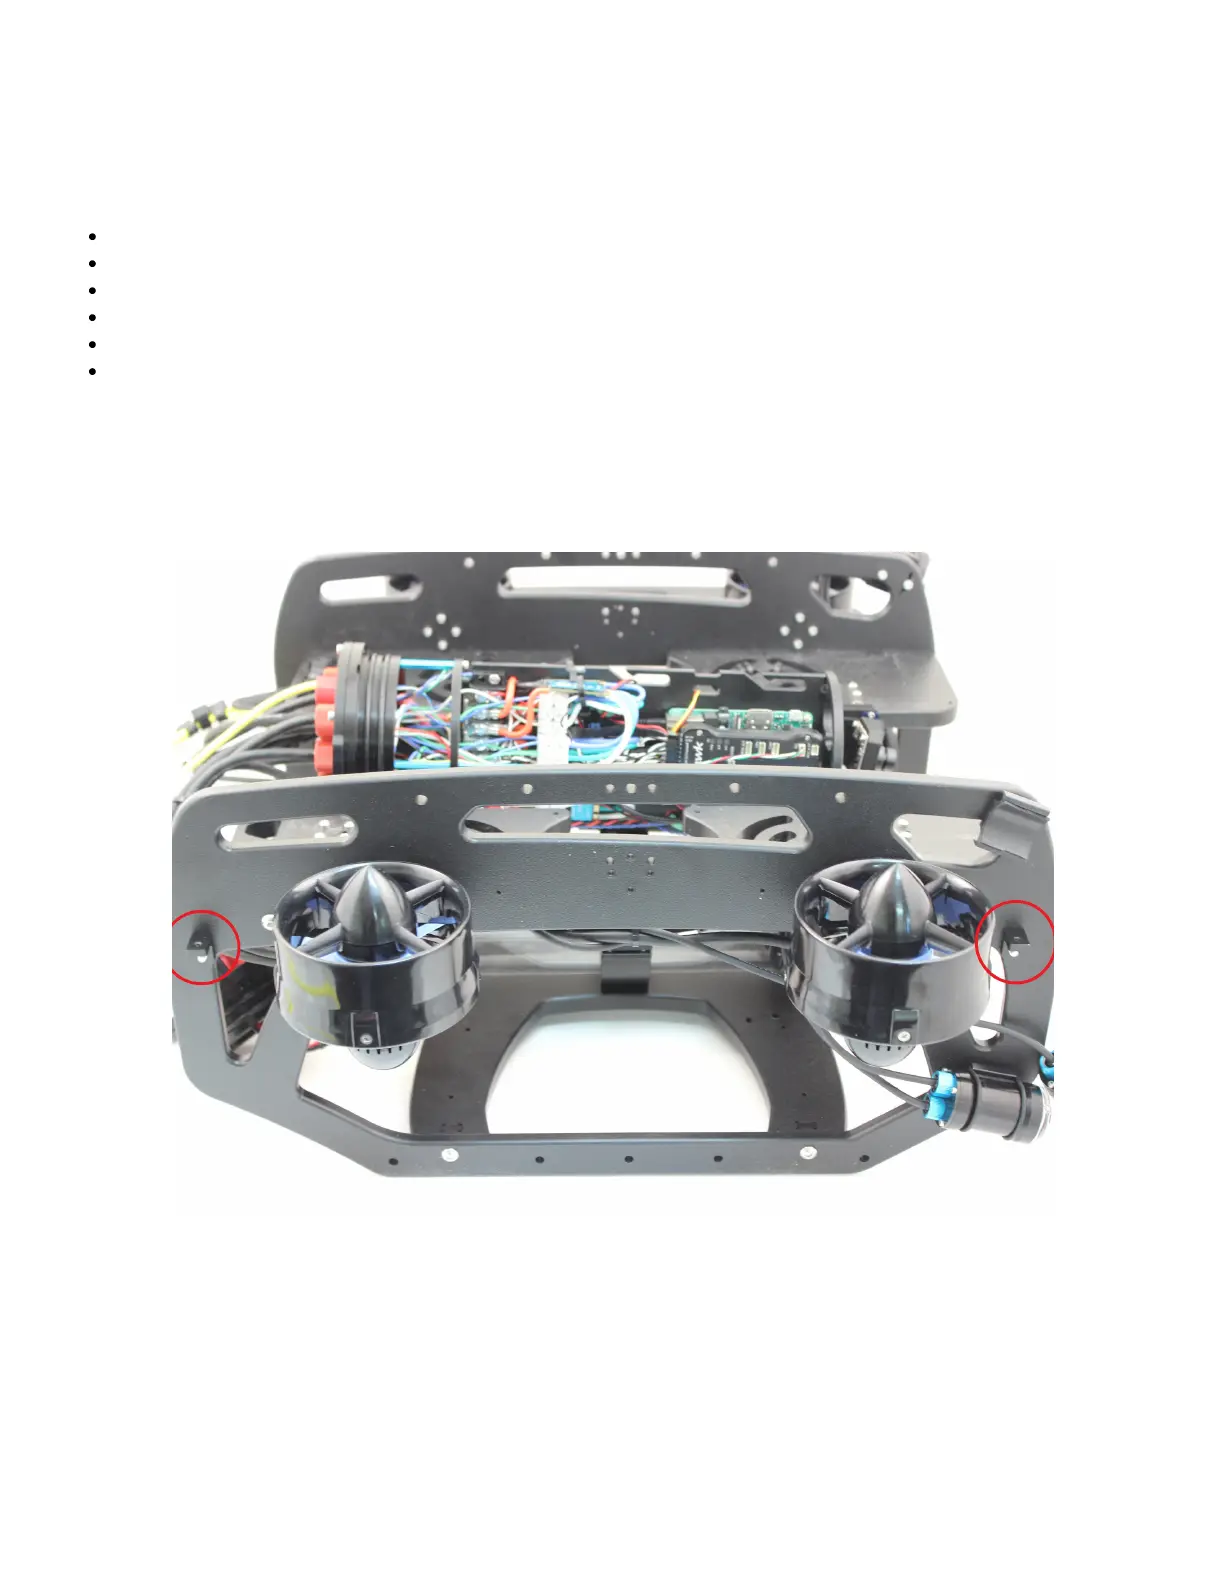
2. Install 4 of the thruster guard mounting brackets on the outside of the frame using 4 M4x16 screws as shown
below.
(/wp-content/uploads/2019/03/heavy-tutorial-24.jpg?x62571)
3. Place the new thruster guards on the brackets you had previously installed and make sure the holes align. The
thruster guards only install in one direction with the shorter leading edge of the guard oriented towards the front end
of the vehicle. If you have Lumen lights mounted in the top mounts, make sure to arrange the wire so it is inside the
guard, near the thruster duct. Secure the guards to the brackets using 4 M4x16 screws.
 Loading...