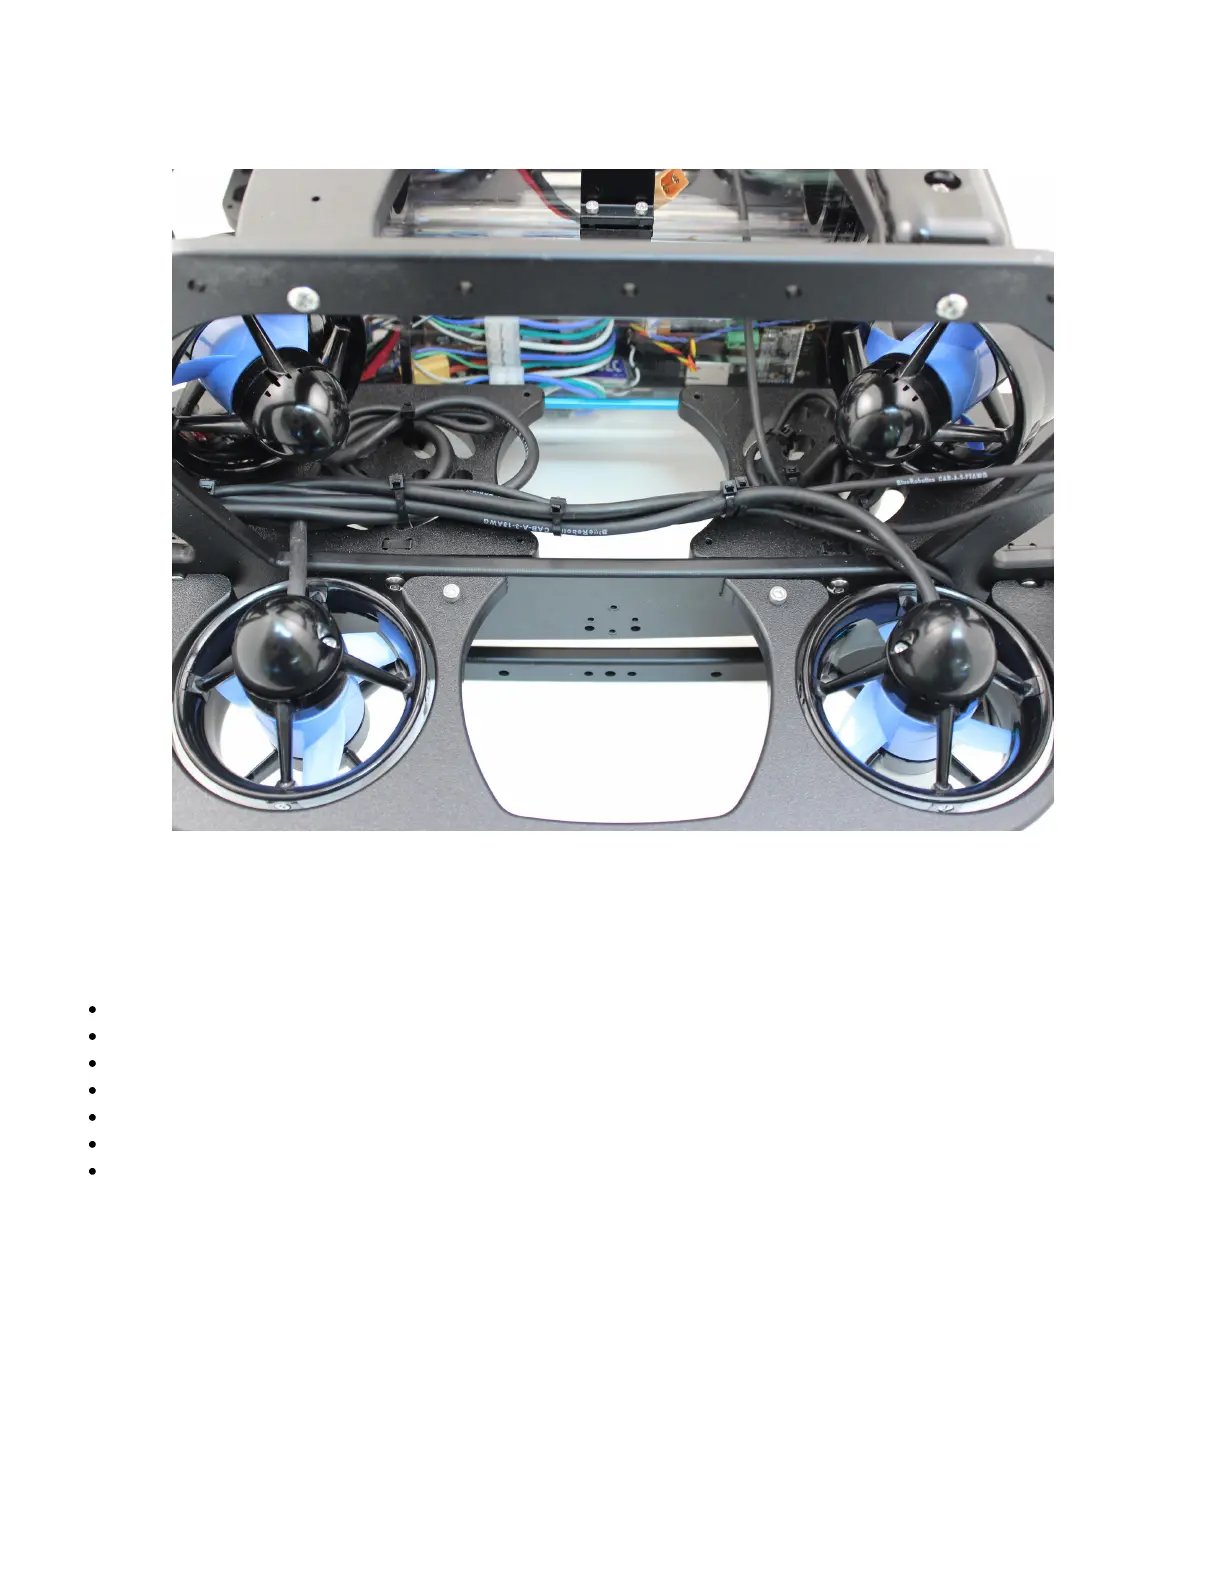
The primary goal of Thruster and Lumen cable management is to prevent the wires from getting cut by the propellers.
Make sure to check that no wire can reach a propeller after you have nished routing the cables. Below are some
examples of what the cable routing should look like.
(/wp-content/uploads/2019/03/heavy-tutorial-20.jpg?x62571)
Install New Buoyancy Blocks and Fairings
To install the new buoyancy blocks and fairings, you will need the following parts and tools:
16 x Fairing screws that were placed o to the side during disassembly
4 x Fairings with buoyancy installed that were placed o to the side during disassembly
2 x Heavy additional buoyancy blocks
2 x Heavy fairings
1 x Bag of 4 fairing screws
1 x #1 Phillips head screwdriver
1 x #2 Phillips head screwdriver
1. Reinstall Original Fairing Blocks onto ROV by installing the screws through the center panels and into the fairings.
 Loading...