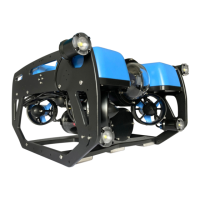
Mounting Additional Ballast to the Frame
To mount the ballast to the frame you need the following parts and tools:
7 x 200g ballast weights (from original BlueROV2 Kit)
3 x 200g ballast weights (from Heavy Retrot Kit)
10 x 8-16 Thread, 5/8” Long, Thread-Forming Screws
1 x #2 Phillips head screwdriver
To get the longest battery life and the best driving experience, it is important to have the ROV close to balanced from
front to back in water and close to neutrally buoyant. The Heavy Retrot kit adds a bit of weight and more buoyancy
to the ROV, so it will need to be re-trimmed based on your operating conditions. Trimming the ballast may involve a
bit of trial and error.
Software Setup
Finally, before operating your ROV, we need to update the software conguration. Begin by powering on your ROV,
connecting it to your computer, and opening QGroundControl.
Load New Parameters
1. Go to the
Frame
tab of the
Vehicle Setup
page (click the gears icon)
2. Click ‘Load Vehicle Defaults’
3. Click BlueROV2 Heavy. A green bar will move across the top of the screen indicating the progress of loading the
parameters; this is usually pretty quick.
4. Reboot the vehicle
 Loading...