Install New Thrusters
To Install the new thrusters, you will need the following parts and tools:
1 x T200 with counter-clockwise propeller
1 x T200 with clockwise propeller
1 x Bag with 8 M3x12 screws
8 x M3x12 screws you had set aside from removing Thrusters 5 and 6
1 x Silicone Grease – 10g Tube
1 x Threadlocker
1 x Penetrator wrench
1 x 2.5 mm hex driver
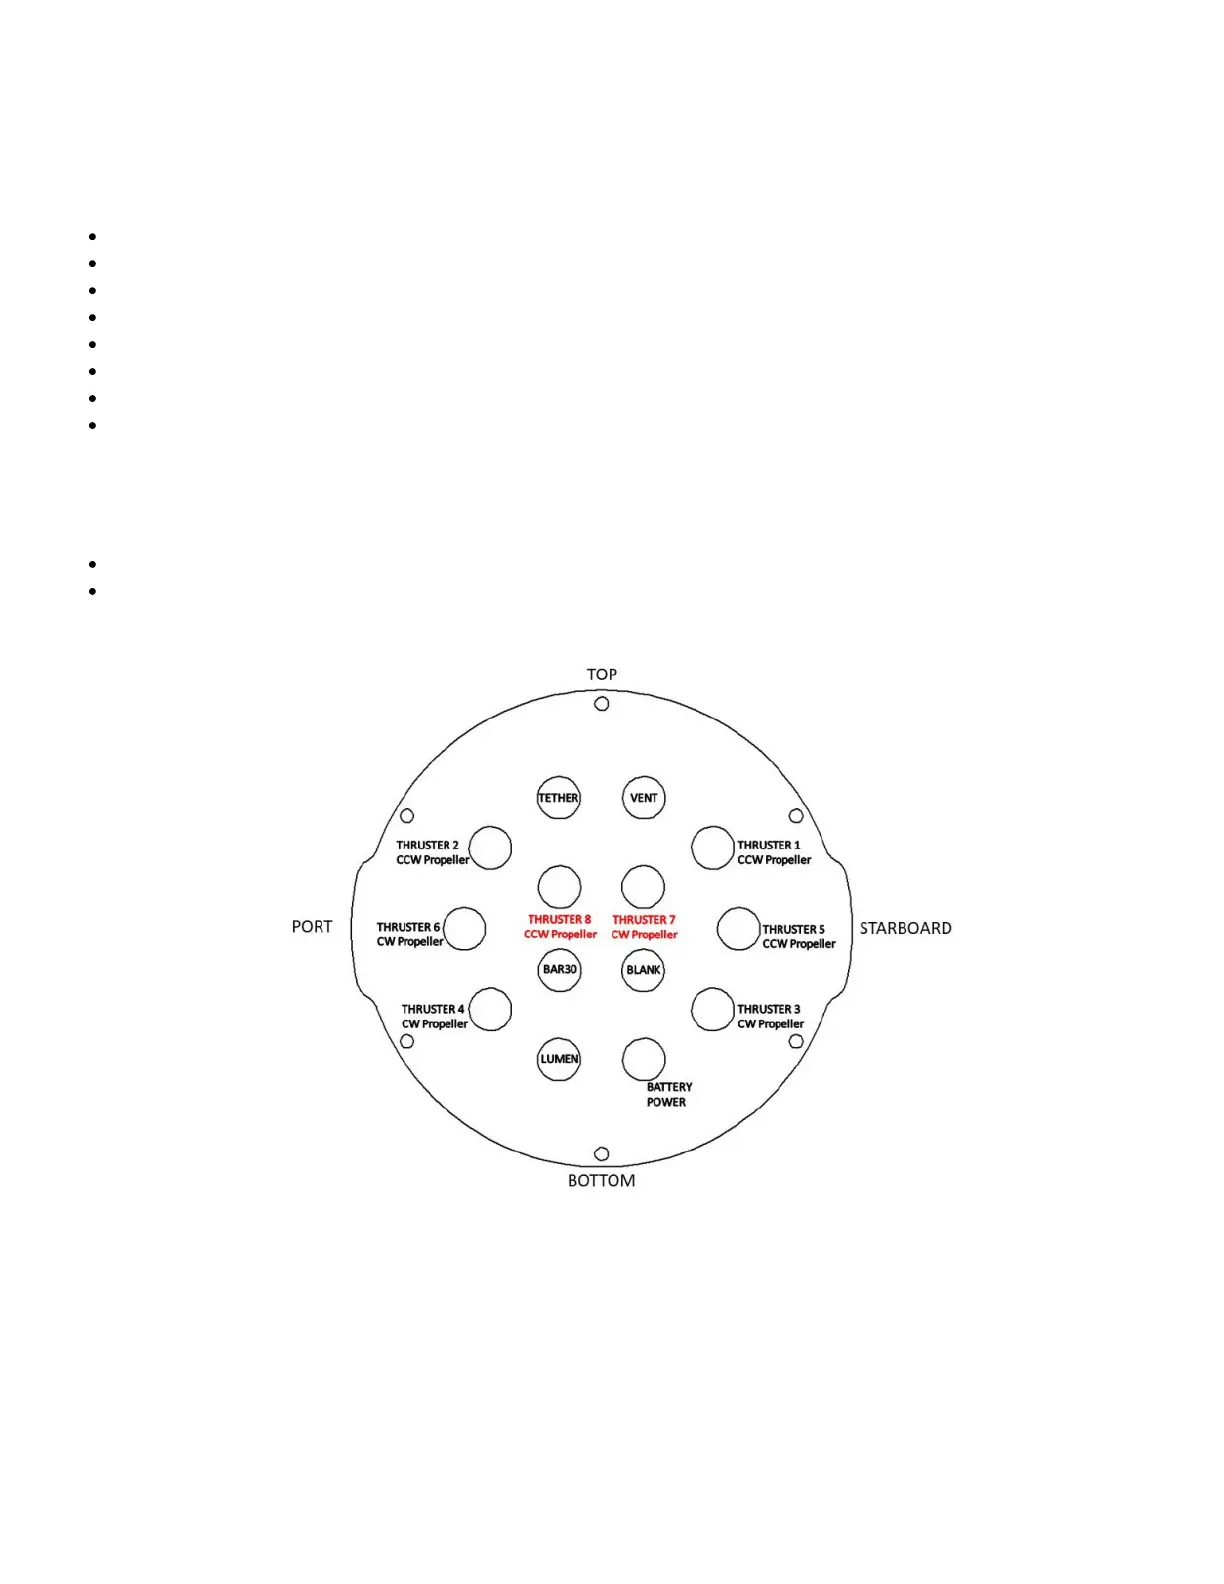
1. Install Thrusters 7 and 8 into the respective empty penetrator holes. Tighten to nger tight, then use the provided
wrench to tighten them an additional ~1/16 of a turn. If you can’t loosen them with your ngers, they are tight
enough.
Thruster 7 (CW propeller) with red penetrator nut.
Thruster 8 (CCW propeller) with red penetrator nut.
(https://www.bluerobotics.com/wp-content/uploads/2019/03/end-cap-new-thrusters.jpg?x62571)
 Loading...