EasyManua.ls Logo

BlueCatBio BlueWasher User Manual

BlueCatBio BlueWasher
3 pages
To Next Page IconTo Next Page
Page #1 background imageLoading...
Page #1 background image
Guide: How to install & adjust
Blue® Washer plate guides
BlueCatBio Europe
Hornungsreuth 22a, DE-95512 Neudrossenfeld
E-Mail: info@bluecatbio.de
BlueCatBio North America
58 Elsinore St., Concord, MA 01742
E-Mail: info@bluecatbio.com
www.bluecatbio.com
Pull off magnetically
attached front cover
and dispenser head
Plate guides with
mounting screws and
washers
Adjust height (top of
guide to bottom of
dispenser mount) to
approx. 11 mm.
Tighten screws.
Mount guide to balcony
side in orientation shown;
tighten height-adjustment
screws only lightly
Plate guides are required to center 1536w plates underneath dispenser pins to ensure
dispense jets enter wells centrally (in y-direction)
Plate guides are pre-installed in Blue® Washers ordered with 1536w dispensers
Plate guides are not needed and can be removed when dispensing into 96/ 384w plates, but
need to be re-installed when resuming 1536w dispensing
Plate guides are adjustable in height and width. Ensure proper adjustment to plate types and
carriers used
Warning: plate guides that are adjusted too narrow or low can cause carrier detachment
during homing
Repeat installation on other side
Loosen width adjustment
screws on top of guide.
Question and Answer IconNeed help?

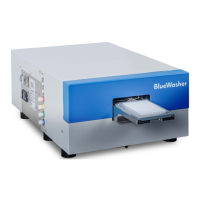
Do you have a question about the BlueCatBio BlueWasher and is the answer not in the manual?

BlueCatBio BlueWasher Specifications

General IconGeneral
BrandBlueCatBio
ModelBlueWasher
CategoryLaboratory Equipment
LanguageEnglish

Summary

Install & Adjust Blue Washer Plate Guides

Mounting Plate Guides

Attach guides to balcony side using height-adjustment screws, tightening lightly.

Adjusting Guide Height

Set guide height to approximately 11mm relative to dispenser mount. Tighten screws.

Adjusting Guide Width

Loosen width adjustment screws to allow movement for centering.

BlueWasher Operational Sequence

Prepare for Homing

Power on, connect, initialize, balance, and remove carrier/plate.

Execute Rackhome Command

Enter "rackhome" command and run to move the push rod to home position.

Replace Carrier and Plate

Place the carrier with the plate back onto the balcony after homing.

Fine-tune Guide Alignment

Center Plate Under Dispenser Tips

Place plate so dispenser tips are centered above wells (y-direction).

Nudge Guides for Clearance

Nudge guides approx. 0.5mm from plate sides; they should not touch when centered.

Check for Rubbing and Nudging

Ensure plate moves freely and guides gently nudge it when off-center.

Test Guide Position

Re-adjust height if too close to carrier, then run dispense to test.