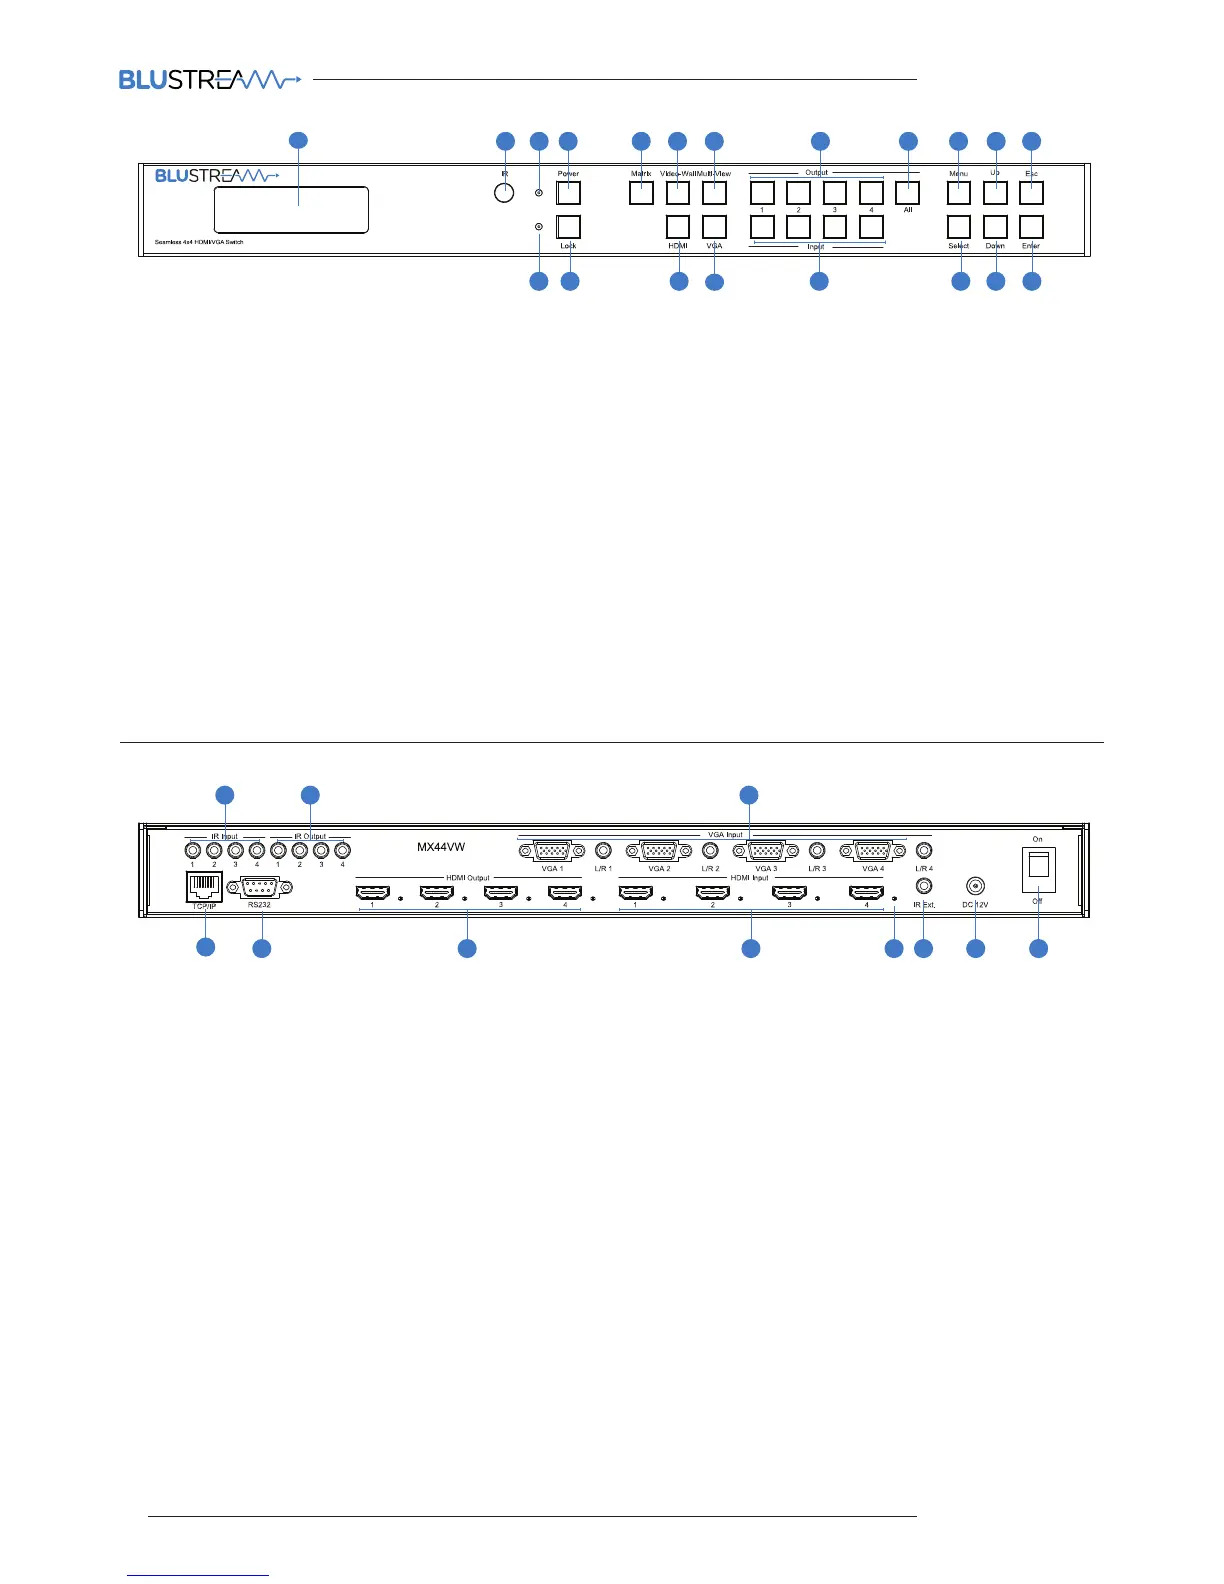
Rear Panel
1 2 3
108 9765
4
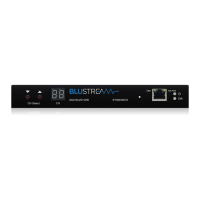
Front Panel
1
2 3 4 5 6 7 8 9
191817
16
151413
1 LCD display – Shows the status of
input/output selection, EDID etc.
2 IR receiver window.
3 Power LED indicator.
4 Power button – Press to power On/
O the Matrix.
5 Matrix mode button - Press to
activate Matrix mode.
6 Video-Wall mode button - Press to
activate Video-Wall mode.
7 Multi-View mode button - Press to
activate Multi-View mode.
8 HDMI output selection button 1 to
4 - To select the output from 1 to 4.
9 All button for HDMI outputs – All
outputs will work as one (Selects all
outputs).
q Menu button – Press to enter EDID
set mode (see page 5).
w Up selection button - Press to
change segment’s value.
e ESC – Press to quit EDID set mode.
r Lock indicator.
t Lock button – Press to lock the
buttons of the front panel.
y HDMI input selection button - Press
to individually change inputs 1-4 to
HDMI.
u VGA input selection button - Press
to individually change inputs 1-4 to
VGA.
i Input selection button 1 to 4 – Press
to select the input from 1 to 4.
o Selection button – Press to select
current setting.
p Down selection button – Press to
change segment’s value.
a Enter button – Press to confirm
mode selection or set EDID to
specified INPUT or copy EDID from
specified OUTPUT to specified
INPUT.
1 IR inputs – 3.5mm stereo jack.
Routes IR to the current source
selected IR output. When using the
IRCAB cable ensure cable direction
is correct.
2 IR outputs – 3.5mm mono jack
– Source specific routed IR. Use
supplied Blustream 5V IR emitters.
3 VGA inputs with associated 3.5mm
L/R Analogue audio – Connect to
VGA sources.
NOTE: Either HDMI OR VGA signal
type must be assigned per source
input. Both video inputs cannot be
active at the same time.
4 TCP/IP (RJ45) – Connect to LAN for
TCP/IP control of Matrix or control by
built-in Web-GUI interface.
5 RS-232 port – For control of the
Matrix switcher from PC or control
processer.
6 HDMI output – Connect to HDMI
displays.
7 HDMI inputs – Connect to HDMI
sources.
8 HDMI active connection LED - Lit
when active HDMI connection is
connected.
9 IR input for matrix control – For hard
wired IR connection. Connect to
control processor or Blustream 5v IR
receiver.
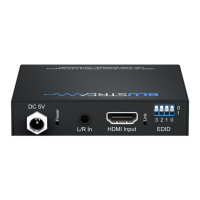
q Power port – Use supplied 12V 3A
DC adaptor to power.
w Power switch - Turn Matrix On/O
10 11 12
20
11