REDUCTION GEARCASE
Removal
and
Installation
Lift and block the loader.
Remove the hydrostatic motor.
Remove the seat
assembly.
Remove the front panel and steering levers.
Remove the chaincase covers and brake assembly.
Drain the fluid from the chaincase and remove the front
chain.
(See Page 4-10.)
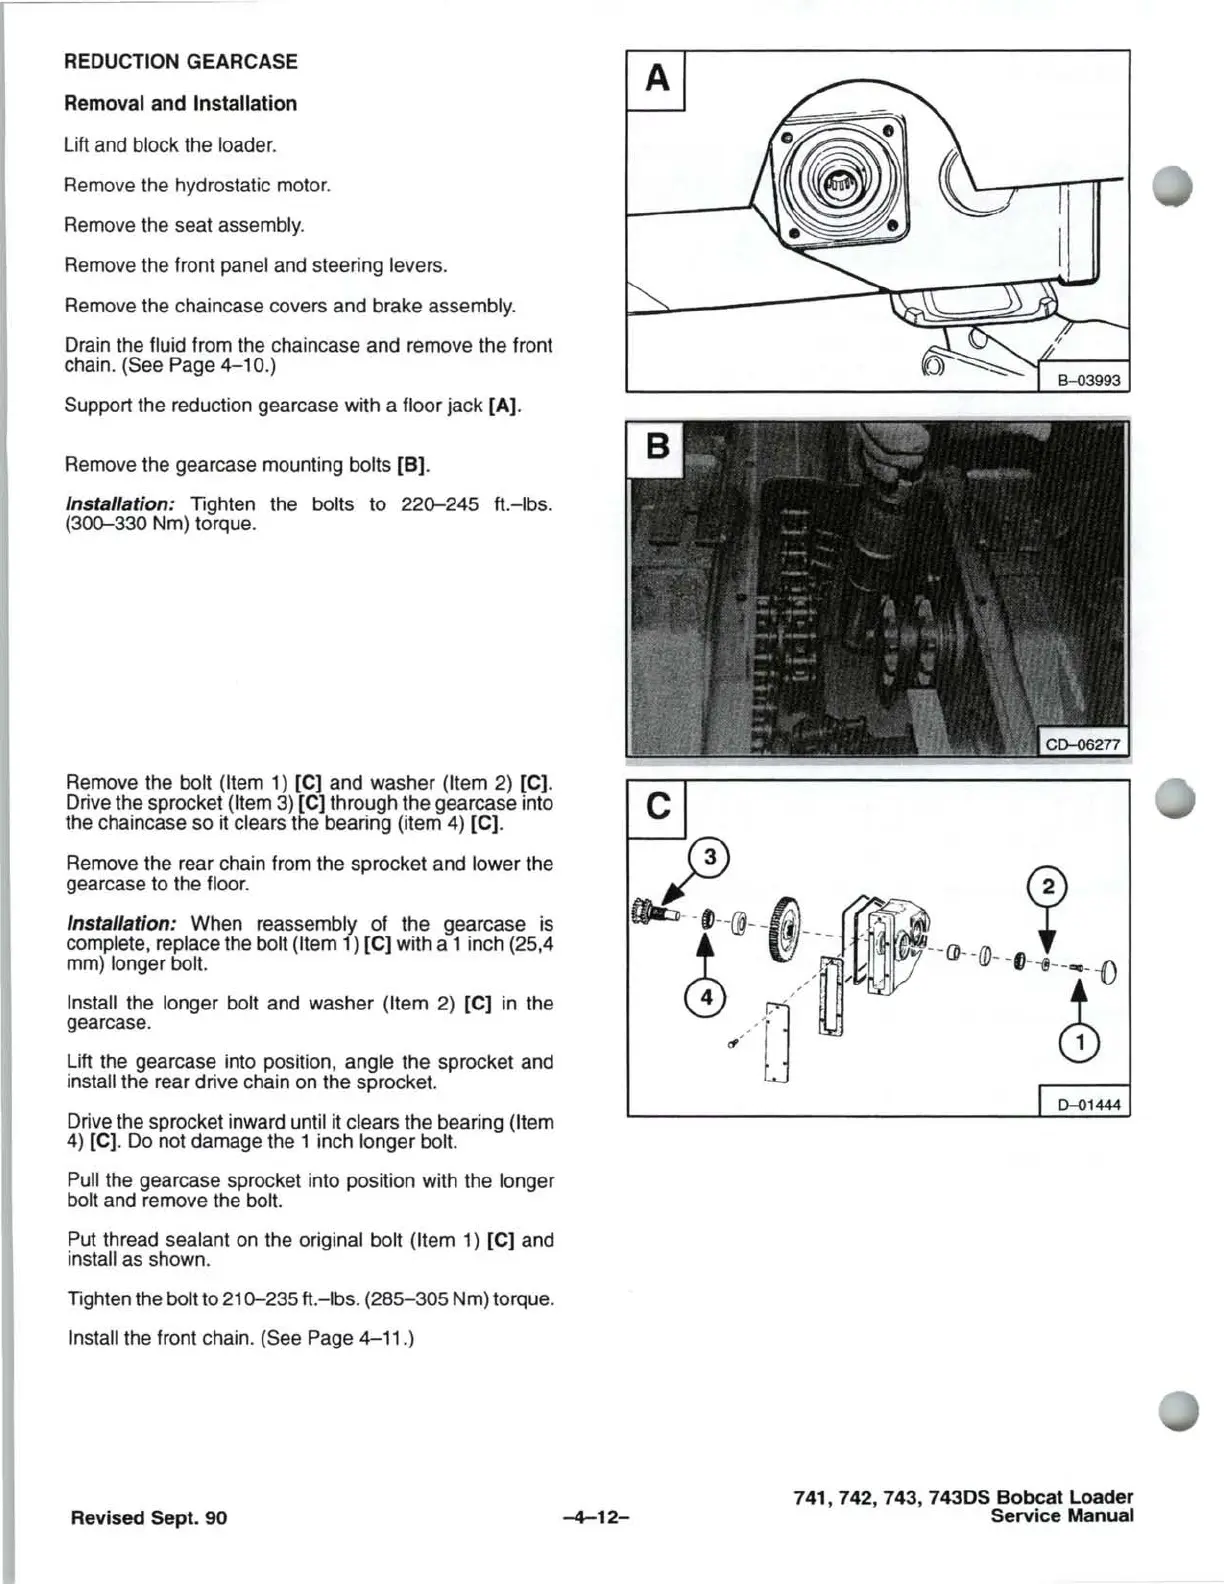
Support
the reduction gearcase with a floor jack [A).
Remove the gearcase mounting
bolts [B).
Installation: Tighten the bolts to 220-245 ft.-Ibs.
(300-330
Nm) torque.
Remove the
bolt (Item
1)
[C] and washer (Item 2) [C).
Drive the sprocket
(Item
3)
[C] through the gearcase into
the chaincase so
it
clears the bearing (item 4) [C).
Remove the rear chain from the sprocket and
lower the
gearcase to the
floor.
Installation: When reassembly of the gearcase is
complete, replace the bolt (Item 1) [C] with a 1 inch (25,4
mm)
longer bolt.
Install
the longer bolt and washer (Item
2)
[C]
in
the
gearcase.
Lift the gearcase into position,
angle the sprocket and
install the rear drive chain
on
the sprocket.
Drive the sprocket inward
until it clears the bearing (Item
4)
[C].
Do
not damage the 1 inch longer bolt.
Pull
the gearcase sprocket into position with the longer
bolt
and remove the bolt.
Put
thread sealant
on
the original bolt (Item 1) [C] and
install as shown.
Tighten the
bolt to
21
0-235
ft.
-Ibs.
(285-305 Nm) torque.
Install the front chain. (See Page 4-11.)
Revised Sept.
90
A
-4-12-
741,742,743,
7430S
Bobcat
Loader
Service
Manual


 To Next Page
 Loading...