40 S130 Operation & Maintenance Manual
INSTRUMENT PANEL IDENTIFICATION (CONT’D)
Deluxe Instrumentation Panel (Cont’d)
Figure 14
The first screen you will see on your new loader will be as
shown in [Figure 14].
When this screen is on the display you can enter the
password and start the engine or change the Display
Screen setup features.
NOTE: Your new loader (with Deluxe Instrumentation
Panel) will have an Owner Password. Your
dealer will provide you with this password.
Change the password to one that you will
easily remember to prevent unauthorised use
of your loader. (See Changing The Owner
Password on Page 163.) Keep your password
in a safe place for future needs.
Change Language: Press the Selection Button at the end
of the arrow [Figure 14] to go to the next screen. Use the
Keypad to select the number of the language.
Press EXIT. The screen will return to [Figure 14]. You
can then enter the password and start the engine.
See CONTROL PANEL SETUP for further description of
screens to setup the system for your use. (See
CONTROL PANEL SETUP on Page 161.)
NOTE: Pressing the EXIT key will go to the previous
screen and you can continue pressing until
you get to the initial (home) screen.
SHORTCUT: Press the “0” (zero) key to get to
the home screen immediately.
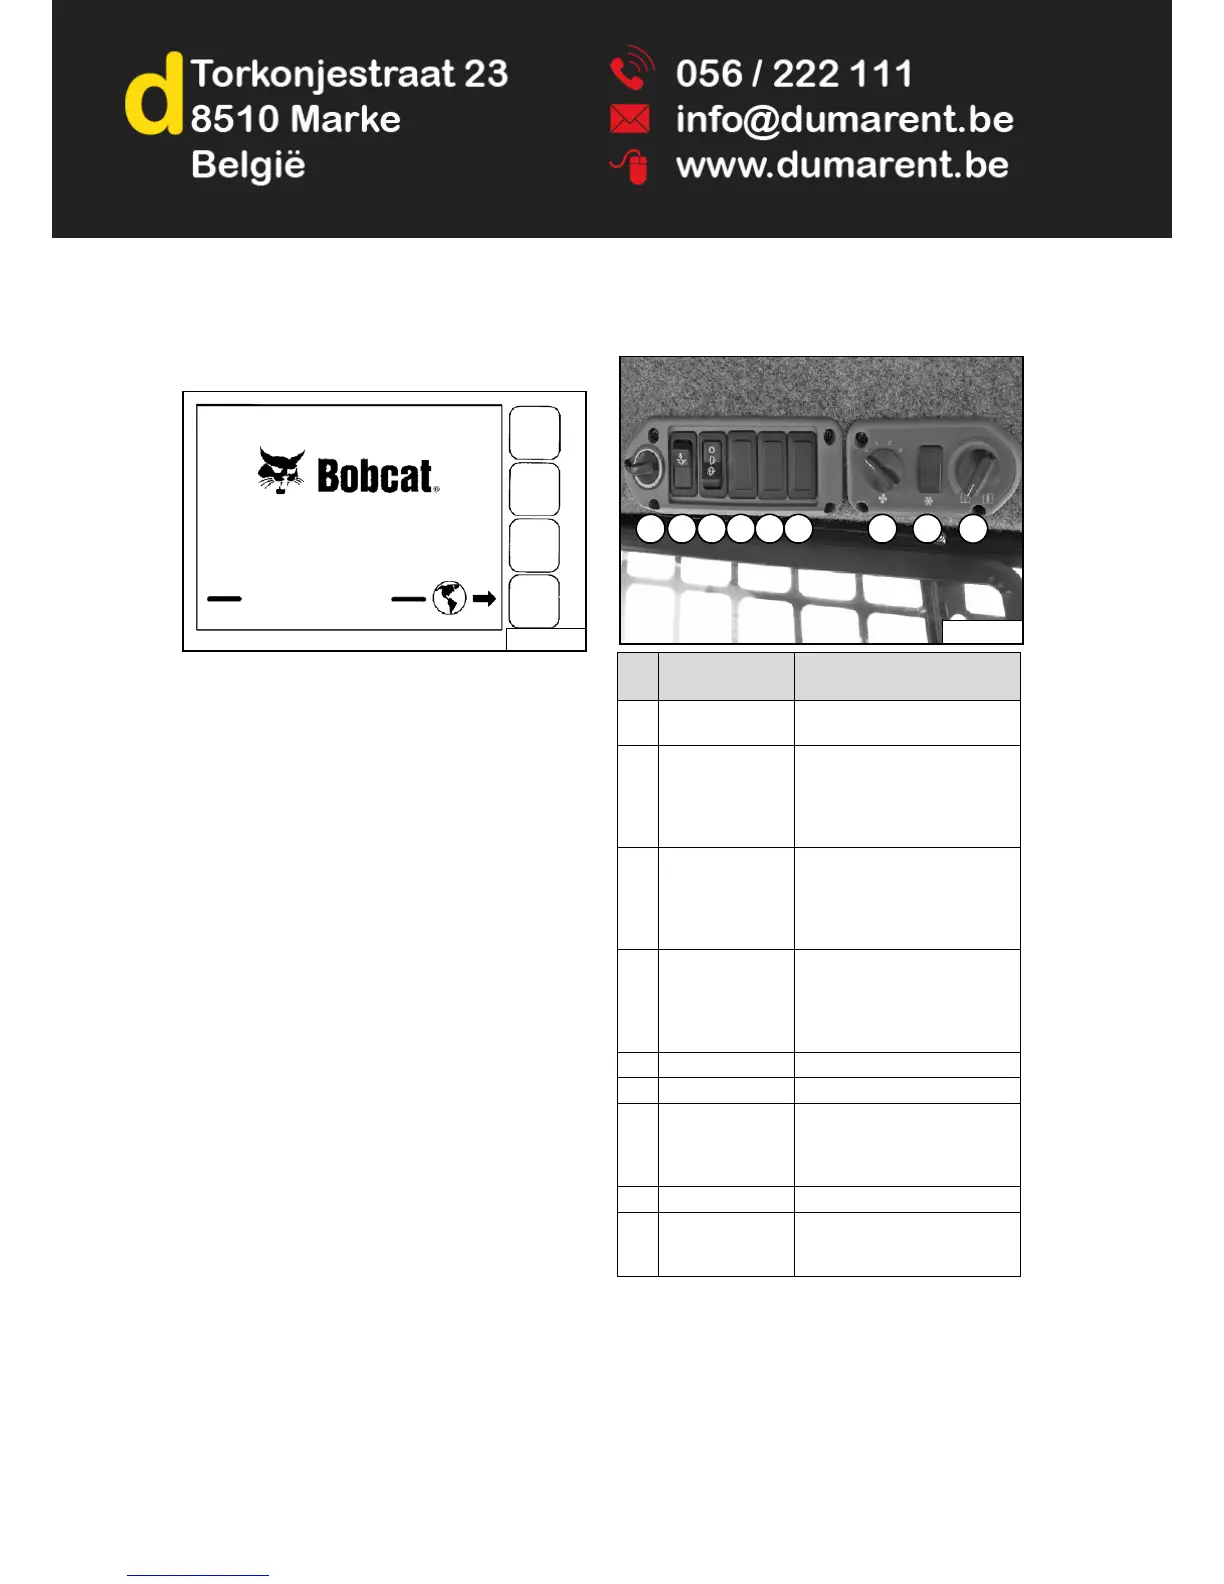
Side Panel
Figure 15
REF.
NO.
DESCRIPTION FUNCTION / OPERATION
1 POWER PORT Provides a 12 volt receptacle
for accessories.
2 TRAVEL LOCK Press the top of the switch to
lock the lift and tilt hydraulic
functions for transport. Press
the bottom of the switch to turn
travel lock OFF.
3 FRONT WIPER Press the bottom of the switch
to start the front wiper (press
and hold for washer fluid).
Press the top of the switch to
stop the wiper.
4 REAR WIPER
(Option)
Press the bottom of the switch
to start the rear wiper (press
and hold for washer fluid).
Press the top of the switch to
stop the wiper.
5 NOT USED - - -
6 NOT USED - - -
7 FAN MOTOR
(Option)
Turn clockwise to increase fan
speed; anticlockwise to
decrease. There are four
positions; OFF - 1 - 2 - 3.
8 NOT USED - - -
9 TEMPERATURE
CONTROL
(Option)
Turn clockwise to increase the
temperature; anticlockwise to
decrease.
 Loading...