S250 Bobcat Loader
OI-44 Operation & Maintenance Manual
OPERATING PROCEDURE (CONT’D)
Hand Control Machines (Includes ACS and SJC with
H-Pattern Selected) (Cont’d)
Leveling The Ground (Using Float Position):
Figure OI-87
Press and hold the float button (Item 1) [Figure OI-87]
while the lever is in neutral. While lowering the lift
arms (Item 2) [Figure OI-87], release the float button.
Tilt the bucket forward (Item 3) [Figure OI-87] to change
the position of the cutting edge of the bucket.
With the bucket tilted farther forward, there is more force
on the cutting edge and more loose material can be
moved.
Drive backward to level loose material.
To disengage float, press the float button again or raise
the lift arms (Item 4) [Figure OI-87].
IMPORTANT
Never drive forward when the hydraulic control for lift
arms is in float position.
I-2005-1285
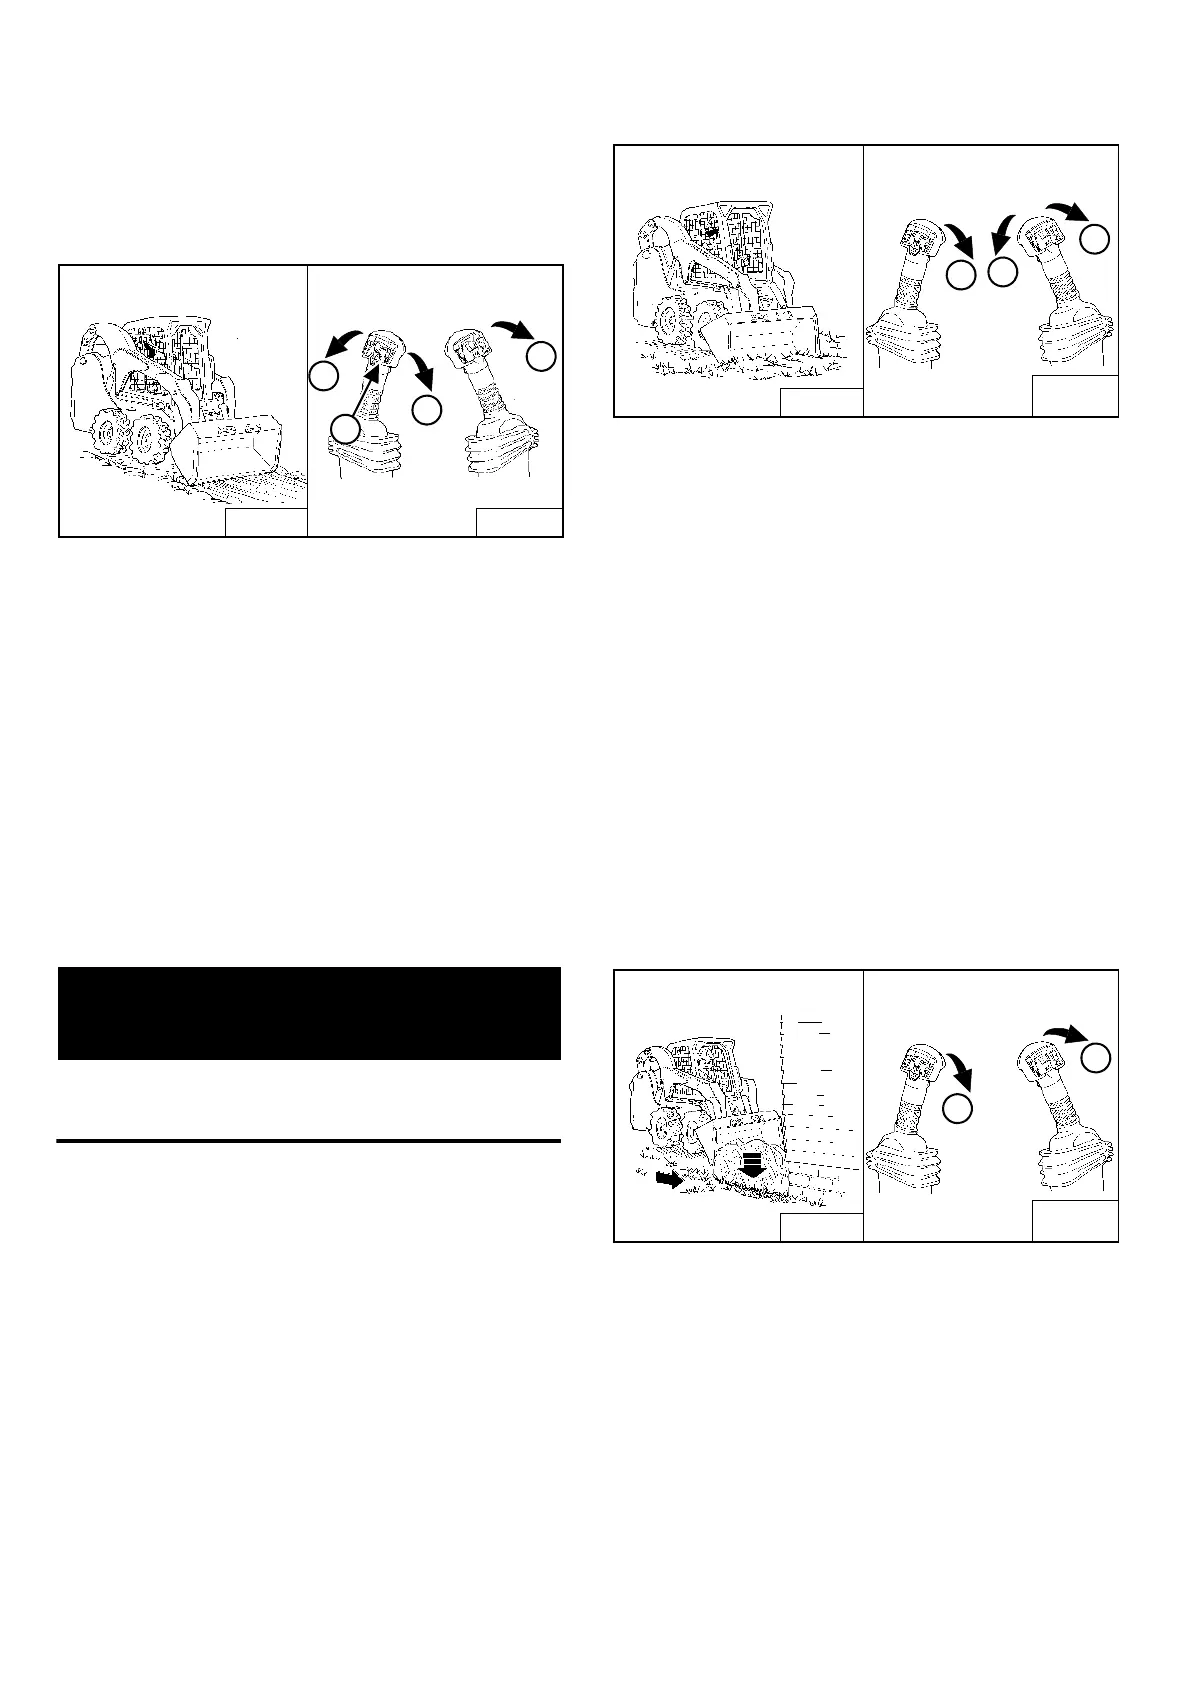
Digging A Hole
Figure OI-88
Lower the lift arms all the way (Item 1) [Figure OI-88]. Tilt
the bucket forward (Item 2) [Figure OI-88] until the
cutting edge of the bucket is on the ground.
Drive forward slowly and continue to tilt the bucket
down (Item 2) [Figure OI-88] until it enters the ground.
Tilt the bucket backward a small amount (Item 3)
[Figure OI-88] to increase traction and keep an even
digging depth. Continue to drive forward until the bucket
is full. When the ground is hard, raise and lower the
cutting edge (Items 1 & 2) [Figure OI-88] while driving
forward.
Tilt the bucket backward (Item 2) [Figure OI-88] as far as
it will go when the bucket is full.
Filling The Hole
Figure OI-89
Lower the lift arms (Item 1) [Figure OI-89] and put the
cutting edge of the bucket on the ground (Item 2)
[Figure OI-89]. Drive forward to the edge of the hole to
push the material into the hole.
Tilt the bucket forward (Item 2) [Figure OI-89] as soon as
it is past the edge of the hole.
If necessary, raise the lift arms to empty the bucket.
B-16268
B-15781
1
1
2
3
4
B-16258
B-15781A
B-15781B
3
2
1
B-16256
1
2
B-15781A
B-15781B
 Loading...