BCB 810 Mid-Width Bench
Assembly Instructions
A s s e m b l y S t e p 4
Hardware Required
Page 8
Please note: This
diagram is designed to
help you easily identify
the hardware type and
quantity you will need
to complete each step.
#24 Hex Bolt (M10x60 mm)
#26 Hex Bolt (M10x50 mm)
[3 Pieces]
#27 Hex Bolt (M10x25 mm)
[2 Piece]
#28 Hex Bolt (M8x15 mm)
Bolts Nuts
Washers
#22 Hex Bolt (M10x80 mm) #29 Lock Nut (M6)
#30 Lock Nut (M10)
[5 Pieces]
#31 Washer (M10)
[8 Pieces]
#32 Washer (M8)
#23 Hex Bolt (M10x85 mm)
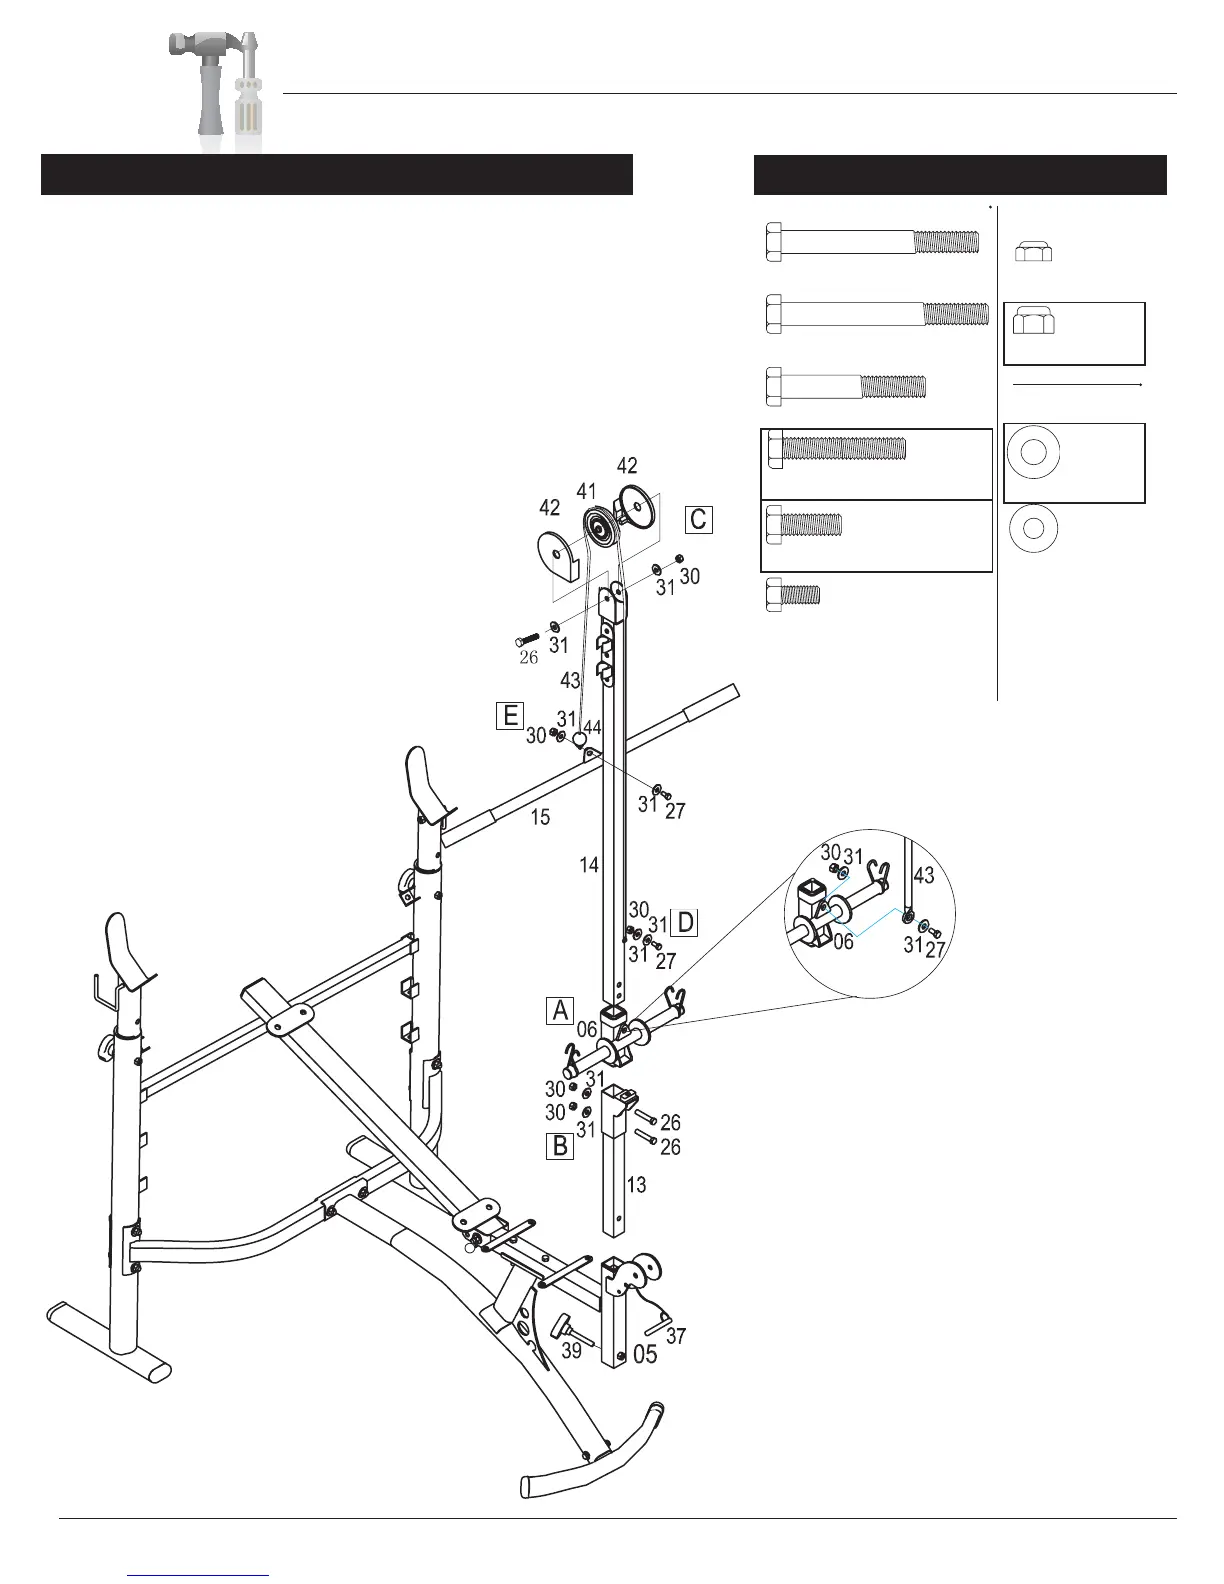
A. Slide the Glide Carriage (#06) onto the Lat Tower (#14) with
the weight mounting tubes facing the front of the bench along
with the round slotted triangle bracket facking the top and then
slide the Lat Tower (#14) into the Lat Tower Base (#13).
B. Secure the Lat Tower (#14) to the Lat Tower Base (#13) using
two Hex Bolts (#26), two Washers (#31) and two Lock Nuts (#30).
Slide this entire assembly into the Front Upright (#05) and
secure it using a Knob Bolt (#39).
C.
D. Secure the Lat Tower Cable (#43) with the flat
fixed washer end to the Carriage (#06) using
one Hex Bolt (#27) , two Washers (#31) and
a Lock Nut (#30). Please refer to the blown up
illustration on the right.
E. Secure the Lat Tower Bar (#15) to Lat Tower
Cable (#43) using a Hex Bolt (#27), two
Washers (#31)
and one Lock Nut (#30).
Assemble the pulley before mounting it on the Lat Tower (#14).
Attach the first Pulley Cover (#42) to the Pulley (#41)
and align the Lat Tower Cable (#43) properly so it is
running through the slot of the Pulley Cover (#42),
then attach the second Pulley Cover (#42) to
the Pulley (#41) and align the Lat Tower
Cable (#43) properly so it is running through
the slot. At this point be sure to align the pulley
so that the safety ball on the Lat Tower Cable
(#43) is on the inside of the bench before
inserting it in the Lat Tower (#14) bracket.
Now insert a Hex Bolt (#26) through a
Washer (#31), Lat Tower (#14) bracket,
the Pulley Assembly from above and
through the other side of the Lat
Tower (#14) bracket. Secure the
assembly with a Washer (#31)
and Lock Nut (#30).
 Loading...