12
STEP
3
Be careful to assemble all components
in the sequence they are presented.
NOTE:
Some components may be pre-assembled. Nylon lock nuts will not fully screw onto bolts,
they must be wrench tightened to fully go on.
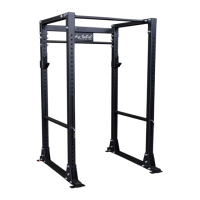
Adjustable J Cups and Pipe & Pin Safeties
3A. AttachLeft&RightJCups(K & J)touprights(D).
3B. HoldPipes(G)betweentheUprightsoftheRack(B)andInsertthe
ChromePins(H)intothePipes(G)andUprights(B).
3C. InsertthePullPins(#6) intotheendoftheChromePins(H).