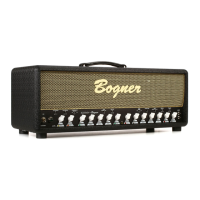
The Manual: Let's begin by hooking up a speaker to the Speaker 1 jack on the back panel of the Ecstasy.
Be sure to set the impedance switch correctly to match your cabinet. If you're not sure what impedance
your cab is, open the back of the cabinet and call your dealer. There are many ways to wire a speaker
cabinet and you need to know what yours is rated at. Now plug the footswitch connector into the "Remote
Control" jack on the back panel. Next, with the standby switch (front left panel) in the "standby" (down)
position, flick the Power switch to the "Power" (up) position. Let the amp warm up for at least a minute or
two! This will stabilize the circuits and prevent a painful surge from flashing through your tubes. If you're
kind to your amp, it will reward you with grateful reliability.
At this point, it might be helpful to understand the difference between Preamp and Poweramp functions.
For instance, you are probably aware that the "presence" knob on most amps is a poweramp brightness
control, while the "treble" knob is the preamp brightness control.
Your new Bogner has been carefully laid out so that you have options regarding how the preamp and
poweramp respond, both together and separately.
On the front panel, turn down Vol.1, Vol.2 & Vol.3 (these are your channel masters). Make sure the loop
on/off button on the rear panel is "off" and the loop light on the foot controller is off (more about this later).
Plug your guitar into the "H" (HI) Input jack on the front panel (Classic and 20thA model have only the HI
input) and flick the "standby" switch to "ON". Please note the “standby” switch on the foot controller is not
associated with the “standby” switch on the amp, this switch is an audio signal mute so you can switch
guitars silently. Tap the Green channel on the foot controller. You are now in channel 1 - the Clean
Channel.
Channel 1 has Gain, Bass, Middle, Treble & Vol. controls. There is a 3 position Pre EQ switch. The
Middle position is "N" or normal. "B1" is bright 1, which acts like the bright switch on an old Fender Twin.
"B2" is bright 2, even brighter than "B1". The higher you set the gain control, the less effect the Pre EQ
will have on the sound. This gives you almost infinite control over Pre EQ level. Channel 1, like channels
2 & 3, also has a boost, activated by the "Boost 1" button on the footswitch and/or the "Gain boost ch.1"
switch on the front of the amp (on the Classic model boost can be only engaged via the foot controller). If
you are using the supplied master footswitch controller or the optional Bogner Medusa for midi switching,
leave the front panel "Gain boost ch.1" set to "L" (Low). The reason for this is: If the front panel boost
switch is set to "H" (High), the footswitch will be bypassed for this function. The "Gain boost ch.1" front
panel switch is there so that you can boost in the studio without your footswitch. If the switch is set to "H",
the channel will be boosted at all times. If you haven't already, bring up Gain 1 and Vol. 1 and play in
Channel 1. Note: Low end response changes drastically with the different positions of the Excursion,
discussed later.
Tap the middle button on the footswitch and you are in Channel 2. Bring Gain 2 and Vol.2 up a little. By
now you've noticed that, in addition to the light on the footswitch, two lights of the same color come up by
the Gain and Vol. of that channel on the front panel. This is meant to help you make quick adjustments on
a dark stage when you need to. Channels 2 and 3 have Gain, Treble, Middle, Bass and Volume controls
as does Channel 1. Of course, 2 and 3 have the crunch and soaring gain that made Bogner famous. As
with Channel 1, you'll find 3 position Pre EQ switches. Though Channels 2 and 3 share Bass, Middle, and
Treble controls, the Pre EQ switches allow you to "voice" the Channels very differently. Don't under
estimate the tonal power of Pre EQ. Experiment... Tap in Channel 3, set the Pre EQ to "B1" and bring up
the volume a little. Now set Ch.2 Pre EQ to "N". Now kick back and forth between channels 2 & 3.
See how different they can sound using different Pre EQ’s. With the dual Presence/Excursion controls,
you can really zero in on the sounds for each channel. >>>
 Loading...