1515
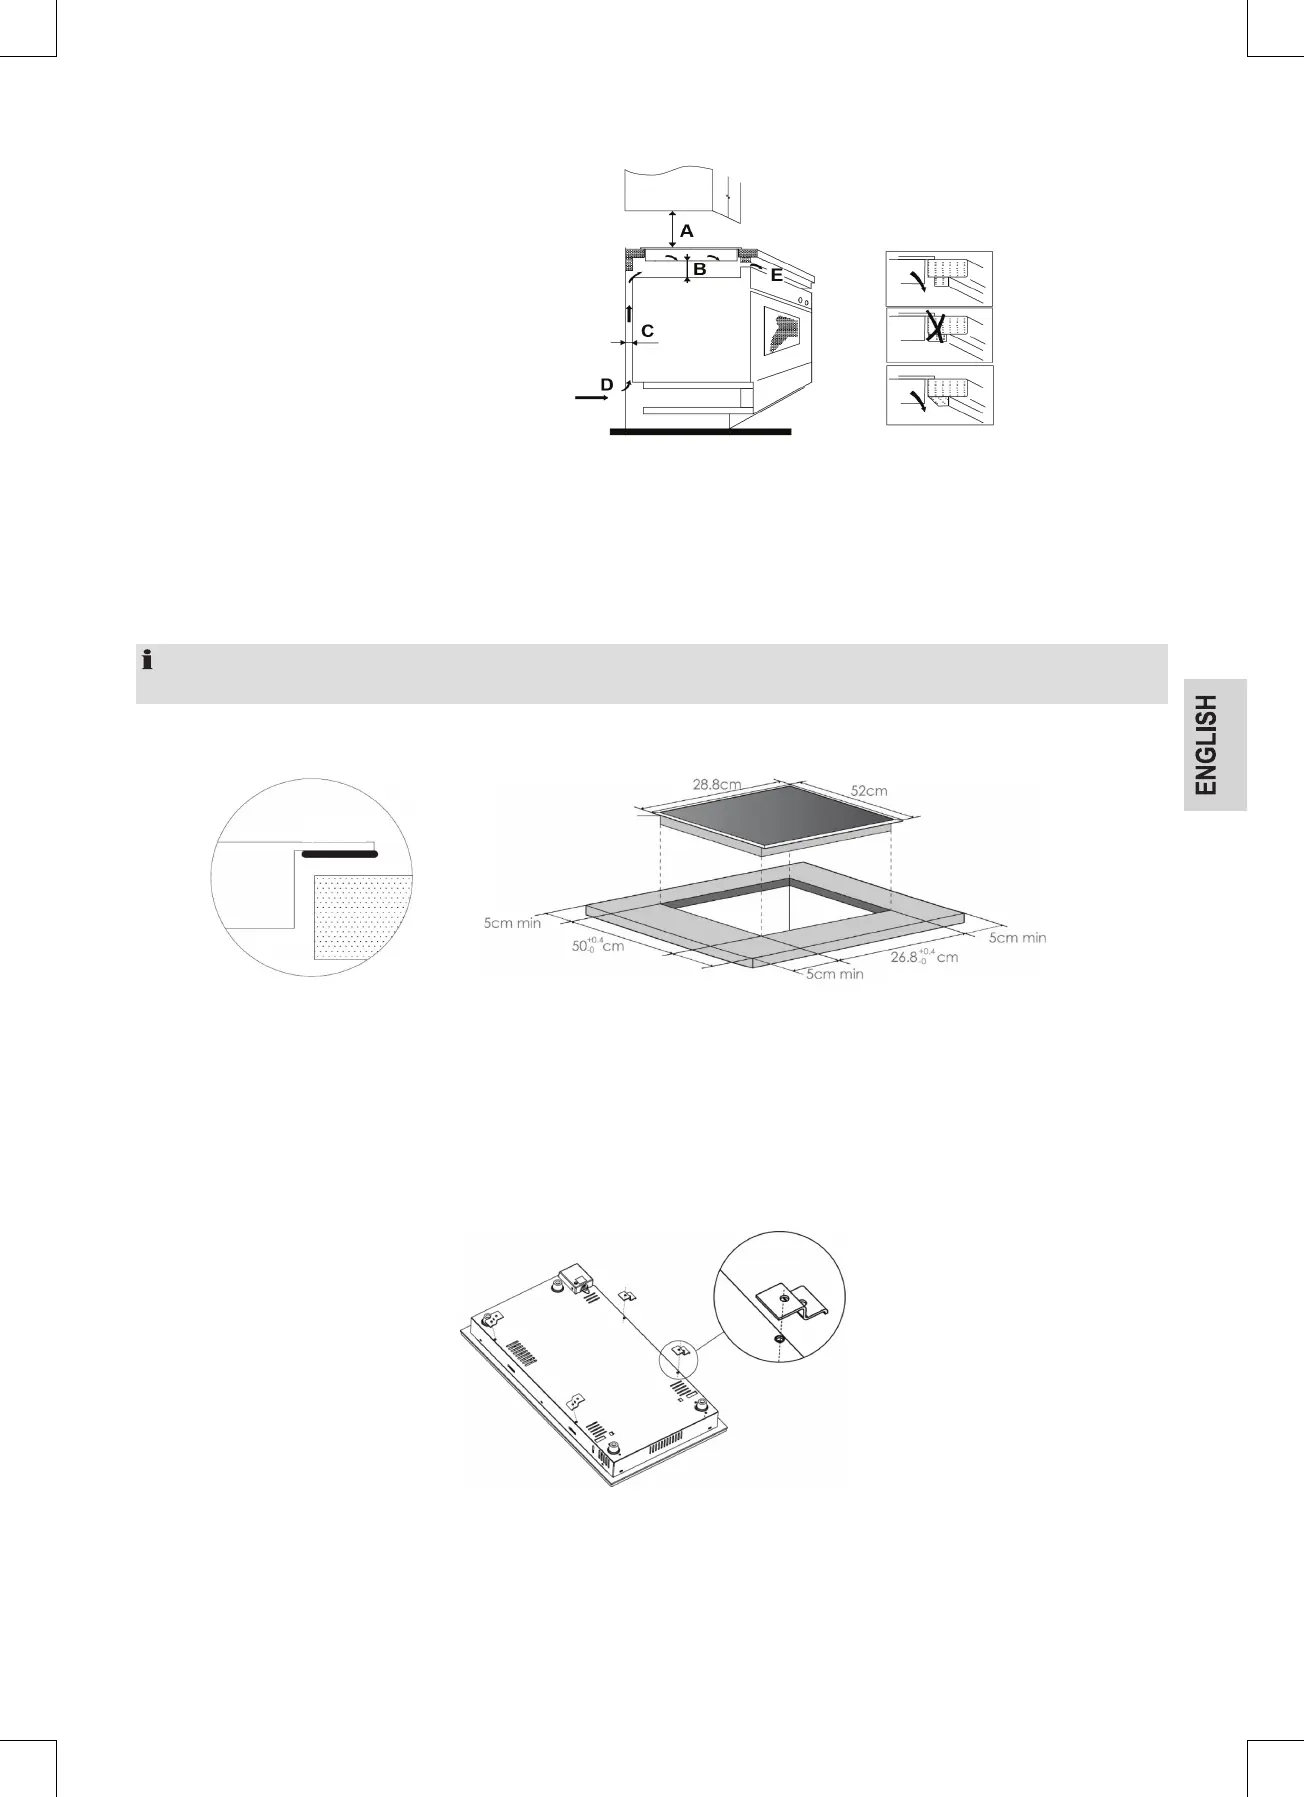
Fig.1
A: 76 cm
B: 5 cm min.
C: 3 cm min.
D: Air intake
E:Airexit1cm
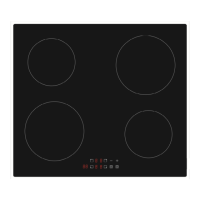
Preparing the worktop for installation of the hob
• Theworktopmustbeatleast3cmthickandatleast62cmdeep.Itmustliehorizontallyandmustbesealedoffagainstoverowingliquidsonthe
wall side.
• Thehobmustbeframedbyatleast5cmofworktop.
• Thecutsurfaces(cutoutedges)mustbesealedwithspecialvarnish,siliconerubber,orcastraisininordertopreventswellingcausedbyhumidity.
• Cleanthecutoutareaoftheworktop.
Preparethecutoutoftheworktopusingthedimensionaldrawingin“Fig.2”.
NOTE:
Priortosawing,stickawideadhesivetapeontotheouteredgeofthecut-outtopreventjigsawmarksontheworktop.
Attach the sealing to the bottom of the hob frame before installing the hob.
Fig.2
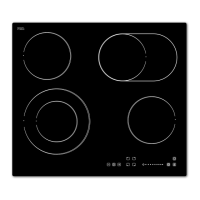
Installing the hob
• Checkthehobsealingforanydamageandforcorrectpositioningonthehob.
• Attachthehobtotheworktopbottomusingthefourbracketsandscrewsprovided“Fig3”.Forthatplacethehobwiththeglasssideontoaneven
surface.Avoidscratches!Placeacushionedsupportbeneathit.Positionandadjustthebracketsdependingonthethicknessoftheworktop.
• Placethehobwiththecablerstintothepreparedcutoutoftheworktop.Theappliancemustbeinsertedintothecut-outwiththecontrolpanel
towards the front. Ensure that the distances to the cut-out are the same on all four sides.
Fig.3
Electrical Connection
Connected wattage
The total power consumption of this device can be up to 3000 W.
Withthisconnectedloadyouneedaseparatesupplylineprotectedbya16Acircuitbreaker(contactgap3mm).Pleaseconsultyourelectrician.
Seal