Safety
When riding your bicycle, do not stare at the
computer for a long time. If you do not watch
the road, you could hit an obstacle, which might
cause you to lose control and fall.
Sicherheit
Schauen Sie während der Fahrt nicht zu lange auf den
Computer. Wenn Sie nicht auf die Straße achten, könnten
Sie gegen ein Hindernis fahren und dadurch die Kontrolle
verlieren und stürzen.
Sécurité
Lorsque vous roulez à vélo, ne regardez pas fixement
votre compteur pendant une longue durée. Si vous ne
regardez pas le chemin ou la route devant vous, vous
pourriez heurter un obstacle, perdre le contrôle du vélo et
tomber.
Seguridad
Cuando estés montando en bicicleta, evita mirar el
ciclocomputador más de lo necesario, ya que si no estás
atento a la carretera, podrías chocar contra un obstáculo,
perder el control y caerte.
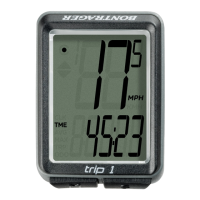
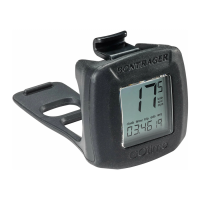
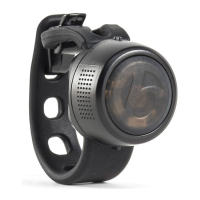
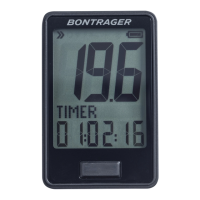
Parts list
1. Computer 2. Battery cover 3. 31.8mm handlebar shim
4. Out front mount 5. CR2032 battery 6. Speed sensor
7. Mounting shim 8. Speed magnet (wheel) 9. Zip ties
Tools needed for assembly: 2.5mm Hex wrench, pliers, scissors.
Teileliste
1. Computer 2. Batterieabdeckung 3. Passstück für Lenker mit 31,8mm
Durchmesser 4. Computerhalterung 5. CR2032-Batterie
6. Geschwindigkeitssensor 7. Sensorhalterung 8. Magnet zur
Geschwindigkeitserfassung (am Rad) 9. Kabelbinder
Für die Montage erforderliches Werkzeug: 2,5mm Innensechskantschlüssel,
Zange, Schere.
Liste des pièces
1. Compteur 2. Cache de la pile 3. Cale pour cintre de 31,8 mm
4. Fixation avancée 5. Pile CR2032 6. Capteur de vitesse 7. Cale de fixation
8. Aimant de vitesse (roue) 9. Colliers serre-câble
Outils nécessaires pour l’assemblage: Clé Allen 2,5mm, pince, ciseaux.
Lista de piezas
1. Ciclocomputador 2. Tapa de la pila 3. Adaptador para manillar de 31,8 mmw
4. Soporte delantero 5. Pila CR2032 6. Sensor de velocidad
7. Adaptador del soporte 8. Imán de velocidad (rueda) 9. Bridas
Herramientas necesarias para el montaje: llave Allen de 2,5 mm, alicates, tijeras.
1
2
5
3 4
8
9
76
RIDEtime
BT19_RIDEtime_V2 PN566367
About this Manual
This is the manual for the RIDEtime Computer.
Check for updates at bontrager.com.
Informationen zu diesem Handbuch
Dies ist die Bedienungsanleitung für den
RIDEtimeComputer. Auf www.bontrager.com
kannst du prüfen, ob eine neuere Version der
Bedienungsanleitung vorliegt.
À propos de ce manuel
Il s'agit du manuel de votre compteur RIDEtime. Pour
d'éventuelles mises à jour du manuel, consultez le site
bontrager.com
Sobre este manual
Este es el manual del ciclocomputador RIDEtime.
Ver actualizaciones en bontrager.com.
Battery Installation
Einsetzen der Batterie
Installation de la batterie
Instalación de la batería
Mount computer
Computer montieren
Installation du compteur
Instalación del ciclocomputador
For 35mm handlebar mounting remove the shim.
Zur Montage der Halterung an einem Lenker mit 35mm Durchmesser muss das Passstück entfernt werden.
Pour une installation sur un cintre de 35mm, retirez la cale.
Si vas a instalarlo en un manillar de 35 mm retira el adaptador.
31.8mm handlebar mounting
Use 2.5mm hex wrench.
0.8 N-m (7 in-lb) recommended torque.
NOTE: The mount can be reversed to position computer over the stem. Mount not to be used with phones.
Montage an Lenker mit 31,8mm Durchmesser
2,5mm Innensechskantschlüssel verwenden.
0,8Nm Drehmoment empfohlen.
HINWEIS: Die Halterung kann zur Montage des Computers über dem Vorbau umgedreht werden. Die Halterung darf nicht mit
einem Telefon verwendet werden.
Fixation sur cintre de 31,8mm
Utilisez une clé Allen de 2,5mm.
Couple de serrage recommandé de 0,8 N-m.
REMARQUE: la fixation peut être inversée pour placer le compteur au-dessus de la potence. La fixation n’est pas compatible
avec les téléphones.
Instalación del manillar de 31,8 mm
Utiliza una llave allen de 2,5 mm.
Par de apriete recomendado 0,8 N-m.
NOTA: El soporte se puede invertir para colocar el ciclocomputador por encima de la potencia. El soporte no debe utilizarse para
el móvil.
•
3
•
1
•
2
•
3
•
4
•
1
•
2
Mount speed sensor
Geschwindigkeitssensor montieren
Monter le capteur de vitesse
Instalación del sensor de velocidad
NOTE: Sensor uses A23 12V battery.
HINWEIS: Sensor nutzt eine A23 12-V-Batterie.
REMARQUE: Le capteur fonctionne avec une pile 23A 12V.
NOTA: El sensor utiliza una batería A23 de 12V.
•
1
•
2
•
3
•
1
Understanding the instructions
Erklärung der Anleitung
Compréhension des instructions
Interpretación de las instrucciones
Grey color represents ashing
characters that show selected
value.
Die graue Farbe weist auf blinkende
Zeichen auf dem Computer hin, die
ausgewählte Werte darstellen.
Le gris représente les caractères
clignotants de la valeur sélectionnée.
El color gris representa los caracteres
parpadeantes que muestran el valor
seleccionado.
Selection note
Hinweis zur Auswahl
Note sur la sélection
Nota sobre el valor seleccionado
Button location Quick press Multi press Long press
(2 seconds)
Front
Rear
The letters indicate the order in which to push
the buttons.
Die Buchstaben zeigen die Reihenfolge an, in der die Tasten
gedrückt werden müssen.
Les lettres indiquent l’ordre à suivre pour appuyer sur
les boutons.
Las letras indican el orden en que hay que pulsar los botones.
More than one arrow means you should push
the button until you see the value you want.
Mehr als ein Pfeil bedeutet, dass die Taste mehrmals gedrückt
werden muss, bis der gewünschte Wert erscheint.
Une flèche multiple (2 traits ajoutés en-dessous de la flèche
simple) indique que vous devez appuyer sur le bouton jusqu'à ce
que la valeur souhaitée apparaisse.
Más de una flecha significa que hay que pulsar el botón hasta
encontrar el valor deseado.
Press and hold until next digit ashes to switch
to next digit or eld.
Um zur nächsten Zahl oder zum nächsten Feld zu springen, die
Taste so lange gedrückt halten, bis die nächste Zahl blinkt.
Pour passer au chiffre ou au champ suivant, maintenez le bouton
enfoncé jusqu’à ce que le chiffre suivant clignote.
Mantener el botón pulsado hasta que el siguiente dígito
parpadee para pasar al siguiente dígito o campo.
NOTE: Zip ties should be trimmed in the illustration after installation.
HINWEIS: Kabelbinder sollten, wie in der Abbildung zu sehen, nach der Installation gekürzt werden.
REMARQUE: Les colliers serre-câble doivent être coupés après montage (cf. illustration)
NOTA: Después de la instalación, corta las bridas como en la imagen.
✂
Battery life indicator.
Anzeige der Batterielebensdauer.
Voyant batterie
Indicador de carga de la batería.
Indicates speed sensor is connected.
Zeigt an, dass der Geschwindigkeitssensor verbunden ist.
Indique que le capteur de vitesse connecté.
Indica que el sensor de velocidad está conectado.
NOTE: Remove rubber cover over the mounting clamp bolt.
HINWEIS: Gummiabdeckung über der Klemmschraube entfernen.
REMARQUE: Retirer le cache en caoutchouc situé sur le boulon de la bride de fixation.
NOTA: Quita el protector de goma del tornillo de la abrazadera del soporte.
3–5mm
Max.
70cm