Page 9
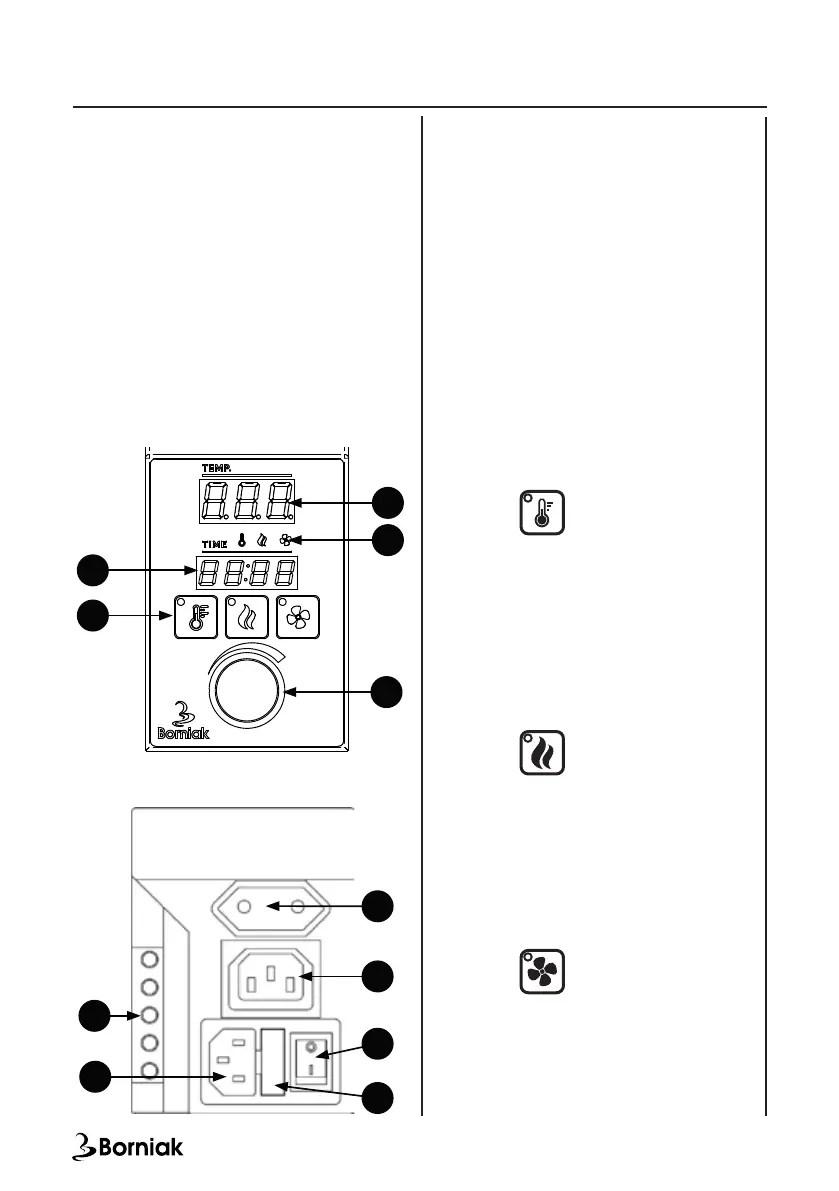
1. Time controller display
2. Function keys
3. Temperature controller display
4. Information lamps for display (1)
5. Knob for temperature setting
6. Dryer power socket
7. Smoke generator power socket
8. Main switch
9. Fuse
10. Electrical connector - connection to the
chamber
11. Power socket - connection to the power
supply
Connection:
Before connecting the power cables, connect
the panel to the smoker in accordance with
the instructions from chapter VII Assembly
and installation. The socket (11) is used
for connecting the panel with the smoking
chamber. Connect the dryer to the dryer’s
power socket (6) (optional accessories not
included with the device). Connect the smoke
generator to the generator power socket (7).
After connecting the socket (6) [optional]
and socket (7), connect the power cord to the
socket (11).
Description of the operation:
After connecting the cables, start the device
with the button (8).
Turn on the heat:
• Start the control panel with the button (8),
• Press (2) on the control panel.
The lamp of heating function
button will light up. The heating function is
switched on.
Turn on the smoke generator:
• Before switching on, make sure that the
generator is positioned according to the
instructions from chapter VII Assembly and
installation.
• Turn on the power button on the smoke
generator rst
• Start the control panel with the button (8),
• Press (2) on the control panel.
The lamp of smoke function
button will light up. The heating function is
switched on.
Turn on the dryer (optional):
• Before switching on, make sure that
the dryer is connected to the smoker
in accordance with the instructions.
(Remember: the dryer cannot be connected
with a smokegenerator!)
• Start the control panel with the button (8),
Press (2) on the control panel.
The lamp of drying function
button will light up. The heating function is
switched on.
IMPORTANT: When the dryer is turned on, the
smoke generator is turned off.
6
FRONT
BACK
7
8
1
2
3
5
10
9
11
VI. Digital Control Panel Operation
4