EasyManua.ls Logo

Bosch D7212 User Manual

Bosch D7212
2 pages
To Next Page IconTo Next Page
Page #1 background imageLoading...
Page #1 background image
D7212/D6103 Installation Instructions
© 2005 Bosch Security Systems Page 1 74-07076-000-A
D7212/D6103 Control Panel and Enclosure
Installation Instructions
1.0 Installation
1. Place the D6103 Enclosure in the desired location; be certain to use all four mounting holes (Figure 1).
Figure 1: D6103 Enclosure and D7212 Mounting Skirt
2
1
3
1 - D6103 Enclosure with mounting screws (4)
2 - D7212 Mounting Skirt
3 - Stand-off mounting tab
2. Mount the D7212 Mounting Skirt (Item 2 in Figure 1) inside the D6103 using the four flat-head #6 mounting
screws.
Figure 2: D7212 Stand-off Mounting Assembly
1
2
4
3
1 - D7212 Mounting Skirt
2 - #6 x 7/8-in. long screw
(P/N: 60-01175-014)
3- 1/4 O.D. x 5/8-in. long spacer
(P/N: 60-07068-010)
4 - D6103 tab
Question and Answer IconNeed help?

Do you have a question about the Bosch D7212 and is the answer not in the manual?

Bosch D7212 Specifications

General IconGeneral
Zones12
Partitions2
Event LogUp to 100 events
Input Voltage16.5 VAC
Operating Temperature32°F to 120°F (0°C to 49°C)
TypeControl Panel
CompatibilityCompatible with Bosch detectors and modules
Power Supply16.5 VAC, 40 VA
CommunicationRS-232
Humidity85% non-condensing

Summary

Installation

D6103 Enclosure Mounting

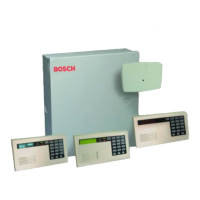
Place the D6103 enclosure in the desired location, ensuring all four mounting holes are used.

D7212 Mounting Skirt Installation

Mount the D7212 Mounting Skirt inside the D6103 using four flat-head #6 mounting screws.

D7212 Assembly Mounting

Mount the D7212 assembly using the screw in the stand-off mounting tab.

Related product manuals