10
Initial Operation
Do not drill, fasten or cut into blind areas where electric, gas
or water lines may exist. Use appropriate detectors to
determine if these lines are hidden in the work area or call
the local utility company for assistance.
Check for correct mains voltage: The voltage of the power
source must agree with the voltage specified on the
nameplate of the machine.
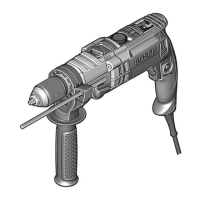
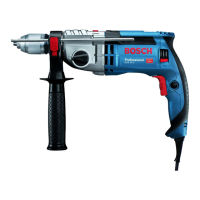
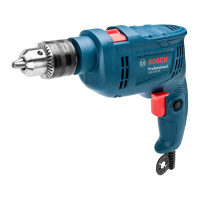
ON/OFF SWITCH
INTERMITTENT SWITCHING
ON - Press trigger of switch 7.
OFF - Release trigger
CONTINUOUS SWITCHING
ON - Press trigger of switch 7, then lock button 8 and release
it.
OFF - Press and release trigger on switch 7.
CHANGING SPEED
Two speed ranges can be pre-selected with the gear speed
commuted 9:
Speed 1: No-Load speed 1000 min
-1
Speed 2: No-Load speed 3000 min
-1
Impact drill is built with a sliding key mechanism which has
two positions. The position can be changed more easily
when the motor is almost stopping or stopped.
Rotate lever 10 in 180° to select the opposite position. The
lever seats naturally in position 1 and 2 (1
st
an 2
nd
speed). If
there is any difficult in getting the gears to engage when
changing speeds, turn the chuck a little bit by hand.
STEPLESS SPEED CONTROL (GSB 20-2 RE)
The machine runs with variable speed between 0 and
maximum depending on the pressure applied to the On/Off
switch 7. Light pressure results in a low rotational speed thus
allowing smooth, controlled starts.
Attention: Do not load the machine so heavily that it comes
to a standstill.
REVERSION OF THE SENSE OF ROTATION (GSB 20-2 RE)
The reversing lever 8 allows to invert the motor's sense of
rotation, thus enhancing the field of applications with all of
screw driving / removal.
Position: R - right = drilling / screw driving
L - left = screw removal
Attention: To invert the sense of rotation, be sure the motor
is switched off.
• The reversing or anticlockwise operation enables
application for tasks such loosening of screw.
Function with and without impact
Without impact (rotation only)
Turn the commutator drilling with/without impact 4 with the
arrow pointing to . In this position you will be able to
drill steel, aluminum, wood, plastic and other materials.
With impact (rotation with impact system)
Turn the commutator drilling with/without impact 4 with the
arrow pointing to . In this position you will be able to drill
concrete, stone, wall tiles, bricks and other materials.
Warning! Use your hammer drill only with the arrow of
switch pointing to one of the two positions, or
Never stop in the dead center (between those two positions),
for this will damage the tool.
To change from one system to another rotate the lever 180°
which can be done while the machine is running.
Practical Advice
Select the right bit
By choosing the correct bit for every specific material, and
keeping it correctly sharpened, you'll allow your tool to show
its best performance.
Carbon tipped bits - wood
High speed steel bits - soft steel, aluminum, wood, etc.
Carbide tipped bits - concrete, marble, ceramics, etc.
Attention! When drilling in metal, use special cutting oil to
prevent the bit to burn. Drillings in concrete, stone, ceramics,
etc. should be in dry.
Check the material to be drilled and select the correct bit. Do
not drill with a bit that is inadequate for the job, because this
will damage either your workpiece or the bit itself.
Small workpieces
Use a vise or clamps to hold your workpiece. Loose pieces
could grip int the bit and cause accidents.
Wall tiles and ceramics
Begin to drill without impact and activate the impact system
after drilling through the enamel surface. By doing this, you
prevent the bit to slide or the material to split.
Replacing the Drill Chuck
Use an open-end spanner at spanner surface to retain the
chuck 1. Place the chuck key 12 in one of the 3 bores and
loosen the chuck by turning it to the left using the key as a
lever. If the chuck is frozen in place, a tap on the chuck key
12 should loosen it. The drill chuck is mounted in reverse
order.
The chuck must be tightened with a torque of
approx. 30 – 40 Nm.
Maintenance and cleaning
§ Before any work on the machine itself, pull the mains
plug.
For safe and proper working, always keep the machine
and the ventilation slots clean.
If the machine should fail despite the care taken in
manufacturing and testing procedures, repair should be
carried out by an authorized after-sales service center for
Bosch power tools.
Guarantee
We guarantee BOSCH appliances in accordance with
statutory/country-specific regulations (proof of purchase by
invoice or delivery note).
Damage attributable to normal wear and tear, overload or
improper handling will be excluded from the guarantee.
In case of complaint please send the machine,
undismantled, to your dealer or the BOSCH Service Center
for electric power tools.
Warning!
Freight and insurance costs are charged to the client, even
for warranty claims.
Environmental protection
Recycle raw materials instead of disposing as waste
The machine, accessories and packaging should be
sorted for environmental-friendly recycling.
The plastic components are labeled for categorized
recycling.

 Loading...