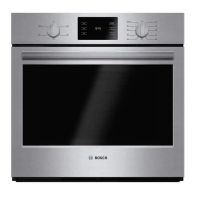
This document describes the Bosch HRA.14B.. oven, a built-in appliance designed for preparing meals and drinks in domestic environments. It emphasizes safe and efficient use, offering detailed instructions for operation, maintenance, and installation.
The oven is intended for use in private households and enclosed domestic spaces, up to an altitude of 4000 meters above sea level. It features touch-sensitive buttons and a display for active functions and time-setting options. The function selector allows users to choose various heating types and other functions, while the temperature selector sets the desired temperature or grill setting. The appliance is equipped with a cooling fan that operates based on temperature and continues to run after operation to cool down the cooking compartment more quickly. The oven light illuminates the cooking compartment during operation and can also be switched on independently.
Safety Instructions
The manual provides comprehensive safety warnings to prevent risks such as fire, burns, scalding, electric shock, injury, magnetism, and suffocation. Users are advised to read the manual carefully, keep it for future reference, and ensure the appliance is not damaged in transit before connection. Repairs should only be carried out by trained specialist staff using genuine spare parts. Children aged 8 and over, and individuals with reduced physical, sensory, or mental abilities, can use the appliance under supervision and after understanding the associated dangers. Children should not play with the appliance or perform cleaning/maintenance unless supervised and at least 15 years old.
Fire Safety:
- Never store combustible objects in the cooking compartment.
- In case of smoke, switch off the appliance or unplug it, and keep the door closed to stifle flames.
- Remove food residues, fat, and meat juices before use.
- Open the appliance door carefully to avoid draughts that could cause greaseproof paper to catch fire.
- Do not place greaseproof paper loosely over accessories; always cut it to size and secure it with a plate or baking tin.
- Do not fill the water bowl with flammable fluids when using steam assistance; use water only.
Burn and Scalding Risks:
- The appliance and its parts become hot during use; avoid touching heating elements and hot parts.
- Use oven gloves to remove hot accessories or cookware.
- Open the appliance door carefully when hot, as hot steam may escape.
- Never pour water into the hot cooking compartment.
- The water bowl for steam assistance reaches high temperatures; remove it only after it has cooled down.
Electric Shock and Injury Risks:
- Do not use harsh or abrasive cleaners or sharp metal scrapers on the glass door to prevent scratches that could lead to cracks.
- Keep hands away from the appliance door hinges to avoid trapping fingers.
- Wear protective gloves when handling components inside the appliance door, as they may have sharp edges.
- Do not let the power cord come into contact with hot parts, sharp points, or edges, and never kink, crush, or modify it.
- Do not use steam or high-pressure cleaners.
- Do not operate a damaged appliance or one with a cracked surface.
- Unplug the appliance at the mains or switch off the fuse in the fuse box if the power cord is damaged.
- Wearers of electronic implants should stay at least 10 cm away from the control panel due to permanent magnets.
- Keep packaging material away from children to prevent suffocation.
Preventing Material Damage
To prevent damage to the appliance, several precautions are outlined:
- Avoid placing objects on the cooking compartment floor above 50 °C, as this can cause heat build-up, incorrect cooking times, and enamel damage. The only exception is the water bowl for steam assistance.
- Do not pour water into the hot cooking compartment.
- Allow the cooking compartment to dry after use to prevent corrosion.
- Do not keep moist food in the cooking compartment for long periods with the door closed.
- Allow the cooking compartment to cool down with the door closed after high-temperature cooking to protect adjacent kitchen units.
- Do not trap anything in the appliance door.
- Remove food remnants before heating the appliance to prevent stains.
- Keep the appliance door seal clean and do not operate the appliance if the seal is damaged or missing.
- Do not place or hang objects on the appliance door.
- Push accessories fully into the cooking compartment to avoid scratching the door pane.
- Do not use oven cleaner in a hot cooking compartment.
- When using steam assistance, do not remove the water bowl during operation and only use the provided water bowl.
Environmental Protection and Saving Energy
The manual encourages environmentally conscious practices:
- Packaging materials are recyclable; sort and dispose of them separately.
- Preheat the appliance only if the recipe or recommended settings require it, as this can reduce energy consumption by up to 20%.
- Use dark-coloured, black-coated, or enamelled baking tins, as they absorb heat well.
- Open the appliance door as little as possible during operation to maintain temperature and reduce reheating needs.
- When baking multiple dishes, do so in succession or parallel to utilize residual heat.
- Switch off the appliance 10 minutes before the cooking time ends for long cooking times, as residual heat will finish the dish.
- Remove unused accessories from the cooking compartment.
- Defrost frozen food before cooking to save energy.
Usage Features
Controls:
The appliance features a function selector for heating types and other functions, and a temperature selector for setting temperatures or grill levels. Buttons on the display are used for time-setting options (timer, cooking time, end time, and current time), and for activating/deactivating the childproof lock.
Types of Heating:
- 3D hot air: For baking and roasting on one or more levels, distributing heat evenly with a fan.
- Gentle hot air: For gentle cooking on one level without preheating, using residual heat.
- Pizza setting: Heats from below and the back wall for dishes requiring intense bottom heat.
- Bottom heating: For final baking or cooking in a bain marie, with heat emitted from below.
- Full-surface grill: For grilling flat items, toasting, and gratinating, heating the entire area under the grill element.
- Hot air grilling: For roasting poultry, whole fish, and larger meat pieces, with the grill element and fan switching on and off alternately.
- Top/bottom heating: For traditional baking and roasting on one level, ideal for cakes with moist toppings, with heat emitted evenly from above and below.
- Hot air Steam: For steam-assisted baking and roasting, distributing heat and steam evenly, ideal for frying meat and baking bread/cakes. Always use with the water bowl.
Other Functions:
- Rapid heating: Quickly preheats the cooking compartment without accessories.
- Oven light: Illuminates the cooking compartment without heating.
Accessories:
The oven uses original accessories like wire racks, universal pans, and water bowls. Accessories are designed with a locking function to prevent tilting when pulled out halfway. They are inserted between guide rods for shelf positions. The wire rack can be combined with the universal pan to catch dripping liquids.
Initial Use:
Upon first connection or after a power failure, the time flashes on the display and needs to be set. Before using the appliance for the first time, clean the cooking compartment and accessories by wiping smooth surfaces with a damp cloth, then heating the appliance at maximum temperature with 3D hot air for one hour, and finally cleaning with soapy water.
Basic Operation:
- Switching on/off: Turn the function selector to any position other than "Off" to switch on, and to "Off" to switch off.
- Setting heating type/temperature: Use the respective selectors. The appliance starts heating after a few seconds.
- Changing settings: Heating type and temperature can be changed at any time during operation.
Rapid Heating:
This function shortens preheat time for temperatures above 100 °C. It is recommended for 3D hot air and top/bottom heating. Food should only be placed in the oven after rapid heating has ended.
Steam Assistance:
Steam-assisted cooking produces steam in the cooking compartment, resulting in crispy crusts, shiny surfaces, and tender, juicy food with minimal volume reduction. The oven must be cold to start. Place the water bowl on the floor, fill it with the specified quantity of water, then select "Hot air Steam" and the desired temperature. After use, remove and clean the water bowl once it has cooled down.
Time-Setting Options:
- Timer: Runs independently of the appliance's operation, up to 23 hours and 59 minutes, with an audible signal.
- Cooking time: Sets a duration for operation, after which the appliance automatically stops. Can be set up to 23 hours and 59 minutes.
- End time: Delays the cooking end time, with the appliance starting automatically to finish cooking at the required time. Not available for grill functions.
- Time: Sets the current time on the clock.
Childproof Lock:
Secures the appliance to prevent accidental switching on or setting changes. Activated and deactivated by pressing and holding the button until "SAFE" appears or disappears on the display. It deactivates after a power cut.
Maintenance Features
Cleaning and Servicing:
Regular cleaning and maintenance are crucial for efficient operation.
- Cleaning products: Use only suitable cleaning products for different surfaces. Avoid harsh, abrasive, or high-alcohol content cleaners, hard scouring pads, or cleaning sponges. Do not use special cleaners on a hot appliance.
- Appliance front: Stainless steel surfaces should be cleaned with hot soapy water or special stainless steel cleaning products, removing limescale, grease, starch, or albumin immediately to prevent corrosion. Plastic or painted surfaces should be cleaned with hot soapy water.
- Appliance door: Door panels, covers, and handles should be cleaned with hot soapy water. Stainless steel parts of the door cover can be cleaned with stainless steel cleaner. Do not use glass scrapers or steel wool on door panels. Remove descaling agents from the door handle immediately. The door seal should be kept clean and not scrubbed.
- Cooking compartment: Enamel surfaces can be soaked with hot soapy water or vinegar water for heavily soiled areas, or oven cleaner for very heavy soiling. Use a brush or steel wool. Allow the compartment to dry after cleaning.
- Oven light glass cover: Clean with hot soapy water.
- Rails: Soak heavily soiled areas with hot soapy water and use a brush or steel wool.
Cleaning Assistance:
This function softens dirt by vaporizing soapy water, making it easier to remove. The cooking compartment must be completely cooled down. Remove accessories, mix 0.4 litres of water with a drop of washing-up liquid, and pour it onto the compartment floor. Set "Bottom heating" to 80 °C for four minutes. After the cooking time, switch off the appliance and let it cool for 20 minutes. Then, wipe the compartment with a sponge cloth, remove remaining water, clean surfaces with a dish cloth or soft brush, and remove limescale with a vinegar-soaked cloth. To dry, leave the door open at a 30° angle for about an hour or heat the appliance at 50 °C with 3D hot air for five minutes with the door open.
Shelf Supports:
The shelf supports can be removed for cleaning or replacement. They are lifted slightly forward, detached, and pulled out. To reattach, push the rail into the rear socket, then the front socket, and press downwards.
Appliance Door:
The appliance door can be detached for thorough cleaning.
- Detaching: Open the door fully, open the locking levers on the hinges, close the door fully, grab it with both hands, and pull it upwards and out. Place it carefully on a level surface.
- Attaching: Slide the door straight onto the hinges, open it fully, close the locking levers, and then close the door.
- Removing door panes: Open the door fully, open the locking levers, close the door fully, push on the left and right sides of the door cover from the outside until it releases, then lift out the inner pane. The condensate trough can also be removed. Clean all parts with glass cleaner and soapy water, then dry and refit.
- Fitting door panes: Place the condensate trough vertically in its retainer and turn it downwards. Slide the inner pane into the left and right-hand retainers, push it upwards, then put the door cover in position and push down until it clicks. Open the door fully.
Replacing the Oven Light Bulb:
If the oven light fails, replace it with a heat-resistant 25-watt, 230 V halogen bulb. Ensure the appliance is disconnected from the power supply and cooled down. Place a tea towel in the compartment, turn the glass cover anti-clockwise, pull out the old bulb, insert the new one, position the sealing ring (if present), screw on the glass cover, remove the tea towel, and reconnect the power supply.
Installation Instructions
The appliance must be installed by a professional in accordance with the instructions and national safety requirements.
- Check for damage after unpacking.
- Remove all packaging material and adhesive film before starting up.
- Fitted units must be heat-resistant up to 95 °C, and adjacent unit fronts up to 70 °C.
- Do not install behind a decorative door or kitchen unit door to prevent overheating.
- Cut-out work on units should be done before installation, and shavings removed.
- The mains socket must be in the hatched area or outside the appliance installation area.
- Unsecured units must be secured to the wall with a standard bracket.
- Wear protective gloves during installation due to sharp edges.
- Do not use extended power cords, non-approved adapters, or multiple socket strips. Use certified extension cables with a minimum cross-section of 1.5 mm².
- The appliance corresponds to protection class I and must be operated with a protective earth connection.
- Fuse protection must match the rating plate and local regulations.
- The appliance must be disconnected from the power supply during installation.
- The power cable must be plugged in at the rear of the appliance until a click is heard.
- The power cable should only be replaced with an original manufacturer's cable.
- For electrical connection without a protective contact plug, only a licensed professional should connect the appliance, integrating an all-pole isolating switch into the permanent electrical installation.
- To install, slide the appliance fully into the unit and centre it, then screw it into place. For handleless kitchens, attach a suitable filling piece and secure with screws.
- To remove, disconnect from power, undo fastening screws, and pull out.