- Coversto beplacedoverthe
holesforthetransportbolts
(afterremovingthem).
- Clampfordrainhose.
- Wrenchforlevelling.
- Elbowforattachingthedrain
hose,e.g.toa sink.
Dependingonthetypeof
connection,the followingmayalso
berequired:
Y-connector(canbeobtained
fromanyhardwarestore)in
casethereisonlya coldwater
connectionavailable.
Anyresidualmoistureinsidethe
drumisduetothefinaltesting
whicheverywashingmachine
undergoesbeforeleavingthe
factory.
Ontherearoftheappliance:
- Powercordwithplug.
C --coldwaterconnection
H--hotwaterconnection
Useful tools
The following tools are helpful:
- Flat head screwdriver.
- Closed wrench (1/2"/13mm).
- Bubble level.
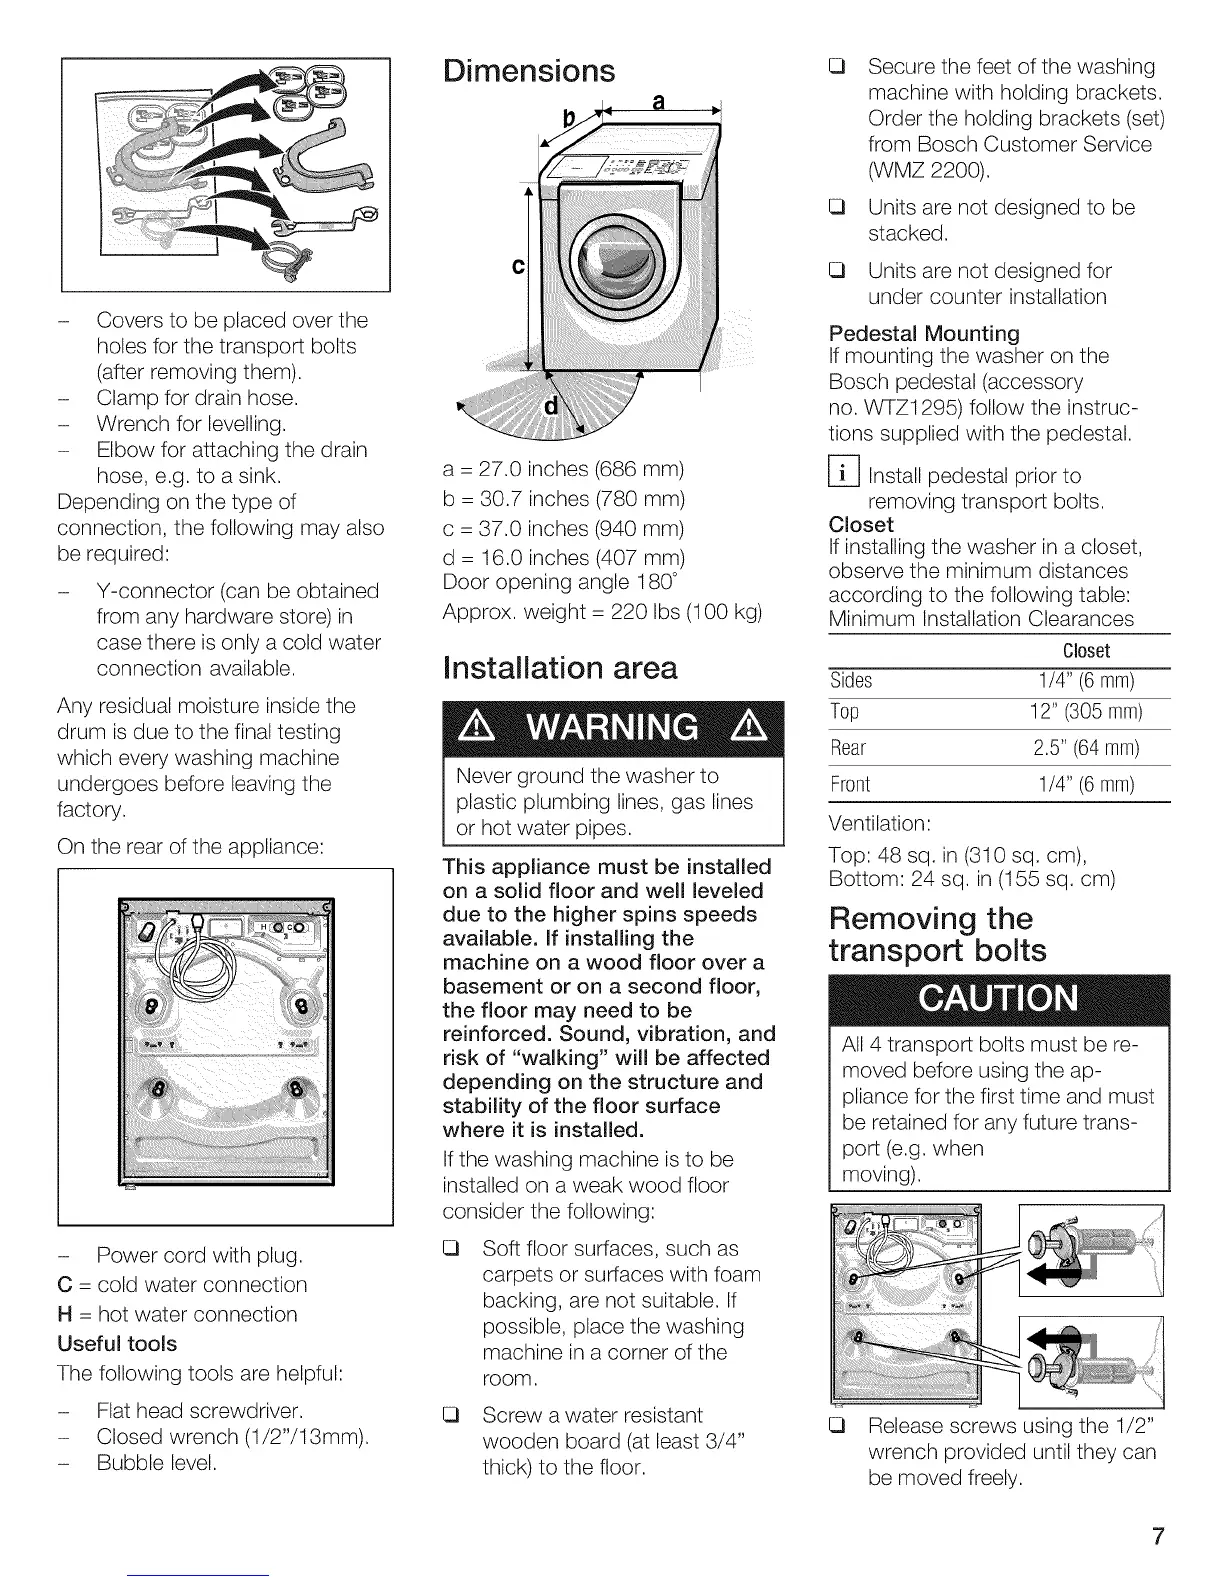
Dimensions
a -- 27.0 inches (686 mm)
b -- 30.7 inches (780 mm)
c -- 37.0 inches (940 mm)
d -- 16.0 inches (407 mm)
Door opening angle 180 °
Approx. weight -- 220 Ibs (100 kg)
Installation area
Never ground the washer to
plastic plumbing lines, gas lines
or hot water pipes.
This appliance must be installed
on a solid floor and well leveled
due to the higher spins speeds
available. If installing the
machine on a wood floor over a
basement or on a second floor,
the floor may need to be
reinforced. Sound, vibration, and
risk of "walking" will be affected
depending on the structure and
stability of the floor surface
where it is installed.
If the washing machine is to be
installed on a weak wood floor
consider the following:
Q
Soft floor surfaces, such as
carpets or surfaces with foam
backing, are not suitable. If
possible, place the washing
machine in a corner of the
room,
13 Screw awater resistant
wooden board (at least 3/4"
thick) to the floor.
13
13
Secure the feet of the washing
machine with holding brackets.
Order the holding brackets (set)
from Bosch Customer Service
(WMZ 2200).
Units are not designed to be
stacked.
13 Units are not designed for
under counter installation
Pedestal Mounting
If mounting the washer on the
Bosch pedestal (accessory
no. WTZ1295) follow the instruc-
tions supplied with the pedestal.
r_ Install pedestal prior to
removing transport bolts.
Closet
If installing the washer in a closet,
observe the minimum distances
according to the following table:
Minimum Installation Clearances
Closet
Sides 1/4" (6 mm)
Top 12" (305 mm)
Rear 2.5" (64 mm)
Front 1/4" (6 mm)
Ventilation:
Top: 48 sq. in (310 sq. cm),
Bottom: 24 sq. in (155 sq. cm)
Removing the
transport bolts
All 4 transport bolts must be re-
moved before using the ap-
pliance for the first time and must
be retained for any future trans-
port (e.g. when
moving).
13 Release screws using the 1/2"
wrench provided until they can
be moved freely.